Lewis and Clark National Historical Park

We just came home from a weekend at Cannon Beach! On our way home we stopped at Lewis and Clark National Historical Park located near Astoria, Oregon. This is a bit of a drive for anyone living in NW Washington, but if you happen to be in the area it is definitely worth a stop!

Lewis and Clark National Historical Park is a grouping of a couple different locations. Our National Park Pass that we bought for our Teton trip in August lets us in to all the National Parks for a year, but if we did not have the pass it would have been $10 per adult (although this kind of seemed like an honor system because there was no entry gate or tag to purchase to display on your windshield). We were at the Fort Clatsop location for about 2 hours total.

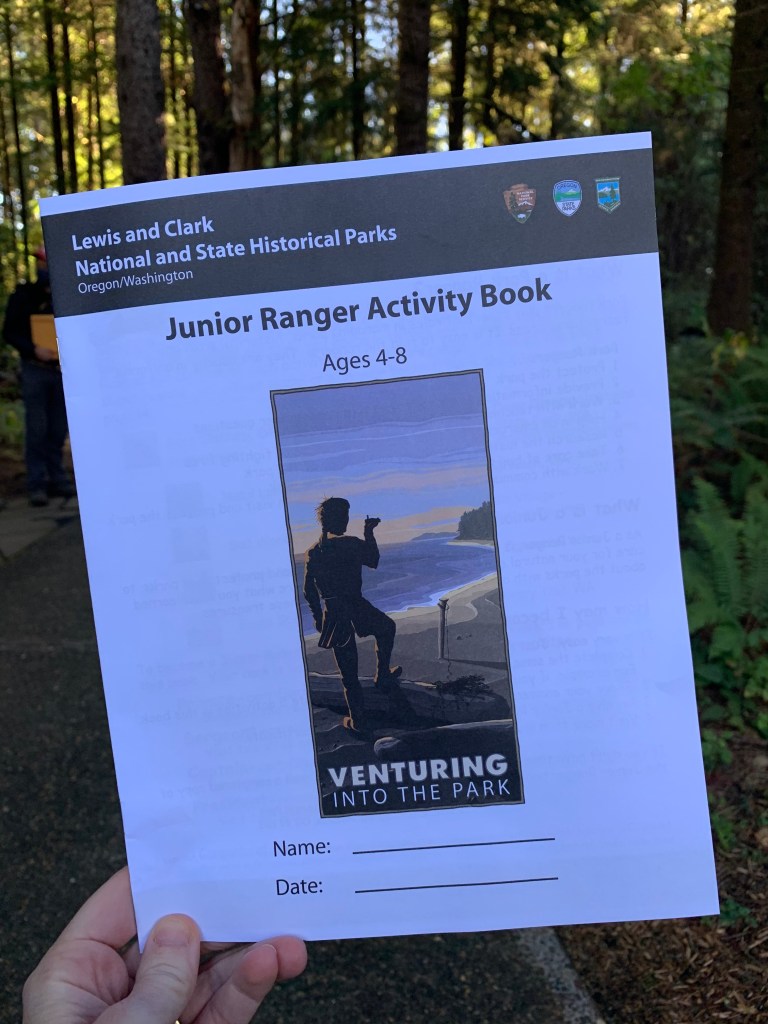
We first stopped at the visitor center where they had FREE junior ranger packets and badges! We have found this varies from park to park (you had to pay for badges and junior ranger activity books at Yellowstone). Eliza especially was very excited to try to search for different plants and animals listed in her junior ranger book.

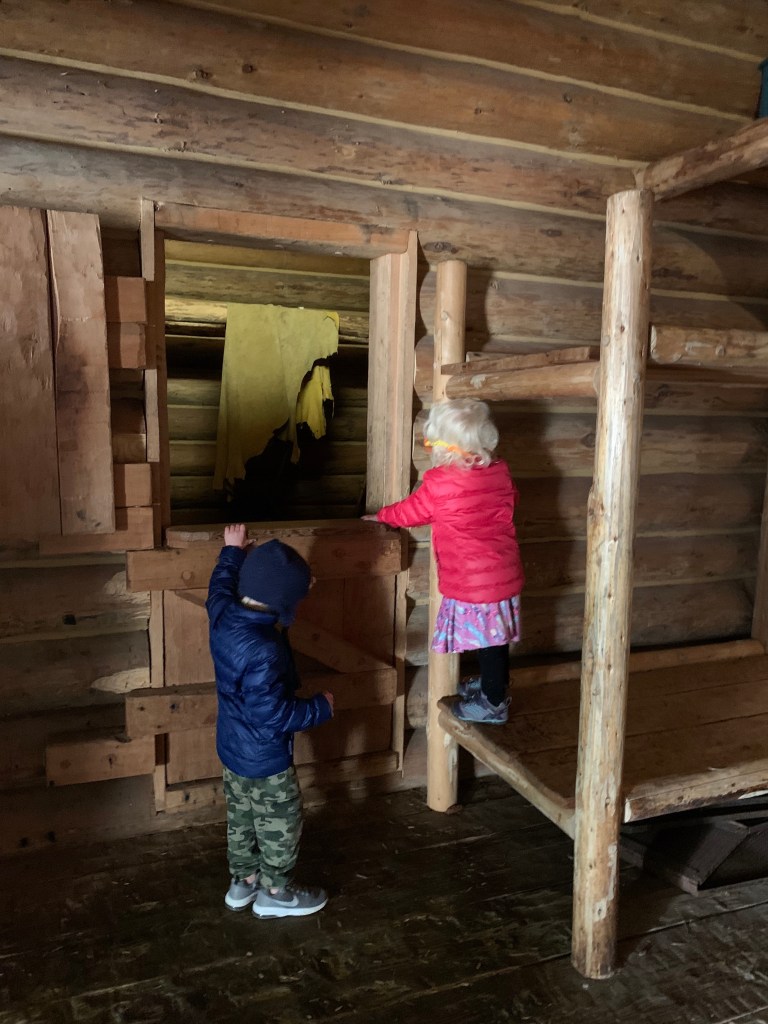
After picking up the kids’ junior ranger pamphlets and a map, we walked around the Fort Clatsop replica buildings. The kids were able to climb all around the structures. There were almost no other people around when we were there (on a Monday morning)!

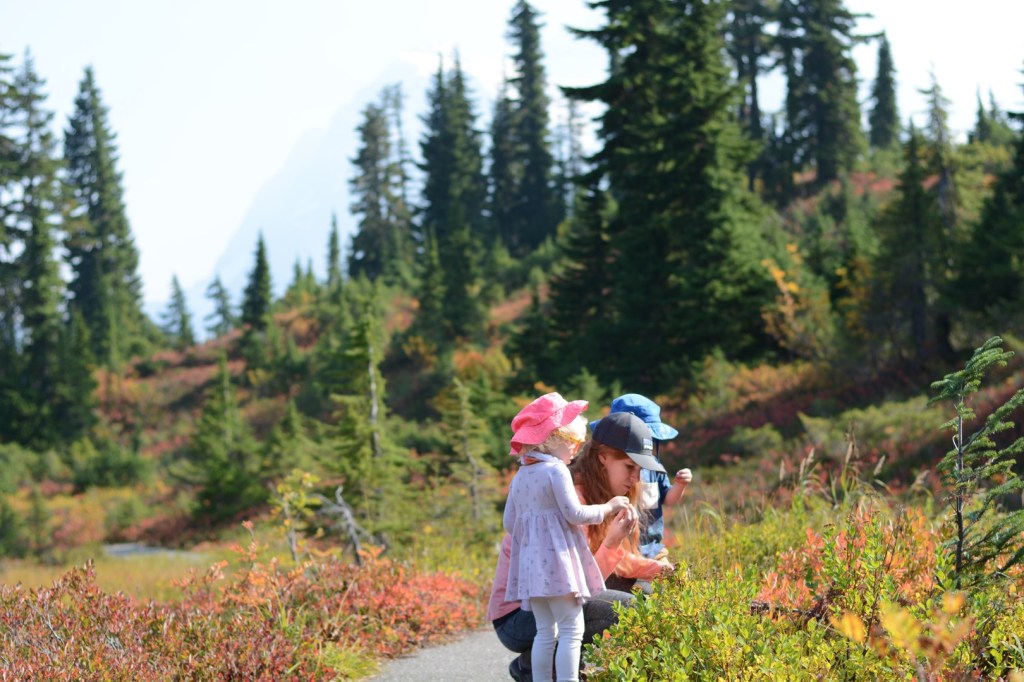
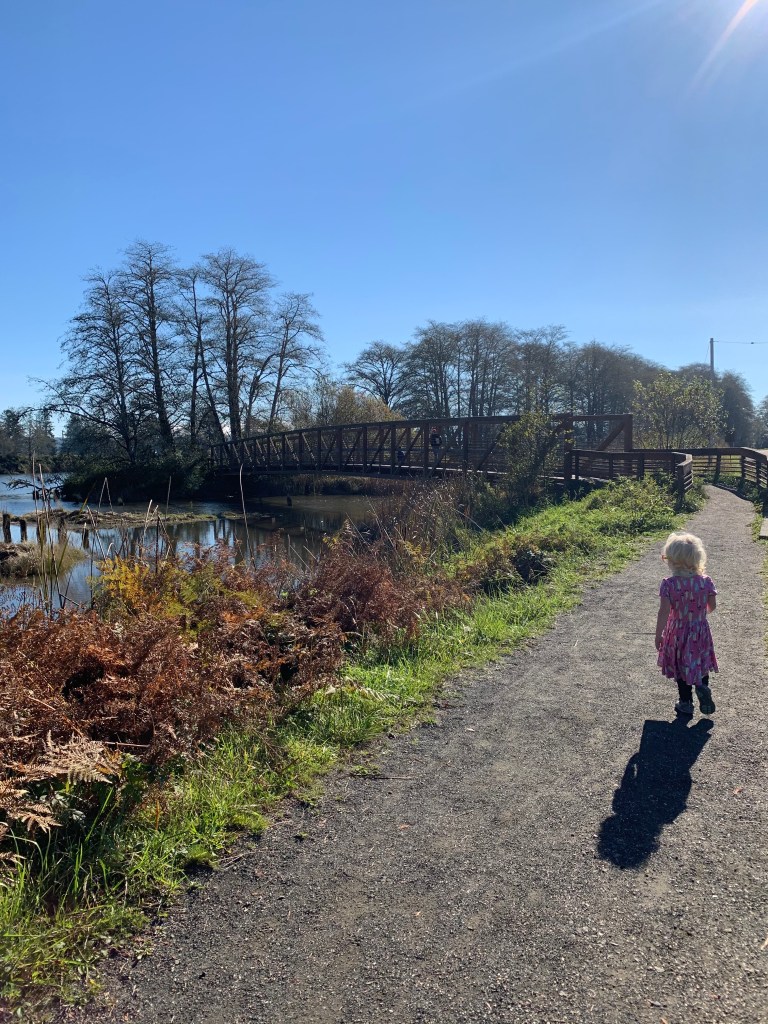
After looking around Fort Clatsop, we did the Netul River Trail hike/walk which is about a mile long one way. There was a lot of wildlife along the river trail. Eliza found 10+ caterpillars, we saw a heron, banana slugs, river otters (muskrat? We weren’t entirely sure what they were), and ducks! It was totally flat and had several boardwalks along the path.

Reading through the park information, it sounds like they have a lot of great programs during the summer including FREE guided canoe tours and ranger hikes and programs! There is no camping at Lewis and Clark National Historical Park so it is more like a day-trip to do if you are already in the area at another state park or staying on the Oregon coast.

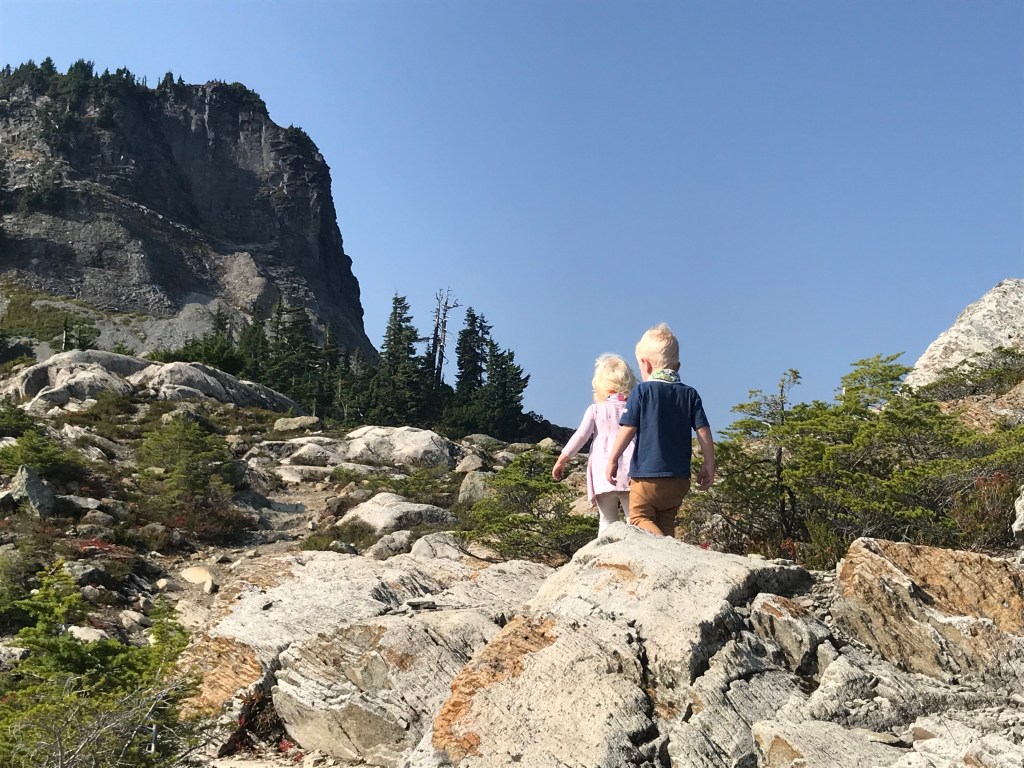
If you have more stamina than a 1 mile hike (pretty much our kids’ max), they have a trail that connects Fort Clatsop to Sunset Beach (about 5 miles) that sounded beautiful!

I would definitely stop here again as a place to stretch our legs if we are driving through!

Centennial Trail Bike Ride!

The nice weather of summer/fall seems to be coming to an end, but there are plenty of outdoor things to do in late fall/winter! We recently biked a good chunk of the Centennial Trail in Snohomish County.

North Trailhead (do not recommend that port-a-potty though!)

It is a little bit of a drive to get there (about an hour from Bellingham), but it is a 30-mile (one way), completely paved and off the road biking trail! It is perfect for kids! Our kids are not very confident on bikes yet so Seth still tows them in our bike trailer (close to 100 pounds!)

We biked from the Nakashima Heritage Barn to Arlington and back to the Nakashima Barn/North trailhead for a total of about 18 miles round-trip. The trail goes right by Twin Rivers Park in Arlington which is a great stop if it isn’t too busy. There is a big playground there with an awesome splash pad open during the summer.

To get to the park entrance, take exit 208 for SR 530 toward Arlington. After 3.7 miles, turn left on to SR 9 (this is an easy turn to miss on your way home). After 7.7 miles the trail head is on the left!

The whole path is so peaceful and beautiful. It would be great for walking a dog or running too if you were not wanting to go as far.

With so many things likely being closed down this winter, hopefully this gives you another idea for getting outside!

My parents came along too!

We have been wearing neck gaiters while biking because they are easier than a mask to take on and off quickly when passing others!

Rainbow Pumpkin Seeds for Learning and Play!

Making rainbow colored pumpkin seeds is a fun fall preschool activity that we did for the first time this past weekend! They are made basically the same way as rainbow rice (which we have and keep in a big Sterilite container for a sensory bin – thank you, BusyToddler!).

Steps to make Rainbow Pumpkin Seeds:

  1. Take the seeds out of the pumpkin and wash them. I got two small pie-pumpkins from Trader Joes to roast and make pumpkin bread. Eliza was in charge of scooping out the seeds/pulp and putting them in a bowl of water to wash them off!

2. Next, we spread the seeds on a cookie sheet and baked them at 350 for about 15 minutes.

3. Meanwhile, we prepared little containers with around 1 cup of water, 1 tablespoon of vinegar, and a squirt of food coloring! Exact measurements are not necessary.

4. We evenly distributed the seeds in each cup and let them soak for about an hour (again, exact measurements not necessary).

5. After about an hour, we used a slotted spoon to move the seeds back to a paper towel-lined cookie sheet.

6. I was going to just let them air-dry but they weren’t drying fast enough for me so I ended up putting them back in the oven at 350 for another 15 minutes and they were perfect when they came out!

That is it! Super easy, and once they are dry they won’t stain your hands/clothes. Eliza and Oliver will use these for craft projects and preschool counting activities! It was a really fun way to explore pumpkins for a preschooler!

Table Mountain Hike

We’ve been having such gorgeous fall days that we decided to head up to Mt. Baker this past weekend to take advantage of probably one of the last rain-free weekends of the season!

It was actually the first time we had been up to the mountains this summer, which is pretty abnormal for our family, but between Artist Point being closed really late this summer and smoke, we really didn’t have a chance to go. We started the day pulling off at Picture Lake and walking around the quick half-mile loop. This trail is ADA accessible and fantastic for little hikers!

Trail around Picture Lake
So many wild blueberries!
Hiking with kids is often slooowwwww…but you definitely see a lot along the way!

We drove up to the Artist Point parking lot and debated whether or not to do a full hike. Our kids weigh about 35 pounds each and I didn’t want to end up carrying them really far. We started down the Table Mountain trail which is rocky and not too steep to begin with. The kids were doing awesome hiking so right before we got to the steep part of the trail, Seth ran back to the car to get our kid carriers and water/snacks.

The lower/flatter part of Table Mountain Trail

We went up Table Mountain two summers ago too but carried the kids 100% of the way (and they both weighed a lot less then!). Seth got back with all of the supplies fairly quickly and we loaded the kids up in the packs. This trail is NOT GOOD FOR LITTLE KIDS unless they are in a backpack! It is less than a mile from the parking lot to the top, but gains over 700 feet of elevation. There are pretty intense, rocky switchbacks right on top of each other for the last 1/8 mile or so.

You can see the top of Table Mountain in the upper left of this picture

We made it to the top with the kids and found a great place to have a snack. The views from the top are incredible! If you have kids that like to run away from you this might not be a good hike either because there are pretty significant drop-offs on the sides of Table Mountain. The top is relatively flat though!

Beautiful views at the top!

Artist Point is a beautiful place to visit even if you don’t do any hiking! We want to do some longer hikes, but we are trying to feel out how far our kids will be able/willing to go without being carried the whole way!

Eliza REALLY wanted to find snow because she remembered finding it last year…there was one very small patch still left next to the trail!

Easy At-Home Composting!

We compost all our food scraps, yard waste, etc. at our house! You don’t need to live on a big farm to effectively compost – our lot is about 10,000 sq feet (1/4 of an acre). We do have a garden that we put our compost in once it is ready, but you could also use the compost for flower beds!

Eliza taking out the compost bucket!

Composting is great because it reduces your carbon footprint (the trucks don’t have to use fuel to haul away the weight and it doesn’t take up space in the landfill), and it reduces or eliminates the need for chemical fertilizers in your garden.

I’m no composting expert, but I know composting can seem really overwhelming to start. This is what our family does and it is VERY simple:

This post contains Amazon affiliate links, I may earn a small commission at no cost to you if you purchase through these links

  1. We have this 0.8 gallon trash can with a removable insert in our kitchen right next to our garbage. We put any food scraps (watermelon rinds, moldy food from the fridge, apple cores, etc.) in it instead of the garbage. We don’t put any meat/bones/animal fat in – those go in the garbage. We empty this about every other day. We haven’t had any issues with it smelling bad because we empty it regularly and the lid actually seals really well! We also add yard leaves, grass clippings, etc. to the bin.
  2. We used to just have a big pile of compost in the corner of our yard but it smelled bad and attracted rodents. Growing up, I lived on 3 acres and we had an open-air compost pile that worked fine because it was far enough away from the house/where people hung out! This past year we invested in this stand-up compost bin with a lid! It is crazy how much faster the bin breaks down organic matter vs having it just sit in the open air.
  3. That bin has openings on the bottom that we can shovel the compost out once we need it! We add the compost to our garden in the spring before we plant. Now is a great time to start composting to get ready for spring gardening!
Kitchen compost bin
Outside compost bin

If you aren’t quite ready for a big huge bin, they have smaller and cheaper options like this one that would work too! You just might end up composting maybe half of your food waste instead of all of it.

You will want to have roughly the same amount of green (food) and brown (yard waste) materials in your compost pile. Sometimes you might need to add a little water, but we haven’t needed to in our compost pile. The EPA has a great beginner website for composting!

It is really interesting (and slightly gross) to open the compost bin and seeing how many different types of insects/worms/fungi are inside! The whole thing looks like it is alive with how much movement is going on in there!

I’d love to hear if you compost and what successes or failures you have had with composting!

Side taken off for easy shoveling access!
Can you see all the creepy crawlies in there?! (Especially visible along the black plastic)

“My Kid Won’t Let Me Brush Their Teeth!”

I’m a dental hygienist and I’ve heard this more than once from parents! I’m not trying to judge anyone, but it is extremely important that parents have tools and strategies for brushing their kids’ teeth because it is so important!

I brought Eliza to her 4 year well-visit with her pediatrician and they had me fill out one of those questionnaire forms to see if your child is on track developmentally. First of all, I understand they need to screen kids somehow, but those forms seem to just make parents of kids with any type of special needs feel bad…I wish they could have adjusted forms for us. Second of all, I was APPALLED when one of the questions asked, “Does your 4 year old brush their teeth by themselves?” I circled no and wrote a lengthy explanation of why (which I’m sure the nurse just rolled her eyes and entered “no” in the computer and shredded the form).

I was appalled because according to the American Academy of Pediatric Dentistry, parents should be brushing their kids’ teeth themselves or at least closely supervising until they are at least 6 years old. Some kids will need help longer!

Eliza says she is going to be a dental hygienist when she grows up.

You can start using a fluoride toothpaste when the first baby tooth comes out but you only use a teeny smear of toothpaste (think grain of rice). The toothpaste commercials showing 2″ of toothpaste are just trying to get you to use more than you need to at a time. Even for adults, a pea sized amount is plenty and a tube of toothpaste should last you a really long time!

A baby should go to the dentist when their first tooth comes through the gums (and then every 6 months after that). Age 1 is the latest a baby should have their first dental visit! You can go to either a pediatric dentist or a family dentist – a pediatric dentist may be a good choice if you think your child will have a difficult time keeping their mouth open or sitting still for a short exam.

Teeny little bit of toothpaste!

But what if my kid won’t let me brush their teeth? It is kind of like asking “what if your kid won’t let you buckle them in their car seat?” …you have to. Some people mistakenly think cavities in baby teeth aren’t a big deal since big teeth will just grow in but they are very important in maintaining space for adult teeth, helping your child learn to eat and speak, and decay can spread from one tooth to another (from baby to permanent teeth in the mouth).

Some tips to help:

  1. Start early! If a kid is used to having their teeth brushed from the time they are a couple months old, it will be less of a battle as they get older!
  2. Make it fun! Have a fun-tasting toothpaste (kept out of reach, obviously), a character on a toothbrush they like, or sing a fun song while you brush. Our kids have the Oral-B kids electric toothbrushes from Costco now that they are both 3 and older!
  3. Show them that you brush your teeth too, that it is a regular part of getting up in the morning and going to bed at night.
  4. Don’t ever threaten kids with “if you don’t brush your teeth, you will get a cavity and it will HURT” That is just totally setting you up for a meltdown disaster when you eventually need to take them to the dentist (or when they are an adult and are terrified to go in!)
  5. Brushing should be twice a day, but the most important time is before bed, because bacteria goes crazy at night when we are sleeping and not producing as much saliva!
  6. Brushing needs to be the LAST thing before going to bed. Absolutely no milk, bedtime snacks, etc. after teeth brushing. If our kids need another bedtime snack, we brush their teeth again. (An exception is nursing babies – just make sure their teeth are brushed and they don’t have any other snacks before bed/their long sleep stretch). No bottles or sippy cups with milk in bed or laying around the house during the day!

And just so you don’t think we have it all together…Oliver (who just turned 3) still HATES having his teeth brushed. He’s happy if we let him do it himself, but can’t stand when we do it for him (which we do). There are sometimes tears, but hopefully he will grow out of it soon!

Rock Polishing At Home

It all started out with a free rock polishing kit. I’m part of a “Buy Nothing” Facebook group where people give things away they no longer want/need. The kit came with the tumbler and enough polishing powder for one batch of rocks. I polished my first batch of rocks over the course of about 7 days and they turned out pretty cool! The main downside was the polisher was extremely loud so we had to keep it in the garage.

My original free one. (You get what you pay for)

This post contains Amazon affiliate links, I may earn a small commission at no cost to you if you purchase through these links

I thought rock polishing would be such a fun preschool/homeschool activity for years to come, but I was out of polishing powder. I did some research online and ended up buying 4.5 pounds of rock polishing powder and ceramic pellets. I was set! Until the VERY next time I used the free rock polisher the rocks banged holes in the plastic and it leaked ALL over the place. (See the duct tape in the picture above). I tried to fix it with duct tape several times but it kept leaking.

Now I had over $20 of polishing powder but no rock tumbler…so I did more research online and ended up getting this National Geographic Hobby Rock Tumbler Kit. Now I’m really committed to rock polishing (haha!). The kit comes with some unpolished rocks and some polishing powder to start with. Here are pictures of the rocks that came with the kit:

Before
After!

The rocks included in the kit were obviously more colorful than the ones we find laying around our yard. I know you can buy more unpolished rocks from Amazon if you wanted to do more of those type of rocks. The main reason I wanted to get the polisher was to collect rocks when our family does trips! Hopefully as a family we will be able to learn more about the different rock types (and which ones polish better!)

Functional Rock Tumbler!

To polish the rocks we fill up the tumbler about 1/2 full of rocks, add about a tablespoon of polishing powder, then just cover the rocks with water. The tumbler spins them around for about a week, then we rinse out the rocks and add the next step of polishing powder. The grit goes from coarse to ultra-fine, finishing off with aluminum oxide.

Unpolished rocks
After Step 1 (The rocks are still slightly wet so they look shinier than they really are)
After Step 2
After Step 3
Final after step 4! Some got much more shiny than others. These are completely dry, so this is what they actually look like!

I’m interested to experiment to see if longer polishing time would lead to shinier rocks or if I need to put some sort of glaze on them? Either way, this is a fun project for homeschool kids!

Also just your friendly reminder that it is against the law to remove anything from National Parks. It comes with a hefty fine – so do your rock collecting outside the parks! 🙂

Vision Therapy Update

Eliza has been doing vision therapy for about 8 months now! She started going weekly for an hour each week from January through mid-March. We took about a 3-month break during COVID, then started going every other week for 30 minutes each time.

Just a little background refresher: Eliza was diagnosed with an optic glioma (tumor on the nerve going to her right eye) in September, 2018. She did a year of weekly chemo which shrunk the tumor but left her nearly blind in her right eye. She does have some vision in that eye, however, and with vision therapy we hoped to maintain/strengthen the vision in that eye and help her with balance and coordination.

I am 100% convinced that vision therapy has helped Eliza. We saw immediate improvements in her balance, ability to color inside lines, and significant improvement in being comfortable with wearing a patch. She doesn’t have enough functional vision to be able to be patched for 3-4 hours a day because she can’t see more than a few inches in front of her, but she is able to do vision therapy exercises for 15-20 minutes each day. We’ve also noticed that doing these exercises helps keep her right eye tracking with her left eye rather than turning in towards her nose and going cross-eyed.

Vision therapy is SO fascinating! Her vision therapist was amazing, and spent a lot of time teaching both me and Eliza different red/green activities (where her left eye can see only one color and her right eye can only see one color) to force both eyes to work together. She also did balance activities, peripheral vision activities, and patched activities.

I am so much more confident in what Eliza specifically can and cannot see with her right eye because of vision therapy. Her routine 3-month eye exams at the ophthalmologist are so quick, and usually happen when Eliza is already exhausted from the drive to Seattle and multiple other appointments. Last time her eye exam was an hour after waking up from anesthesia for her MRI…you can bet that eye exam wasn’t accurate! Her ophthalmologist isn’t really supportive of vision therapy, but I’m going with my mama gut on this one and pursuing this alternative therapy to give Eliza the maximum use of her vision that she can get!

Example of a red/green activity: Eliza wears these glasses
Eliza wears the glasses and puts the tokens of the corresponding color on the squares
One eye can see the RED and the green is cancelled out by the green shade
The other eye can only see the GREEN and the red is cancelled out by the red shade!

Eliza has started getting a little bit sneaky with her red/green activities by scrunching her nose up so she can see with her left eye for a millisecond to complete the activities faster. Her vision therapist said this is REALLY common with kids doing vision therapy her age. We want to keep vision therapy as light and fun, and not something she dreads SO…

We’re taking a 4-6 month break from going to vision therapy sessions (as recommended by her vision therapist) to focus on just doing patched activities at home to try to continue to strengthen/maintain her right eye. We will continue to do 15-20 minutes every day at home!

Vision therapy is pretty expensive ($90-120 per session, not covered by insurance because it is an “alternative medicine”) and her vision therapist knows we have plenty of patched activities we can do at home (pretty much any preschool-type sorting or matching games). We will go back in a few months to see if Eliza is ready to do red-green activities again! Eliza’s vision therapist said it is very common to do a few months on/a few months off as she grows up.

We have been so happy with doing vision therapy and I’ve heard from many other moms that it helped their kids with various vision-related issues too!

I’m so happy to answer any questions about vision therapy to the best of my ability!

Not vision therapy, but Eliza’s drawing and letter forming has improved significantly since doing vision therapy!

5 Day Car Camping Meal Plan

Camping food can be so delicious and it also can be a big disaster. We have car camped enough to have experienced both. We were really happy with our meals on our Teton trip so I thought I would share them to give you ideas for future car camping trips!

When I planned our Teton trip, I tried to choose meals with a minimum amount of refrigeration requirements. We have a big Yeti cooler which is great, but with the temperatures reaching 90+ outside, our cooler just baked inside the bear box and needed the ice refilled about every other day. I mainly wanted to use our cooler for the kids’ milk, eggs, and cheese sticks.

We’ve also tried cooking over the fire many times and have never had a lot of success. We finally bought a double-burner propane stove and it has been a GAME CHANGER for our camping meals! We also have a griddle that fits right on top of the two burners for pancakes, bacon, etc. Now we mostly just use the fire for s’mores after dinner is all cleaned up!

Breakfast was the same each day: a hard boiled egg for each person and a bowl of plain quick-cook oats sweetened with honey. Lunch was also the same every day: peanut butter and jam sandwiches, cheese sticks, and apples. We would pack our lunches as we were cleaning up breakfast to avoid hauling all our cooking supplies out again at lunch.

Dinners:

Day 1: Kodiak Cakes pancakes, bacon, and hash browns. This was the only meal we regretted a little because the bacon was SO greasy/messy and we had to be really careful how we cooked and cleaned up since there were bears in our camp twice while we were there. The Kodiak cakes are awesome because you just have to mix them with water and they have a decent amount of protein. Costco has awesome dehydrated hash brown cartons that you just add water and fry right up!

Day 2: Spaghetti and (pre-cooked) Sausage: I brought spaghetti noodles, a can of sauce, and pre-cooked sausage. If I made this at home, I would have just used regular sausage, but since we were camping I wanted already cooked sausage (kept in the cooler, of course) to add an extra layer of food safety.

Day 3: Quesadillas with chicken and black beans: These were SO easy, I actually make these at home for dinner sometimes (with freshly cooked chicken). I just mixed up canned chicken, black beans, cheddar cheese, and BBQ sauce and put it in a tortilla. I fried them dry on the griddle for about 2 minutes on each side! The kids had just plain quesadillas!

Day 4: Breakfast Burritos: I made scrambled eggs and we added cheese, the rest of the sausage from day 2, a new batch of hash browns, and salsa!

Day 5: Chili: Towards the end of the week I really wasn’t wanting to rely on our cooler anymore, so we had a can of chili and added tortilla chips and cheddar cheese on top.

We also had two days worth of Mountain House meals on standby just in case one of the meals wouldn’t have worked out for some reason!

There was no dishwashing station at our campground so our dual dish containers were fantastic for doing dishes after eating! We boiled water in our kettle to have hot water for washing the dishes.

When I was researching camping meals, there were some crazy gourmet recipes out there that I wouldn’t even make at home – much less camping! We like to keep things pretty simple when we car camp! Let me know if you have any other easy go-to camping meals!

Our Homeschool Preschool Plans 2020-2021 (P3/P5)

We’re heading in to our second year of homeschool preschool with Eliza! We started last year with Playing Preschool curriculum, which gave me some great ideas, but we ended up modifying it quite a bit as the year went on. I thought I would list what we are planning on doing for this fall here!

Eliza will be 5 in December, so she will not start kindergarten until next year. When Eliza was born I always thought she would just go right in to public school in kindergarten but the closer we get and the more I realize how much I love teaching her at home. We are now hoping to do a hybrid public school/homeschool education for kindergarten next year. We’ll re-evaluate each year what is working for our family and for each kid.

I’m a HUGE fan of independent play, read-alouds, and exploring outside. Our “preschool” takes about an hour each day and I’m really flexible with what we get done. It just adds a lot of helpful structure to our day doing an hour of preschool each morning. Eliza loves doing it for the most part, which is why I feel like we will be able to do these different subjects! I’m trying to make this homeschool preschool fun and lighthearted so we will have a good routine and foundation as she gets older.

This post contains Amazon affiliate links, I may earn a small commission at no cost to you if you purchase through these links

Reading: How to Teach Your Child to Read in 100 Easy Lessons. We have started this one twice and both times Eliza wasn’t quite ready for it. I’m very confident Eliza will learn to read when she is ready. We’ll start this one again in September and take it as slowly as she needs.

Handwriting: Handwriting Without Tears. Eliza has made leaps and bounds advancements in handwriting since starting vision therapy. This might be an area she needs extra help in due to only having functional vision in one eye. I’ve heard amazing things about this program!

Math: Abeka Numbers Skills K5. I was homeschooled for four years and used mostly Abeka curriculum. I chose this because I’m familiar with it and it claims to be equivalent to common core standards.

Bible: Long Story Short. This is a 10-minute daily devotional that involves actually reading out of the Bible plus discussion questions. This will be part of our “Calendar Time” in the morning.

Extras: We will do science and Spanish once a week. Eliza is really interested in names of bones/muscles/etc. The other day she said “I got some water down my trachea on accident” haha. We have this Human Anatomy Book for Kids. The Spanish book I chose is labeled for preschool through first grade. We’ll more likely use this for more than one year. We also have plenty of BOB/easy reader books and sight word flashcards to supplement!

We will continue to do our morning calendar time, picture books, read-aloud chapter books, playing outside, and lots of independent play time! Hopefully we will be able to have more play-dates too depending on what things are looking like! Eliza’s vision therapy exercises take about 20 minutes every afternoon too.

Oliver will mostly do coloring books/sticker books/play-doh type activities while Eliza does her workbooks. One book I love for his age is the Big Preschool Book. Eliza just finished going through this entire book and loved it. It is full-color and really engaging for preschoolers! It is so crazy to already see big differences in Eliza and Oliver’s learning interests and styles.

Every family is so different with their school choices, but I know many more families are forced into choosing at-home options this year. I’m really interested to see if hybrid models become more popular in the future as schools are quickly modifying now. I’m excited to have another year at home with Eliza after spending so much time apart from her during Oliver’s transplant.