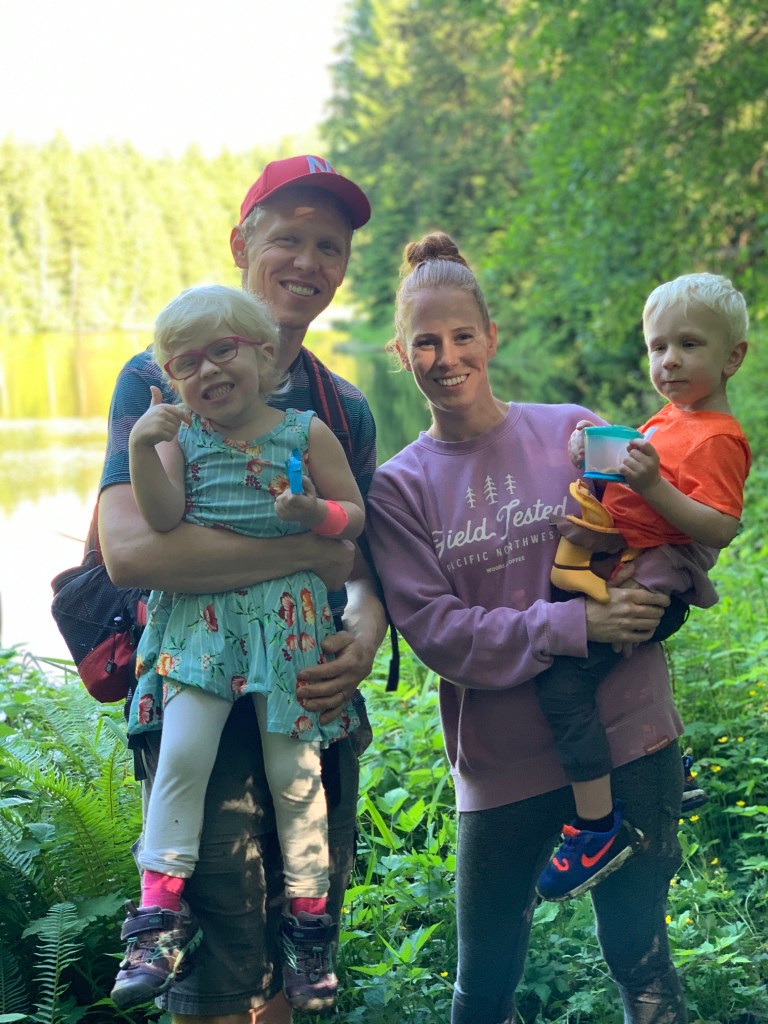
4 Days in Redwood National Park

We spent 4 days of spring break exploring Redwood National Park in northern California! We left on Friday and drove 10 hours to Crescent City, California and returned the following Wednesday. We stayed in a VRBO apartment on the same block as the Redwood National Park Headquarters. We were surprised by the large homeless population in Crescent City, but other than that it wasn’t very busy at all. I would imagine Crescent City would be a lot busier during the summer. Entry to Redwood National/State parks is free!

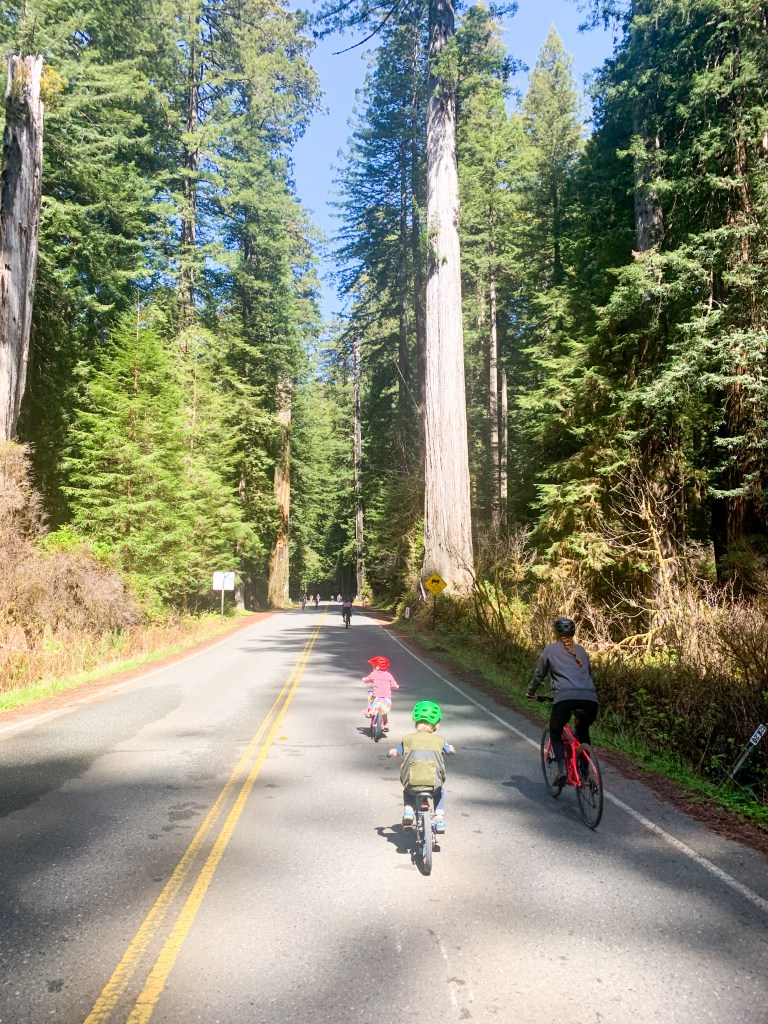
Day 1: The first Saturday of every month October-May they close the 10 mile Newton B. Drury Scenic Parkway to motorized traffic. Bikers (including e-bikes), rollerbladers, walkers, skateboarders, etc. can take advantage of this gorgeous road without having to worry about traffic! Our kids were able to pedal bike 7.5 miles each direction through the beautiful trees! We pulled over at a couple spots for quick little hikes and for lunch. One thing to note though: it is uphill from south to north/downhill north to south. The very north part of the road is a 6% grade. There was plenty of parking along the side of the road to unload bikes for the road.

Day 2: In the morning we visited Battery Point Lighthouse. This area is only accessible during low tide. There was an option of a $5 tour of the inside of the lighthouse but we just looked around outside and checked out the tide pools around the base of the lighthouse.

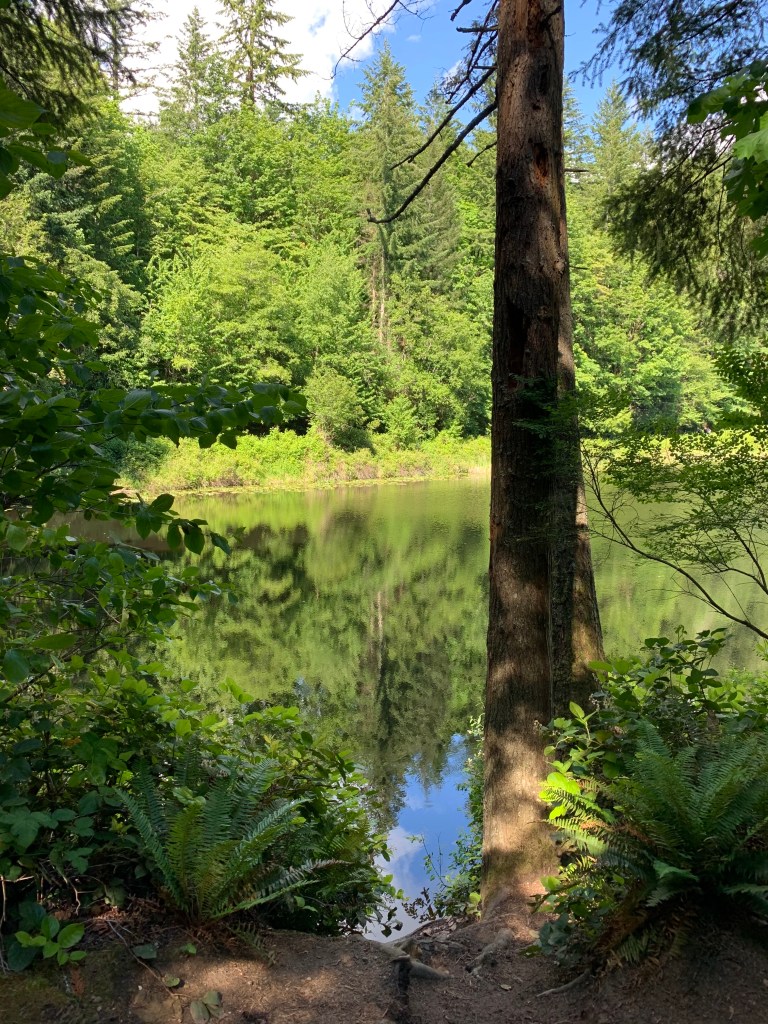
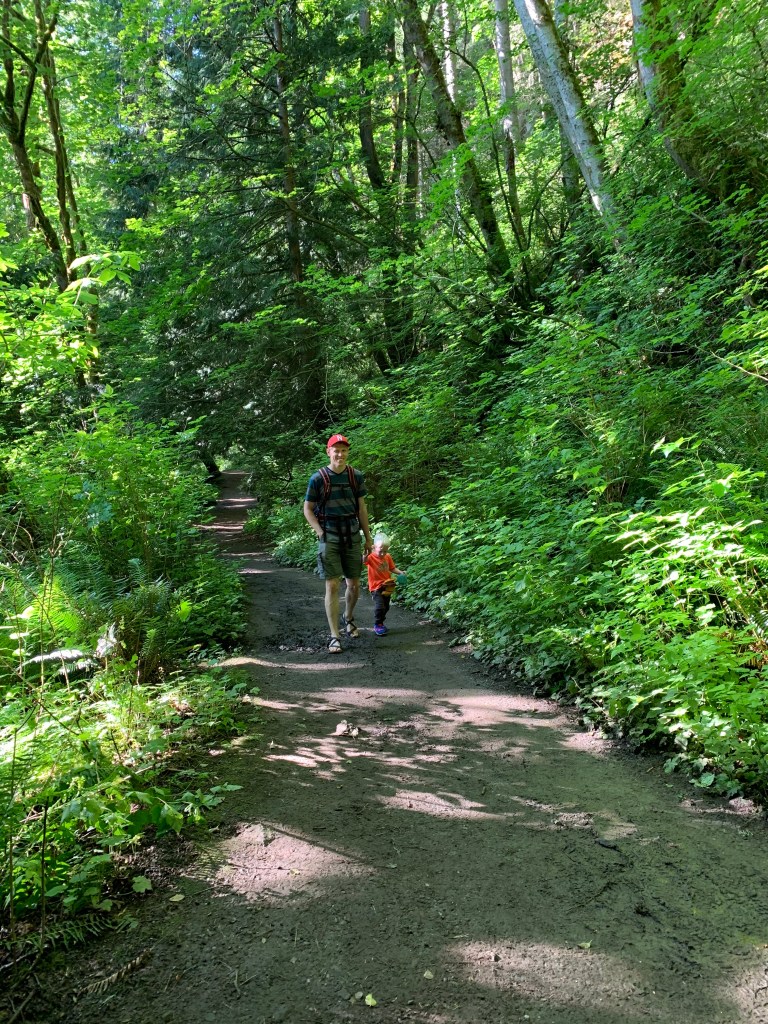
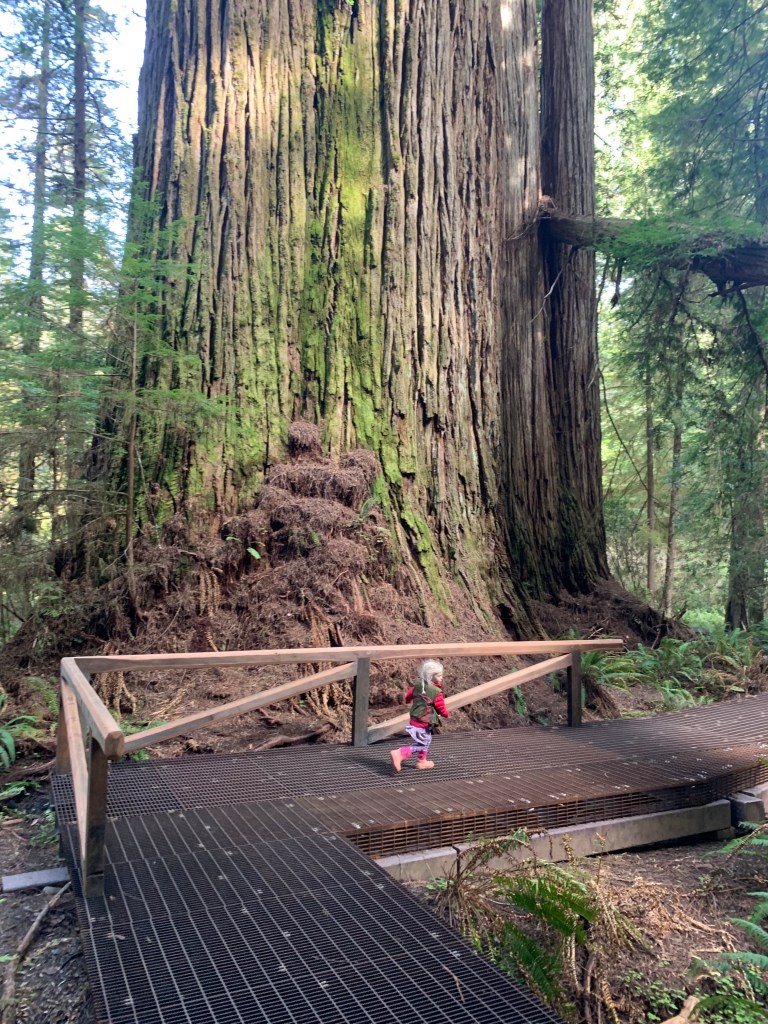
In the afternoon, we drove on Howland Hill Road and hiked around Stout Grove (about 1 mile, basically flat) and Grove of the Titans (about 3 miles, some elevation change. This one just recently officially opened so it wasn’t on the park maps yet). Grove of the Titans was probably my favorite thing of the entire trip. It felt like we were in the movie Avatar with the ENORMOUS trees we were walking around. They recently added steel boardwalks around the last bit of the trail to help protect the forest and the entire hike was just magical. Parking was somewhat limited along Howland Hill Road and the road itself is only 1.5 car lengths wide so you need to pull over when two cars pass each other. The trees were so impressive even just driving the road!

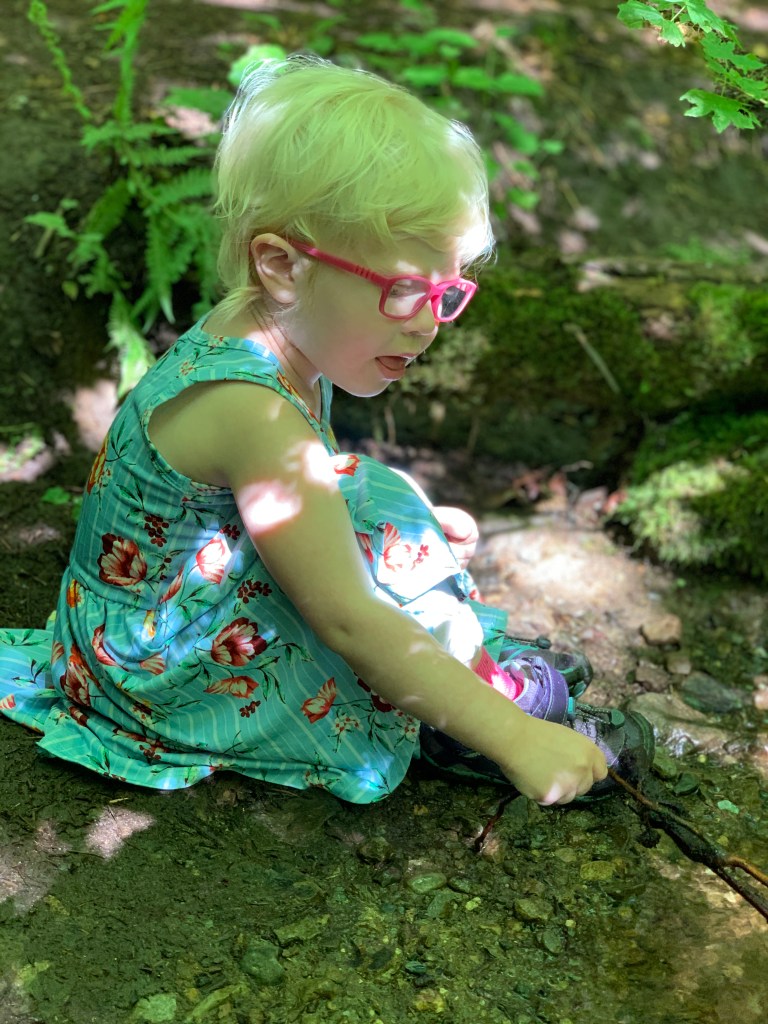
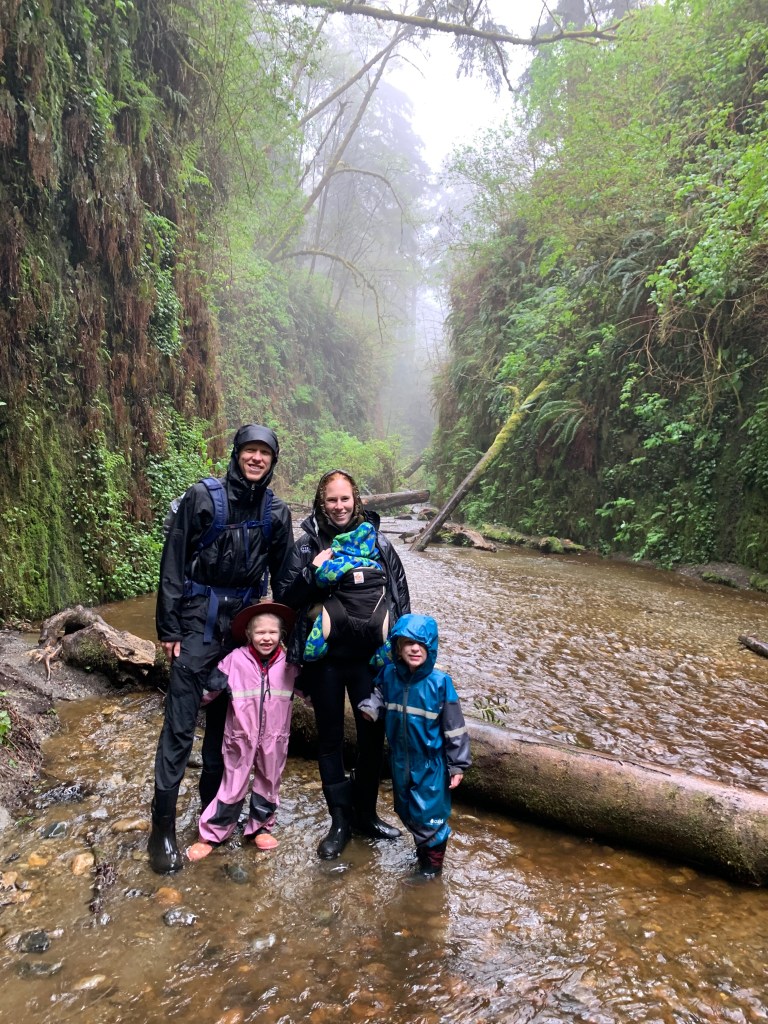
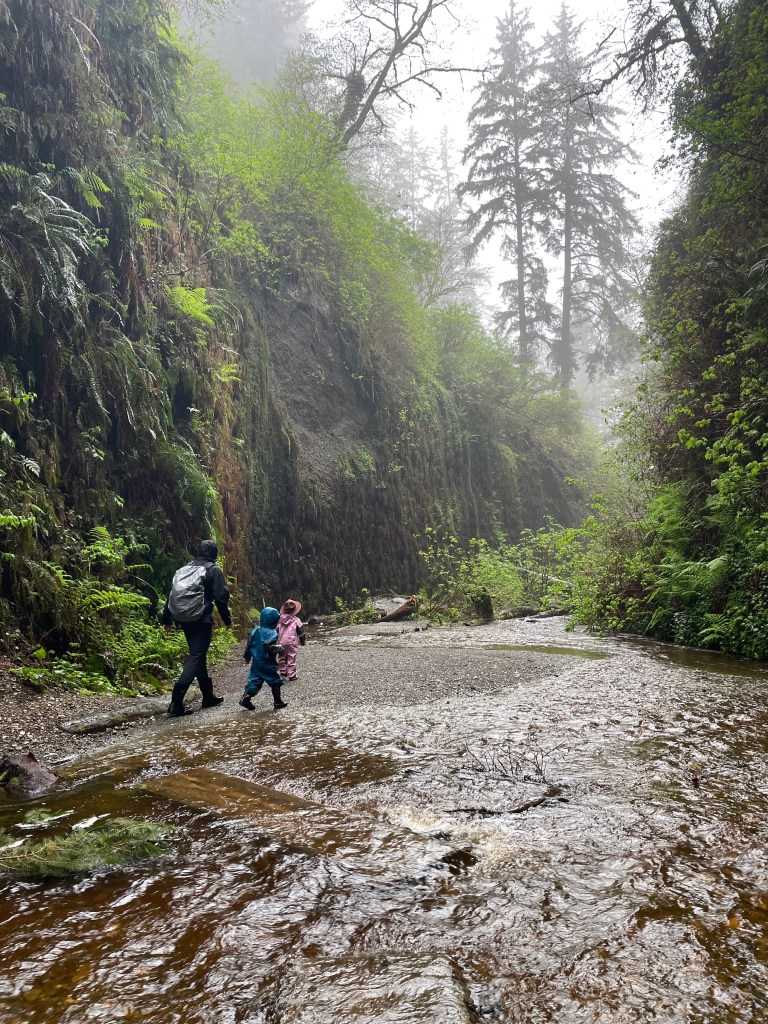
Day 3: We drove south to Fern Canyon. No permit is needed during the winter but a free permit is required during the summer so they can limit visitors. There is a $12 cash only entry fee, but if you have a National Park Pass, that is accepted as well. Fern Canyon has huge fern-lined walls on either side of the creek. It had rained quite a bit the night before we were there (and continued to rain while we hiked) so the water was running pretty strong. Wearing knee-high muck boots were the only way we were able to stay dry. In the summer the creek bed is much drier and they add little foot bridges to the hike. You can either hike back along the rim of the canyon or go back down the way you came! Part of Jurassic Park was filmed in Fern Canyon! There is a creek you have to cross with your car to get to the trail head. We decided not to cross it with our van since the water was up to our knees the day we visited so we parked and walked an extra mile along a dirt road to reach the trail head. Bigger trucks were able to make it across and I’m guessing on a drier day our car would have made it too!

Day 4: Endert’s Beach and Crescent Beach: Endert’s beach is about a 1/2 mile wide downhill path to the beach. The beach was gorgeous and we even saw a sea otter! In the afternoon while Goldie napped, Seth walked down to Crescent beach with the kids to look for sand dollars. Crescent Beach is a long, wide, and sandy. It looks like a wonderful place to hang out in the summer!

Day 5: (Drive home day) We drove up Highway 101 and stopped at the Oregon Dunes Day Use Area and hiked a mile on sand out to the beach and back. In retrospect we could have just stayed in the sandy area near the car and let the kids play on the sandy dunes. The beach was pretty, but similar to the other beaches that we had driven by all day.

All in all it was a wonderful trip! I’m sure there are many more hikes we could have done, but we got a really good overview of the park. April was an awesome time to visit because it wasn’t crowded at all and parking/permits were never an issue. If you have a chance, I’d highly recommend that you spend some time in the Redwoods! I’d love to answer any other questions you have and always love hearing recommendations of where to go!

Getting sworn in as Junior Rangers!

A Week at Mt. Rainier National Park

We planned for months to do a week-long camping trip at Glacier National Park but two days before we left we still were not able to get a Going to the Sun Road ticket (the website always crashed when everyone tried to buy tickets at the same time every morning and were instantly sold out) AND the weather was forecasted to be 100 degrees and smoky. 24 hours before we left, we decided to spend the week at Mt. Rainier instead! The weather was forecasted to be perfect and we called the park to make sure we thought we could get a first-come-first-serve camping spot. We are so glad we changed it up last minute!

Cougar Rock Campground fills up fast in the morning, especially on weekends! It has flush toilets, soap, paper towels, and drinking water but no hot water or showers.

Day 1: We had everything packed Thursday evening and left Friday morning for a family birthday party a couple hours from our house. We stayed in a hotel Friday night and left at 4:30am to arrive at Cougar Rock Campground by 7am. Seth waited in line at the ranger station until the ranger arrived at 7:30. There were 14 camping spots available for the day and we got the 6th one! Our camp spot was still occupied so we drove to Grove of the Patriarchs for a morning hike. Grove of the Patriarchs has enormous old-growth trees and a suspension bridge. Round-trip it is 1.5 miles and totally doable with little kids. In the afternoon we got to our campsite and set up our camp!

Grove of the Patriarchs Suspension Bridge
Old Growth Trees

Day 2: Sunday we drove up to the Sunrise area of Mt. Rainier. Looking back we probably should have gone on a weekday since we had to wait over an hour in line to enter the Sunrise area – they were letting cars in as cars drove out to make sure the parking lots were not overwhelmed. We were easily able to find a parking spot once we were in though! We did a hot and dusty 2-mile hike called the Silver Forest Trail. The views of Rainier were nice but were pretty much the same the entire way.

Silver Forest Trail at Sunrise

Day 3: We spent the day in the Paradise area of Mt. Rainier. The Paradise area is pretty much the only area in the park with full cell phone service. We took the Skyline Trail to Myrtle Fall and then continued on for about another 3/4 of a mile. There were gorgeous views of Rainier, wildflowers, streams and the trail had a good mix of shade and sun! The kids also completed their Junior Ranger booklets and got their Junior Ranger badges at the Paradise ranger station.

Hiking in the Paradise area

Day 4: This was our biggest day, and probably deserves its own blog post! We drove 3 hours south to Mt. St. Helens to hike the Ape Caves, a lava tube tunnel that is open to the public. Ape Caves does require a reservation and a $2 reservation fee, but it covers your whole car of people. There were plenty of spots available for a reservation when we booked a couple days in advance! There is an upper cave more difficult section and a lower, easier .75 mile section. We did the lower cave and it was perfect for the kids! It is definitely not wheelchair/stroller accessible but our kids were able to walk the entire way themselves.

Ape Caves!

Day 5: We woke up to cloudy skies and a colder campground on Wednesday. When it is cloudy at Mt. Rainier you aren’t able to see the mountain at all. We drove back up to Paradise and explored the Paradise Historic Inn. The kids enjoyed splitting a cinnamon roll from the cafe and Seth and I got some coffee. It felt warm and cozy and was a great morning of relaxing after our 6 hours of driving the day before. In the afternoon, we drove down to Longmire and walked around the 1/2 mile Trail of the Shadows nature trail. The clouds cleared by the afternoon and it ended up being the only cloudy day!

There are a lot of different areas to pull over and see waterfalls on the side of the road!
Crystal Mountain Gondola View

Day 6: Another out of park adventure day, we drove to Crystal Mountain Resort and took the gondola up the ski area. The views were incredible – you can see Mt. Rainier, Mt. St. Helens, and Mt. Adams from the top. We enjoyed our packed lunch at the top and did a little bit of hiking. There is a restaurant at the top for anyone wanting to pay $25 for lunch. You are able to hike down the 5 miles if you want, but the kids really wanted to ride the gondola back down!

Day 7: Our final day! We packed up our camp in the morning and explored part of the Carter Falls trail which starts right across the road from Cougar Rock Campground. This trail was really beautiful and we could have probably done more of the hike if we were ready with water and hiking shoes on the kids! We met some people on the trail from the Glacier area this day and they told us it was very busy, smoky, and hot in Montana – we were so thankful we chose Rainier!

I’d love to answer any questions about visiting or staying at Mt. Rainier National Park! It was a wonderful family camping trip! There are incredible longer hikes in the area too if you have older kids or no kids with you!

Table Mountain Hike

We’ve been having such gorgeous fall days that we decided to head up to Mt. Baker this past weekend to take advantage of probably one of the last rain-free weekends of the season!

It was actually the first time we had been up to the mountains this summer, which is pretty abnormal for our family, but between Artist Point being closed really late this summer and smoke, we really didn’t have a chance to go. We started the day pulling off at Picture Lake and walking around the quick half-mile loop. This trail is ADA accessible and fantastic for little hikers!

Trail around Picture Lake
So many wild blueberries!
Hiking with kids is often slooowwwww…but you definitely see a lot along the way!

We drove up to the Artist Point parking lot and debated whether or not to do a full hike. Our kids weigh about 35 pounds each and I didn’t want to end up carrying them really far. We started down the Table Mountain trail which is rocky and not too steep to begin with. The kids were doing awesome hiking so right before we got to the steep part of the trail, Seth ran back to the car to get our kid carriers and water/snacks.

The lower/flatter part of Table Mountain Trail

We went up Table Mountain two summers ago too but carried the kids 100% of the way (and they both weighed a lot less then!). Seth got back with all of the supplies fairly quickly and we loaded the kids up in the packs. This trail is NOT GOOD FOR LITTLE KIDS unless they are in a backpack! It is less than a mile from the parking lot to the top, but gains over 700 feet of elevation. There are pretty intense, rocky switchbacks right on top of each other for the last 1/8 mile or so.

You can see the top of Table Mountain in the upper left of this picture

We made it to the top with the kids and found a great place to have a snack. The views from the top are incredible! If you have kids that like to run away from you this might not be a good hike either because there are pretty significant drop-offs on the sides of Table Mountain. The top is relatively flat though!

Beautiful views at the top!

Artist Point is a beautiful place to visit even if you don’t do any hiking! We want to do some longer hikes, but we are trying to feel out how far our kids will be able/willing to go without being carried the whole way!

Eliza REALLY wanted to find snow because she remembered finding it last year…there was one very small patch still left next to the trail!

Squires Lake Hike

We hiked another beautiful Pacific Northwest trail this past weekend! Squires Lake is located on Highway 99. It is just a couple minutes off Exit 242 on I-5. There is a small parking lot and additional parking on the wide gravel shoulder of the road. The parking lot also has a large, wheelchair-accessible port-a-potty. The trail is not wheelchair or even stroller friendly though!

I’ve seen mixed labels of how long this hike is. Washington Trails Association says it is 2.0 miles roundtrip with 200 feet of elevation. Alltrails says it is 1.4 miles with 350 feet of elevation. Seth had Strava going during the whole hike and it said that the trail was 2.5 miles roundtrip with 350 feet of elevation gain so I’m guessing that is the most close to accurate!

The first ¼ mile is uphill with switchbacks. Our kids (2 and 4) were able to go all the way up by themselves no problem though! Once we reached the lake it is a mostly flat trail around the lake. There is one decently sized hill up and down during the loop that our kids both wanted to be carried on towards the end.

There were streams, waterfalls, a few bridges, and lots of wildlife to see! The trail is dog-friendly and connects to several other trails if you wanted to make it a longer hike or a bigger loop.  Various places have benches at outlooks along the way. There were not many other people on the trail, even for a sunny Sunday afternoon!

Oliver’s fanny pack filled with snacks!

I hope no one thinks that we have perfect children that always happily hike along with us. At one point on the hill, Eliza just plopped down and said, “I ran out of energy.” Overall, they are really good troopers, and the more we get out with them, the more used to it they will be! We are hoping to work up to longer and longer hikes so we can eventually go backpacking with them (without needing to carry them)!

Eliza is very confident she will catch a fish one of these days with the sticks she finds along the trails.

This trail was a bit muddy in spots so Oliver’s Nike’s were not the best shoes for this trail. Eliza has amazing waterproof Keen hiking shoes that I bought used for $20 but I’m not willing to fork over $55 for the same shoes for Oliver since he seems to outgrow his shoes every 3 months! I have a great pair of Keen hiking boots that I got last year to replace the exact same old Keens that had lasted about 10 years! Seth wore his Chacos for this hike, which also worked great for the distance.

One extra fun addition that we just started using for the kids is the addition of a kid-size fanny pack. We only have one right now for Eliza but we will probably get one for Oliver too. This lets them have quick access to their snacks or works for collecting little pebbles along the way. It is a lot easier for them to use than an entire backpack for right now!

Happy Hiking!