Racehorse Falls

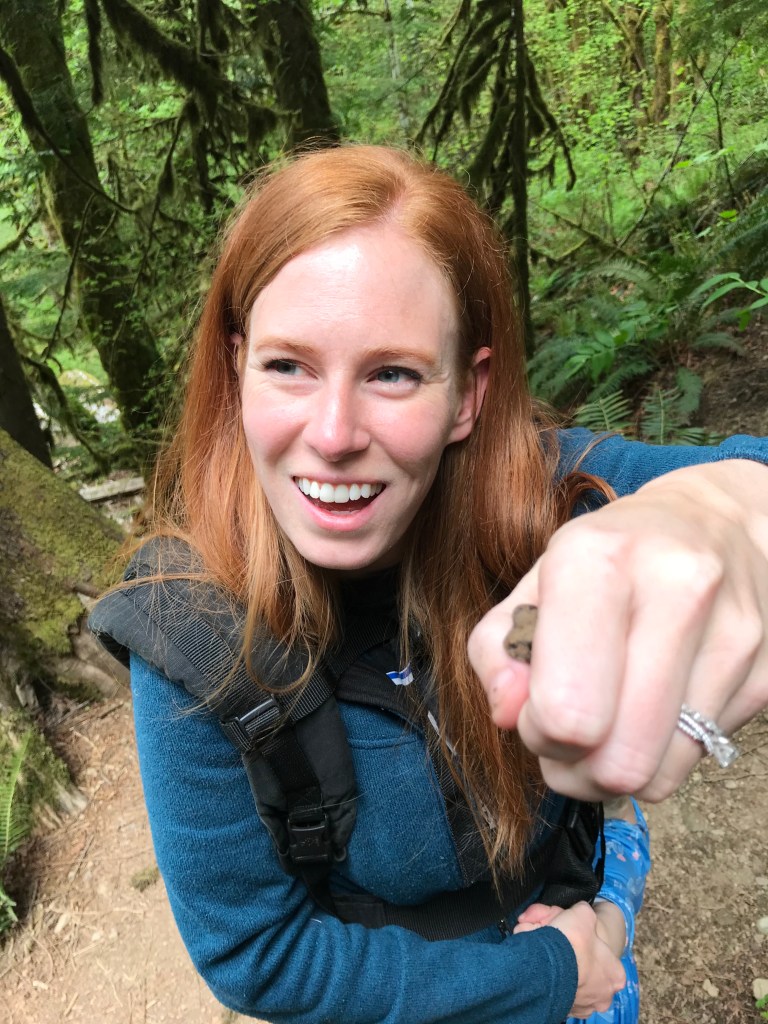
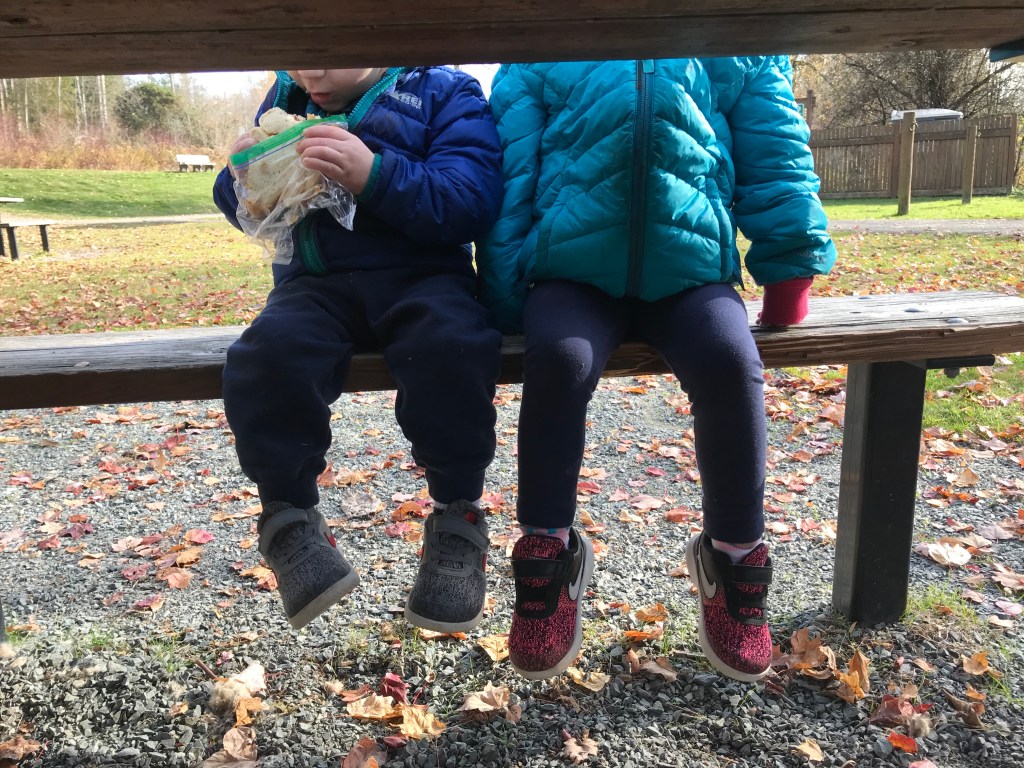
Hiking is finally allowed again in Washington so we can get back to some outdoor family adventures! Monday morning was a gorgeous day for the Pacific Northwest. We attempted to find Racehorse Falls a week ago and thought we found it…but realized when we got home that we pretty much found a steep creek, not the actual racehorse falls.

Here is what we thought was Racehorse Falls the first time haha!

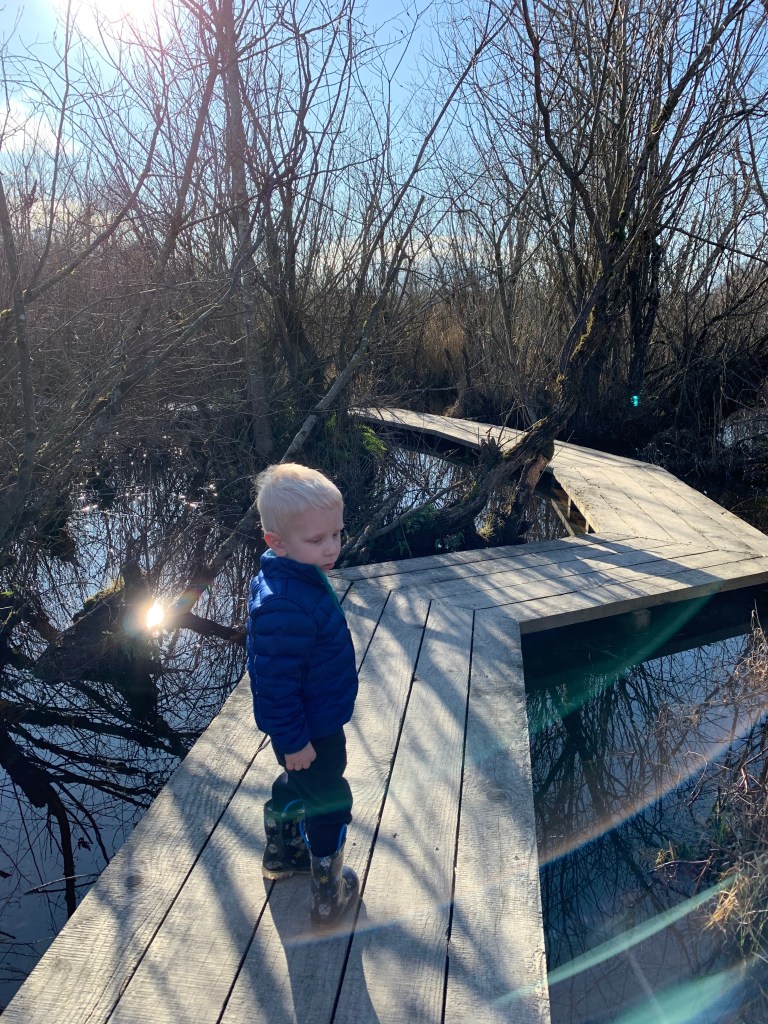
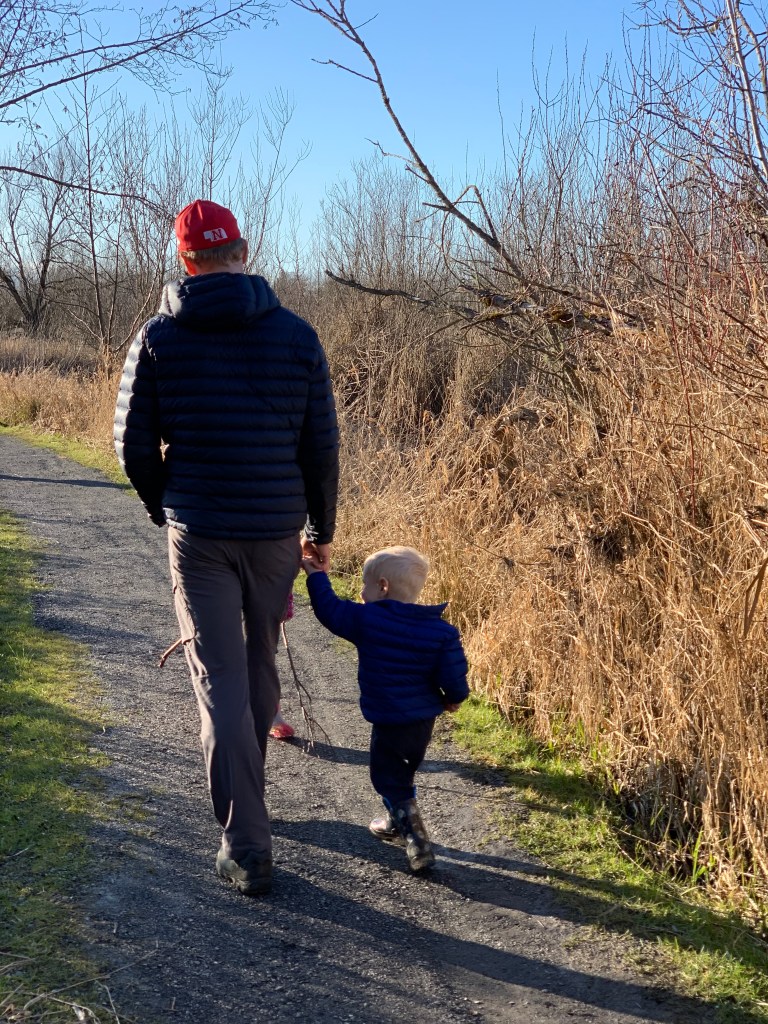
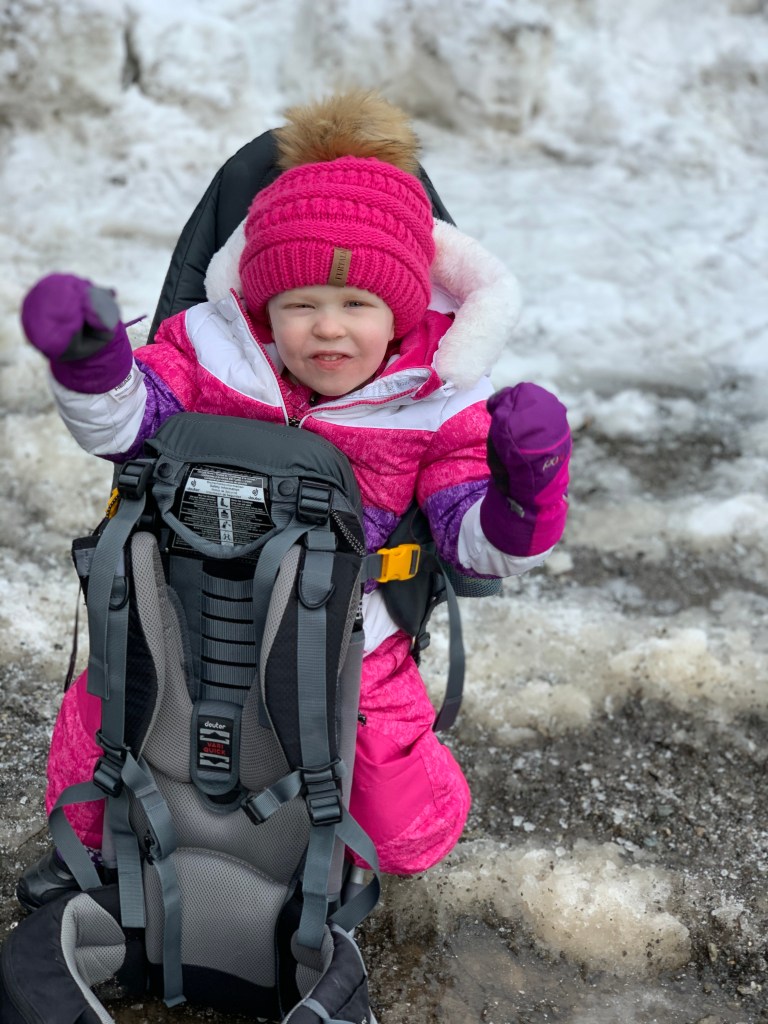
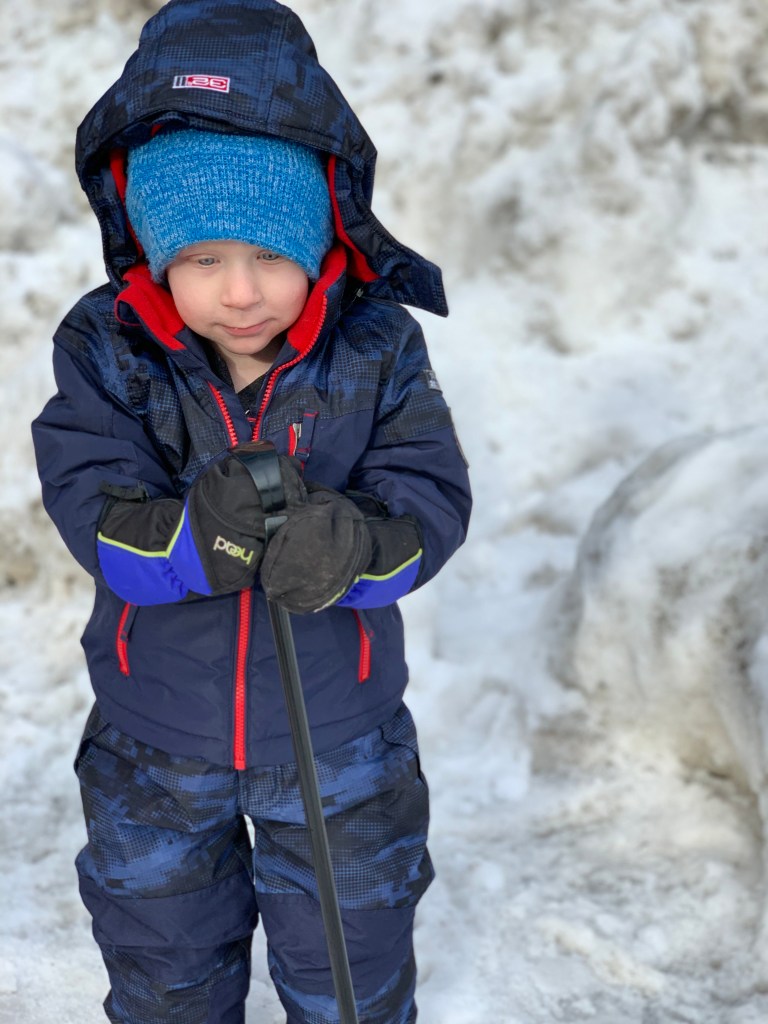
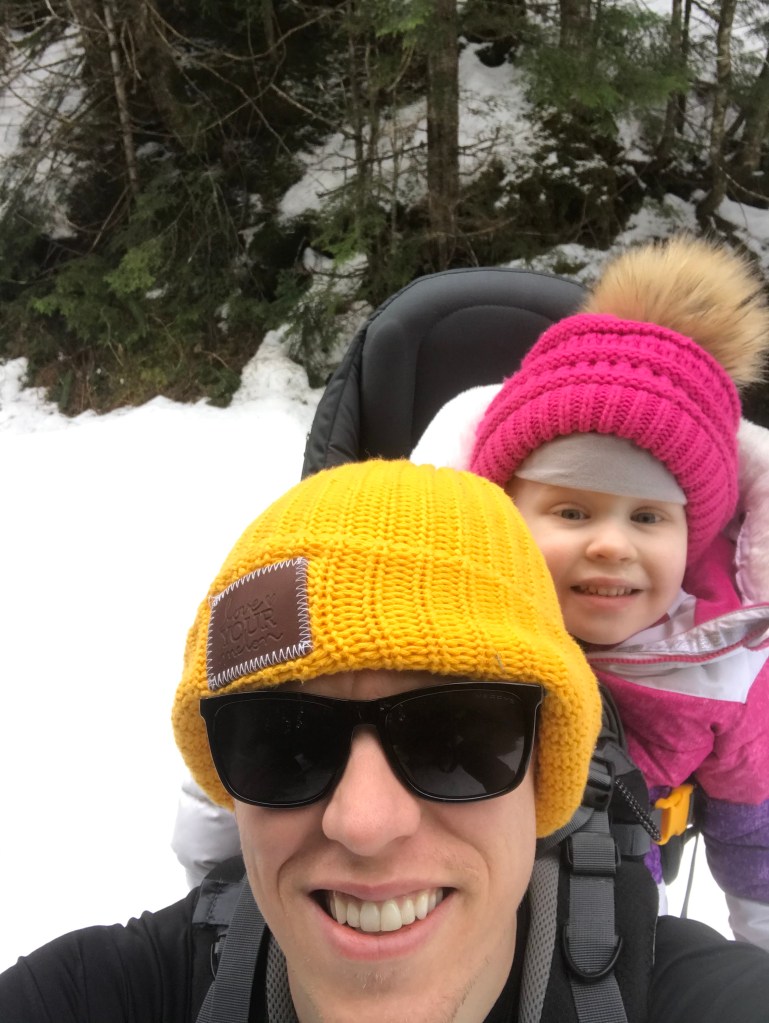
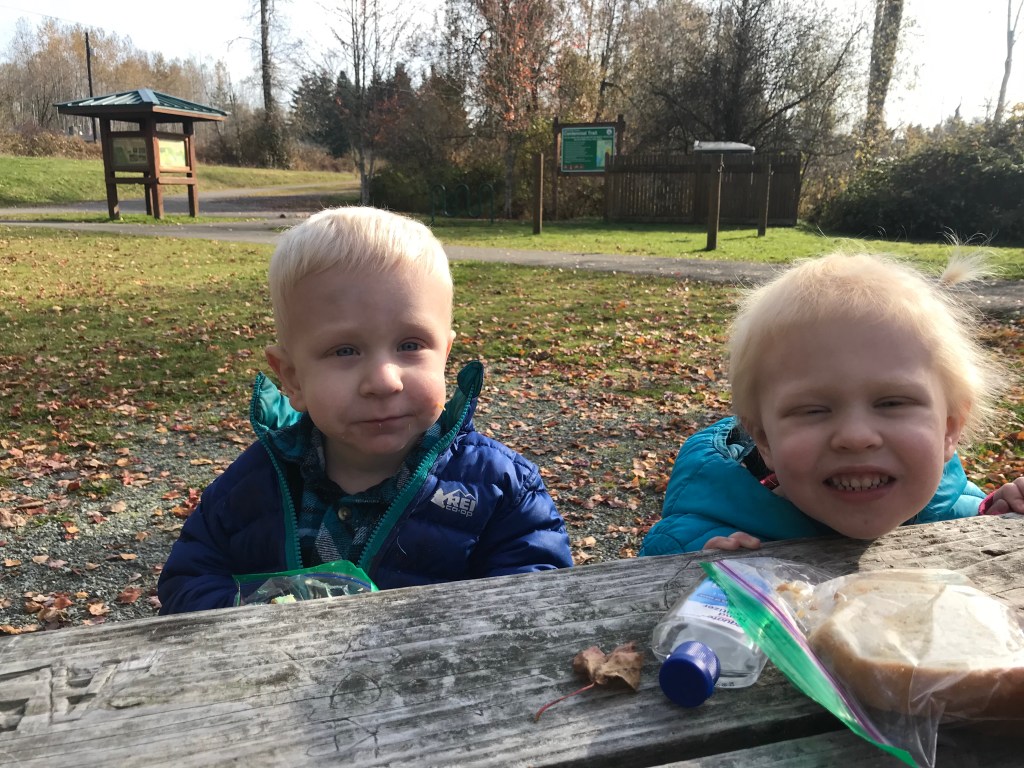
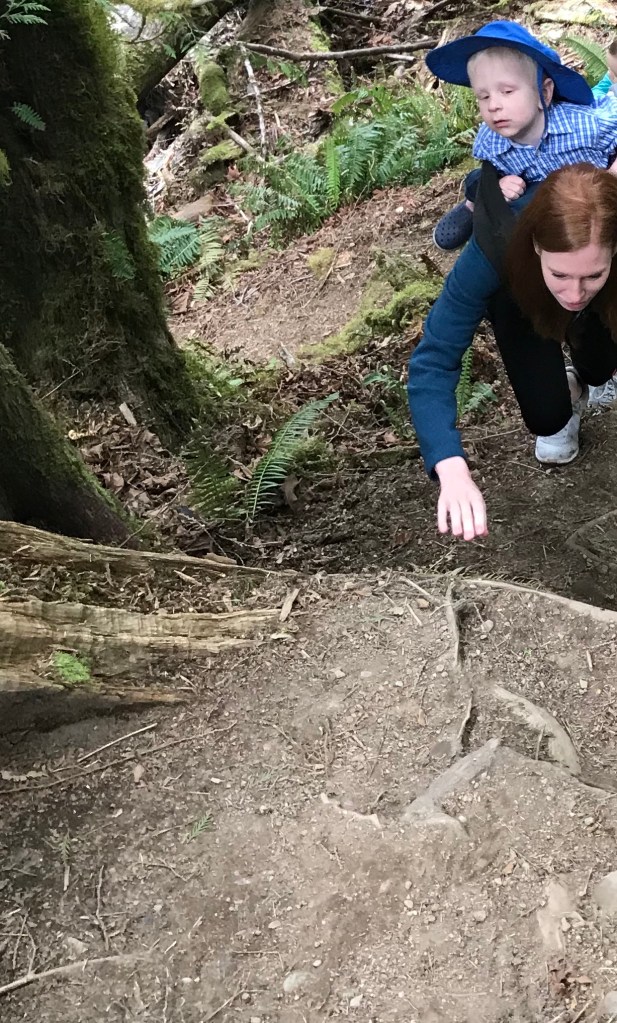
Eliza and Oliver are getting to a tricky hiking age where they are too heavy to carry for a really long distance, but don’t have quite enough stamina for a multi-mile or steep hike. Racehorse falls was a perfect hike for them because it was only 0.6 miles each direction and had a gorgeous view of a waterfall at the end! It was pretty much entirely flat except for the last ¼ mile which was pretty steep (down on the way there, up on the way back). I held Eliza’s hand in a death-grip on the way down. On the way up, I put Oliver in the Ergo and Eliza in Seth’s kid-backpack for the way back up. I used my hands to grab roots to help myself up on the way back up a couple times, so I felt a lot safer having the kids in carriers. There was a good size drop-off in a couple areas too so I’d probably recommend a 1:1 adult-child ratio for toddlers/preschoolers if you go to the base of the falls.

Hand-over-hand on the uphill!

One great thing about this hike is that it is only about a 30 minute drive from our house! To get to Racehorse Falls, you drive up Mt. Baker Highway to Mosquito Lake Road – the trailhead is not well marked, but if you enter it in Google Maps it gives you the exact directions. Here is the link to the Alltrails website with reviews and directions too! The last part of the drive is on a gravel road. When we went a week ago there were quite a few potholes, but they filled them in since then and the road was totally fine to drive on with our VW Golf yesterday! There is no cell service on the trail though so it is a good idea to download offline maps before you go.

Oliver showing the entrance of the trail!

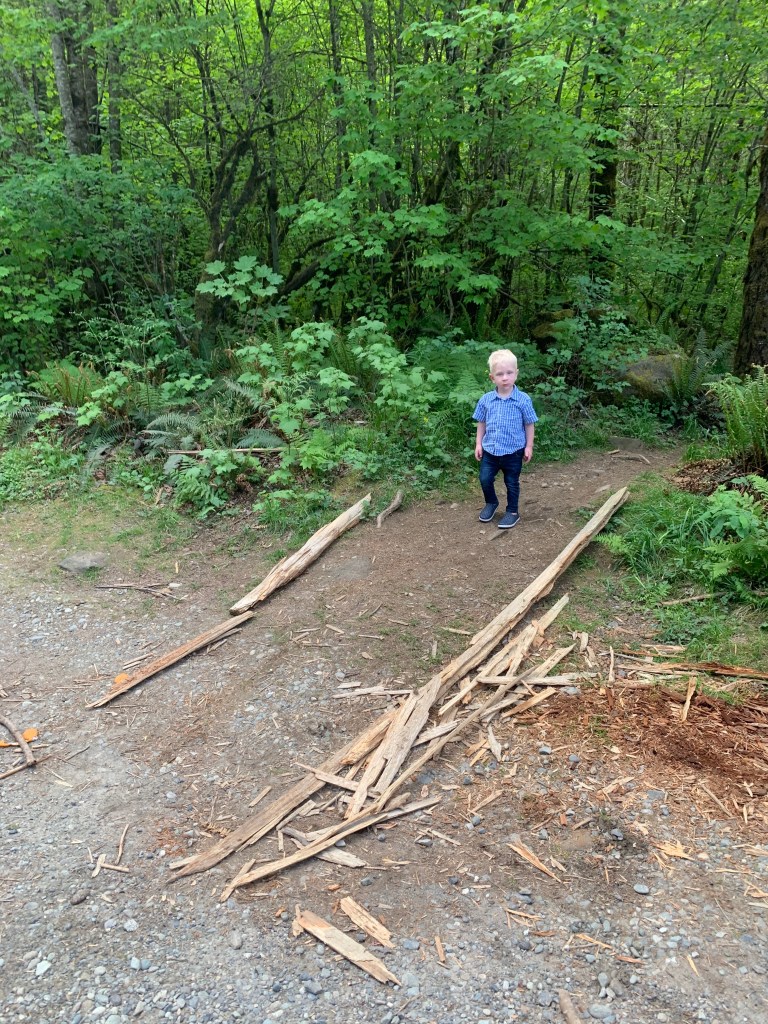
If you are worried about the steep hill with kids you could easily just hike to where it starts getting steep and then turn around. If you make it to the base of the falls, there are many wonderful picnic spots! There were very few bugs when we went since it is so early in the year. You definitely get a lot of bang for your buck as far as effort goes on this hike!

Racehorse Falls is beautiful!

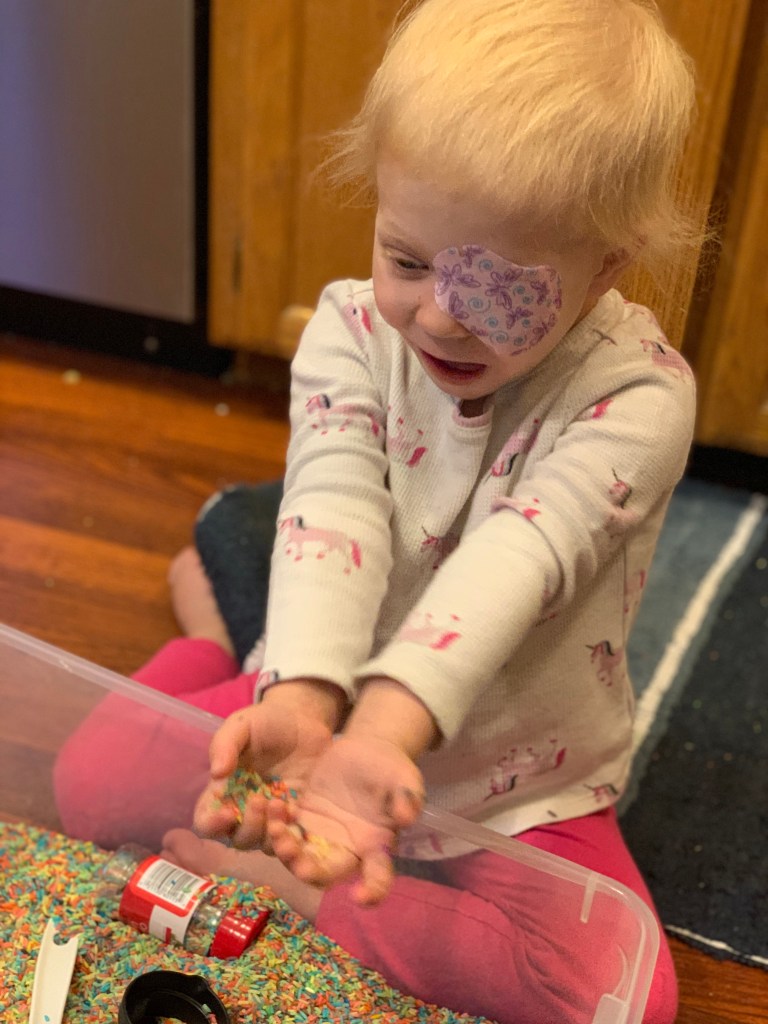
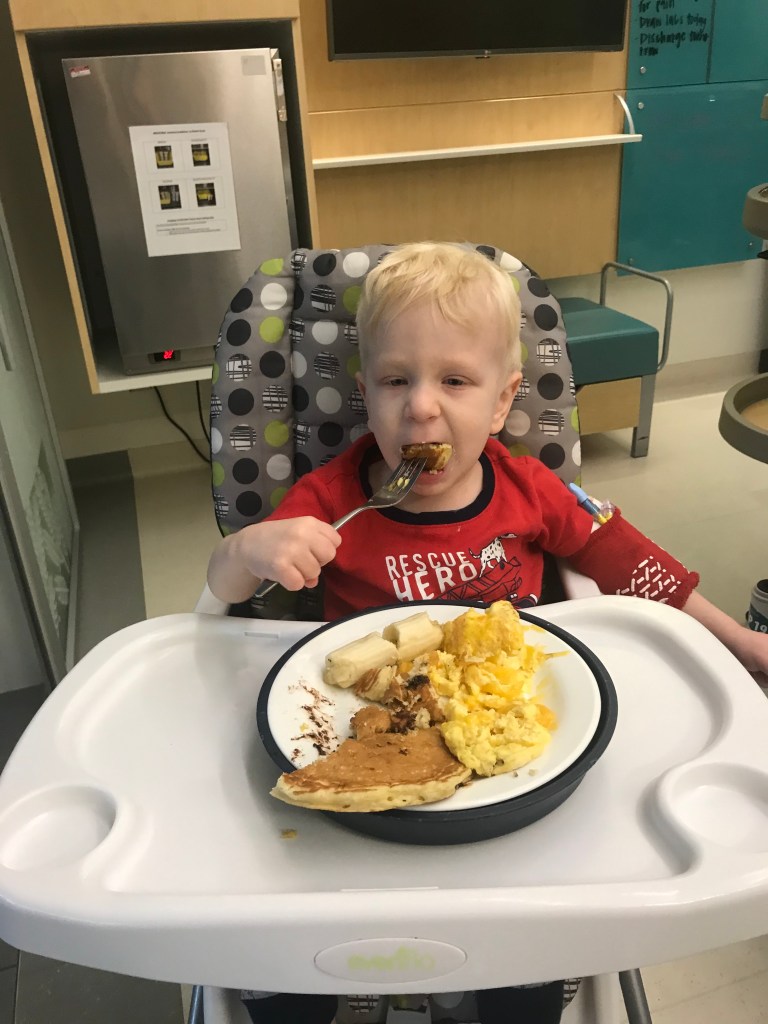
We are really excited to get out and hike more this summer! Last summer we had to be extremely careful to keep Oliver out of the sun and he was not allowed to touch dirt for a year after transplant (until December 2019). This year we are still careful with sunscreen but let Oliver play outside as much as we can. He is able to hike and play in the dirt like a regular 2-year-old boy. It is so good for him and for us! Happy hiking!

We found a frog!

Fireplace Renovation!

Seth and I have a long list of house projects we want to do and we got a big one done over the last 2 months!

During this blog post I’m going to say that “we” did this project, but I want to make sure you know that Seth (and my dad) did 95% of this project. 😉

Original fireplace!

Step 1: Demo!

We originally were going to replace the entire fireplace unit until we found out it would be over $5000. After discussing it, we decided to save our money and keep the same fireplace unit. We painted all the gold parts black. We took hammers and crow bars and just started hitting! We taped plastic to the ceiling to make a “dust tent” to try to minimize demo dust.

Step 2: Beam!

We looked at a lot of different options for mantle beams and ended up deciding on an 8″x8″ solid wood beam from Westside Building Supply. The beam cost $120 and my dad used a beam cutter to cut it to the correct length. The beam set into the wall about 2-3″.

Fireplace prepped for the beam
The beam is in!

Step 3: Stacked Stone

We bought about $100 worth of stone from Northstar Stone & Landscape Supply. My dad is a contractor so he was able to show Seth how to place hardy backer against the 2x4s, place metal lath, then place a scratch coat to prep it for the stone.

Placing the hardy backer and metal lath
Ready for the stone!
Measuring and cementing the stone

Step 4: Staining the Beam

Once the stone was done, we chose some stain did two coats of stain. It turned out a little bit darker than we were planning because we did not realize we were supposed to wipe the stain off as soon as we put it on! We were still really happy with how it turned out. Once everything was dry we put the doors back on to the fireplace and decorated the mantle! In total the project cost about $300 since we did all the labor ourselves!

Next plans: We are hoping to place this exact same stone on the bottom 1/3 of our house in the front. Our plan is to take off the existing siding and use the same methods to make the front of our house look a little bit more modern. It looks like we will be having a pretty long unplanned vacation thanks to COVID-19 so hopefully we will be getting this done in the next couple months!

Finished project!

Homemade Bread Recipe!

I have been making my own bread for ten years! I grew up eating only my mom’s homemade bread and she grew up eating her mom’s homemade bread. The main reason I make my own bread is the taste – I just plain do not like the flavor of store bought bread! I also make my own bread because it is cheaper than buying bakery bread and healthier.

My recipe is still a majority “white bread” recipe, but I like knowing exactly the ingredients going in it! It always makes me feel a little weird that the bread I make will start to mold around 4 days after leaving it on the counter while the store-bought bread will still sit not molding for 2+ weeks! The only time we ever buy bread is if we are going on a road trip or vacation.

I don’t have a bread machine, although I’m sure this recipe would work just fine using one! This recipe makes 10 loaves but when I used to live in an apartment and did not have a freezer in the garage, I would half the recipe to make 5 loaves and it worked great! The dough also works great for cinnamon rolls or raisin bread.

The #1 secret to great bread is using the right flour! I buy my bread flour in Canada because they have cheap 20kg bags at Costco. I typically buy Rogers Silver Star which is a high protein, unbleached hard-wheat flour that makes excellent bread! Robin Hood is also a Canadian brand that is a hard-wheat high-protein flour but it is more expensive than Rogers. I usually buy my Robin Hood brand for my wheat flour. The best flour I have found in the US that is comparable is King Arthur Unbleached Bread Flour. I bought this when we lived in Nebraska and did not have access to the Canadian flour!

Most normal bowls are not big enough to make 10 loaves of bread so I use a Rubbermaid container that is sold as a “dish washing” container that works perfectly for making bread!

My favorite bread pans!

Sandwich Bread Recipe:

Ingredients:

  • 4T Active Dry Yeast
  • 1 C Sugar
  • 2 C Warm Water
  • 1 C Oil
  • 4 Eggs
  • 1 T Salt
  • 6 C Warm Water
  • 2.5 C Whole Wheat Flour
  • 20 C Bread Flour

Instructions:

  1. Combine yeast, sugar, and 2 C warm water. (You should be able to put your hand in the water without it hurting/burning. This is to avoid killing the yeast). Set for 10 minutes to let it proof (it will bubble up a little bit)
  2. Add oil, eggs, salt, 6 c warm water, and whole wheat flour
  3. Stir, add flour until no longer able to stir. (Stir as hard as you can! The less sticky the bread is when you dump it on the counter, the easier it will be to knead!). You will only add about 12 cups of flour to begin with – and most likely won’t use all 20. This part is what takes practice to feel when the dough has the right amount of flour. You want it to be smooth and stretchy, not sticky or floury/chunky when you are done!
  4. Knead bread for about 10 minutes on a lightly floured surface. Add flour as needed when the dough is too sticky.
  5. Place about 2 T of oil in a bowl (or wash out your Rubbermaid bin and use that), rub the oil on the bottom of the bowl, place dough inside then flip dough over so the oil lightly covers all the dough.
  6. Let rise for 1 hour with a towel or plastic wrap covering it
  7. Divide dough into 10 equal parts, lightly knead each part into the shape of a loaf. Place in greased pans about halfway full. Cover with a towel and let rise for about an hour.
  8. Bake 24-30 minutes at 350F. Let cool for about an hour.
  9. Eat within a couple days or freeze.
The Rubbermaid mixing container I use!
Kneading the dough
Ready to bake!
Slicing the bread before freezing

I know making bread can seem like a daunting task if you have never done it before, but it is really second nature to me now. I have the recipe memorized and even though it takes about 4-5 hours from start to finish, I am really only actually “making” the bread for about 30 minutes. The more you do it, the faster and better you will be!

These loaves last our family 2 weeks. I always slice them with an electric knife before freezing them. One loaf makes about 12 slices of bread. We use these for our lunch sandwiches, eat eggs on toast in the morning, and occasionally make French Toast or grilled cheese. I actually make our sandwiches in the morning on frozen bread and by lunch they are thawed and ready to eat!

Let me know if you have any questions about bread making! I love baking but I have never really branched out and tried any other bread recipes. Let me know if there are any other recipes you love or if you try to make bread for the first time yourself! Happy baking!

Seth’s PB&J lunch with PB&J socks
PB&J Picnic

Tennant Lake “Hike”

Saturday was the first sunny, slightly warm day in what seemed like a long time! We decided to take the kids to Tennant Lake in Ferndale for the afternoon. The last time we went to Tennant Lake, Oliver still had a feeding tube and I’m fairly sure he wasn’t walking yet. It felt so good to see him RUN down the boardwalk!

If you live in Whatcom County, I totally recommend going to Tennant Lake if you haven’t been in a while (or if you haven’t been since your elementary school field trip!). You walk through a fragrance garden then past a 50-foot overlook tower on your way to the boardwalk. They have both a shorter wheelchair-accessible boardwalk and a nearly 1 mile long boardwalk loop! The boardwalk has no edge on it so I probably wouldn’t be comfortable walking it with any more than a 1:1 ratio of parent to toddler!

We grabbed the back of Eliza and Oliver’s coats a few times when we felt like they were getting too close to the edge! The water isn’t super deep in most areas, but it would still be a pretty wet and muddy mess if someone fell in. When we went last fall we did take our single BOB stroller on the boardwalk, but it was pretty narrow when people walked by us coming from the opposite direction so I probably wouldn’t recommend taking a stroller.

This would be such a fun place for a preschool/homeschool activity to take a yardstick to measure the water depth at various locations. It also has beautiful views and a big variety of wildlife! I did see online that the boardwalk trail is closed from October-January for hunting season but any other time of the year is great to go! The fragrance garden would definitely be more exciting in the spring/summer.

We finished off the afternoon with a stop at Edaleen Dairy in Ferndale. What a fun day!

Eliza’s Vision Therapy

Eliza has done 5 weeks of vision therapy so far! I had never heard of vision therapy until recently so I thought I would write about what I have learned and seen so far in case it might help someone else!

Eliza had perfect vision until age 2.5 when a tumor grew around her optic nerve, cutting off the blood supply to the nerves of her right eye. When nerves have their blood supply cut off, they die. Even though her tumor significantly shrunk with over a year of chemo, according to images of Eliza’s right optic nerve, she has about 16% of the nerve remaining “alive.”  This eye is so weak that if we did not do anything about it, her brain would start only using her left eye and completely “forget” her right eye. I have heard many stories of people that live with vision in only one eye that function totally normal day-to-day BUT if there is a chance we can improve Eliza’s vision, even a little, I am willing to try!

I asked Eliza’s ophthalmologist at Seattle Children’s about vision therapy and she did not really recommend it either way. She said “you can try patching her good eye for 2 hours a day and see if there is any improvement, but if you are just forcing her to play blind for 2 hours a day it is pretty pointless.” From my research, vision therapy has been scientifically proven to help with convergence insufficiency, but there have not been as many studies that have scientifically proven vision therapy’s help in other areas.

However, since Eliza has started vision therapy:

  • She is now able to tell me how many fingers I am holding up in front of her “dark” eye when her strong eye is patched and she WAS NOT able to do that 5 weeks ago.
  • She has gotten faster (better balance) at running around our kitchen table.
  • She also has started coloring inside the lines instead of scribbling.
  • She wrote her whole name out for the FIRST time ever a couple of days ago.
  • She has gotten more comfortable walking around the house with her patch on.
Coloring inside the lines for the first time!

This could just be Eliza getting older or more confident…or it could be vision therapy. It is hard to know if it is just the placebo effect that we are noticing these changes, or if it is really making a big difference. It REALLY seems to me that it is making a big difference.

When we met with Eliza’s vision therapist for the first time, she discussed that even if we are not able to improve Eliza’s vision, doing vision therapy will help her brain recognize where “center” is so that she will be able to improve her balance, coordination, and writing skills. This is exactly what seems to be happening. I do think her vision is also improving and she has gotten significantly more comfortable with being patched.

Balancing marbles on golf tees

Eliza has been going to the vision therapist once a week. It is similar to physical therapy or occupational therapy, but she just works on vision exercises. The downsides to vision therapy are that it is expensive (similar to a physical therapist) and not covered by our insurance. The exercises are a LOT of work too. Her vision therapy is one hour each week but we do her “eye exercises” at home for 30-45 minutes each day. This has to be done during a time when she is able to focus well. There is also a 30% chance that Eliza’s tumor could grow back which could potentially erase all progress we made with vision improvement. (I see this as a 70% chance of the tumor NOT growing back though!)

A lot of the activities for Eliza specifically include sorting shapes and colors with her strong eye patched. She also does balancing exercises (jumping on a trampoline while looking at a fixed point, walking heel to toe, etc) and hand-eye coordination exercises like alternating hands when tossing a ball.

Tossing a white balloon with red/green glasses

From what I understand, we will learn quite a few different exercises from vision therapy, then stop going every week as we continue to do the exercises at home. After a few months we will go in and re-evaluate where Eliza is at, see if we need different/new exercises or glasses, then continue the exercises at home.

I don’t think Eliza will ever have normal vision in her right eye, but I want to know that we did everything we could to try to have her vision be as strong as it can be! Vision therapy is a very non-invasive way to move in the right direction! I’m not an expert on vision therapy by any means, but I would love to try to answer any questions if you have any! Or correct me if I am wrong about anything! I will hopefully update again in the future once Eliza is further along in her vision therapy sessions!

Sensory bin patched!

Cross Country Skiing With Kids!

We were planning on downhill skiing this past weekend but ended up not having a babysitter. Instead, we packed up the kids and our cross-country skis and headed up to Mt. Baker! We hadn’t taken the kids cross country skiing since Eliza was a little baby.

Eliza’s first time XC skiing at age 1.5 months in 2016 (it was in Nebraska…super flat and super safe, we had her in the front pack Ergo)

Mt. Baker has a couple different options for cross country skiing. We knew there was a snowboard competition this weekend AND it seemed like the first non-raining weekend in forever. We wanted to avoid going all the way up to the downhill ski area if possible!

We parked at the Razor Hone/Salmon Ridge Sno-Park (just past mile post 46 on the Mt. Baker Highway). The parking lot was pretty snowy; Seth had to help someone push their front wheel drive out of their parking spot when we were about to leave. The Sno-Park is groomed and has a $20 pass fee per vehicle which can be purchased online ahead of time. You can also buy an annual Sno-Park pass for $40.

Eliza’s first time on her own skis!

Eliza had never tried on skis before, but I found some used kiddie skis the day before we went so Eliza could try cross country skiing too! The brand I got was Lucky Bums Kid’s Beginner Snow Skis (they sell new on Amazon for $45 but I paid $20 getting them used on a buy/sell group). They would not be good for downhill skiing, but they were perfect for Eliza trying out cross country skiing and having skis on for the first time! You buckle in regular kids snow boots and the heel is able to lift up a little bit. Eliza has issues with balance because of being blind in one eye so I was really impressed with how well she did trying to stand and scoot with the skis!

Eliza ready to go in the Deuter pack!

Seth carried Eliza in the Deuter backpack and I carried Oliver in the Ergo when we started on Razor Hone Rd. This is labeled as a green run that goes slowly uphill but we turned around when it started to get steeper than we were comfortable with. It was no problem going uphill but we were a little bit nervous about flying downhill with kids on our backs. The weight of the kids actually did slow us down quite a bit on the downhill though! Oliver and Eliza both weigh about 30 pounds so this might be trickier if you have a heavier 4-year-old!

Oliver trying out holding a ski pole

Overall the kids had an awesome time! We remembered to keep them really warm and really fed which always makes for happier kids! The only time Oliver cried was just before we got back to the car when his legs started to go numb from being in the Ergo for too long. He really should have a child-carrier with stirrups to put his feet in to avoid this issue in the future!

Both kids loved it!

We own cross country skis but there were other people renting – you can rent XC skis and boots for $30 from the Glacier Ski Shop. We want our kids to feel comfortable doing all different types of outdoor activities. I did fall once with Oliver but we were both fine. I also took off my skis on a steeper downhill part that I didn’t feel comfortable doing with Oliver on my back and one of my skis went down the hill without me and landed in the (very shallow) creek on the side. Oops! Hopefully soon we won’t be carrying the kids and they will be skiing right along side us!

The whole family!

No Spend January!

For the first time ever, Seth and I decided to do a “no spend” month this January. We did it for a few reasons – January is a good time for a reset after Christmas spending. I LOVE Christmas and buying presents, especially this year when our family got to be home instead of living in the hospital, but I always have to stop myself from buying too many things! We also had gotten in a habit of ordering things on Amazon Prime without spending enough time thinking about if we really wanted/needed them. That one-click ordering will get you!

Seth has a pile of student loan debt still (I don’t want to get too specific with numbers here, but it is going to take us awhile to plow through it). One of our goals this year is to try to aggressively tackle Seth’s student loans.

We have budgeted every single month since 2016 and I’ve listened to some Dave Ramsey podcasts here and there as well as reading The Total Money Makeover. If you are struggling with debt or overwhelmed at making a budget, I would totally recommend checking out his podcast or books. With that being said, we definitely do not do all of the things he recommends. We still use credit cards (getting that cash back!) and pay them off at the end of every month.

We also aren’t going quite as crazy at paying off debt as Dave Ramsey recommends because over the last couple years we have realized how fragile life is, and how quickly it can change. Personally, we are trying to prioritize family time together rather than having Seth deliver pizzas or something on the weekends to try to pay off student loans faster.

January meal plan!

What we did for no-spend month:

  1. We were allowed to use any cash we already had in our wallets and our venmo/cash apps.
  2. For groceries, we tried to eat what was already in the house and paid cash for what we really needed to buy like milk & eggs.
  3. I unsubscribed from marketing emails which I think actually made a pretty big difference! I also tried to minimize watching any social media influencers.

Did we actually save money? I think we did a little bit, but we also had some “catching up” to do after January. We did a huge Costco run on the evening of January 29 to restock everything we were almost completely out of. More than saving money, I think it was just a good exercise in realizing how often we are buying things and trying to take a step back to re-evaluate what our goals are.  We want to be good stewards and try to plan ahead in case life suddenly changes again. I think it is a good thing we might try every January.

I know I’ve talked about this before, but we were SO generously given financial assistance from so many of you when our kids were diagnosed. All money given to us from the GoFundMe or in other ways has only ever been used directly for medical expenses, gas, food in Seattle, and the allergy-free carpet for Oliver’s bedroom and playroom. I’ve also had people say we don’t have to explain, but it makes me feel more comfortable when I do! We are so incredibly thankful and so humbled from how we are so surrounded and loved. It has changed our perspective on generosity and giving for the rest of our lives.  

Costco feast on January 29!

The Time Someone Told Me I Could Cure Oliver’s Cancer with Celery Juice

When Eliza was born, I had such high ambitions for being the perfect mom. I read an article (probably some non-scientific article on Pinterest) about how if you introduce pureed vegetables to your baby before fruit that they will LOVE vegetables for their whole life. Eliza’s first vegetable try was a disaster and she spit it out over and over…I finally tried some applesauce and of course, she loved it. It turned out I couldn’t force her to love vegetables.

Two years later Seth and I took a parenting class and the topic of eating came up. Someone made the comment, “your kids should eat what you put on the table, and if they don’t, they don’t get anything else…a toddler will never actually starve themselves.” It turns out that was a completely wrong statement. Just over a year later I had a toddler that needed a feeding tube because he literally would have starved to death without one. Oliver went to several sessions of feeding therapy to re-learn how to chew and swallow. By God’s grace he no longer needs a feeding tube BUT he still is a pretty “picky” eater. His weight is monitored very closely. We do the best we can to give him a few different options of things to eat at each meal but there is absolutely no way we can force anything.

I just love watching Oliver eat now – it is such a miracle!

These situations just served to humble me and make me realize that no one can really be a perfect parent and hopefully helped me to become less judgmental towards other parents and their food choices.

BUT then our kids were diagnosed and I started hearing more people’s opinions – I started getting messages from either strangers or barely-acquaintances like this:

If you feed Oliver only celery, his cancer will go away without any chemo.” (I’m so serious someone ACTUALLY said that to me haha)

Sugar feeds cancer so if you don’t feed your kids sugar, their cancer will go away” (Translation in my head: you gave your kids cancer from feeding them sugar)

If you rub essential oils on Oliver, his blood cell counts will be normal…I can sell you some” (This one * probably * made me the most angry)

There must be something in the environment in your house that is causing your kids to get cancer.” (Translation in my head: you gave your kids cancer by not picking “healthy” enough products in your house)

These types of messages and comments were in the minority BUT they were still there. The worst one was probably someone telling me I was committing child abuse by allowing my kids to get chemotherapy. I see messages of fear all over social media, especially regarding using “clean” products. I have spent so much time thinking about these things and have a couple thoughts about them.

  1. First of all, as far as pediatric cancer, there have been NO STUDIES that show that food, environmental factors, etc. play a role in the development of pediatric cancer. The doctors have told us many times, “This is not fair, and this is not your fault.” Oliver’s NF1 gene did predispose him to getting leukemia, BUT even then it was not directly caused by his NF1 gene, it was an additional mutation that just happened.  I can guarantee you that my 9-month-old breastfed baby boy did NOT get cancer from eating too much sugar.
  2. There is SO MUCH fear-mongering in advertising, which I have especially seen in certain multilevel marketing companies.  I see posts with quasi-science quoted and passive-aggressive phrases like “I used to think I was doing the best thing for my family, but I wasn’t and you aren’t doing the best thing for your family, but if you buy xyz you will be.” Should we make healthy food choices, product choices, and lifestyle choices? Of course, of course! BUT should we let it define who we are and allow us to feel guilt? Nope, 100% not – there is a lot that is just plain out of your control. Feeding your child a completely organic diet is just plain not going to guarantee they will not get sick.
  3. I just finished a chapter in Risen Motherhood by Emily Jensen & Laura Wifler about food choices and they had a great quote: “We can’t heal our broken bodies by feeding our children more vegetables than fruit snacks (though we are tempted to try). Only Christ’s broken body on the cross can give us true redemption and freedom from our sin…Because of Christ’s work, we don’t find our identity in special food rules or diets. We still want to be wise stewards of our bodies, but we know we are not set apart or made more godly by avoiding certain foods, nor should we feel ashamed or embarrassed by what’s in our refrigerators.” They go on to say “Bodily training, and the food that fuels it, is of some value, but let’s not act like our salvation hangs in the balance over it.”
  4. Romans 14:1-4 says “As for the one who is weak in faith, welcome him, but not to quarrel over opinions. One person believes he may eat anything, while the weak person eats only vegetables. Let not the one who eats despise the one who abstains, and let not the one who abstains pass judgement on the one who eats, for God has welcomed him. Who are you to pass judgement on the servant of another? It is before his own master that he stands or falls. And he will be upheld, for the Lord is able to make him stand.”

I’m not anti-natural products. I make all my own bread to avoid the preservatives in bread. We limit high fructose corn syrup in our house. We were actually gifted some really great natural products to help take care of Eliza and Oliver. (One was skinsoother which works really well on Oliver’s skin!) I AM pro-healthcare though. I’m going to do what the leading oncologists, feeding therapists, and other healthcare providers in the country are telling me to do to take care of my kids.

Oliver & Eliza eating their PB&J sandwiches made with homemade bread, homemade jam, and all-natural peanut butter.

What I am trying to say is that food is not a salvation issue. We want to take care of the bodies that God has given us and teach our kids to be healthy and respectful of the food that is made for them, but it shouldn’t be giving us guilt and we shouldn’t be judging the choices that others are making because we might not know the whole story there either.

Eliza eating her sugar-filled birthday cupcake!

The other thing I’m trying to say is don’t try to profit off of parents of cancer kids by selling them stuff through Facebook messenger…that is just common human decency. 😉

The 11 Books I Read in 2019

This post was supposed to be called “The 12 Books I Read in 2019” but I mis-counted how many books I read this year. Whoops! In my defense, I read 5 books in December, 2018 during the long lonely hours by myself at the Ronald McDonald House in Seattle as we prepared for Oliver’s transplant so that is probably why I added wrong!

Fun fact: I graduated cum laude from Western Washington University with a degree in English Literature before my dental hygiene days! I used to read a ton as a kid and then read enormous stacks of books for college each semester. After college (especially during dental hygiene school and then having kids) I read way less…pretty much only my Bible.

I have been keeping track of the books that I read in a notebook since I graduated from college. The genre of books I have been reading has shifted significantly since having kids too.  I used to read quite a bit of fiction and now it is mostly nonfiction.

I’m making another goal for 2020 to read 12 books but I’m planning ahead exactly which 12 books I want to read in order to hopefully be able to actually make my goal this year!

Here is a quick summary of the 10 books I read in 2019!

  1. The Cellist of Sarajevo by Steven Galloway: It was interesting to read about the siege of Sarajevo which happened in 1994. I had actually never heard of this event in history before reading this book. It was a fairly dark book to read (especially during Oliver’s hospital stay) but I’m glad I read it.
  2. Her Mother’s Hope by Francine Rivers: This was a pretty classic Francine Rivers book, perfect to easily pick up and put down in the hospital. There is a sequel to this one that I did not read.
  3. Girl, Interrupted by Susanna Kaysen: This was a memoir of Susanna’s time in a mental hospital in 1968.
  4. I Am Malala by Malala Yousafzai: I had been wanting to read this one for a long time and I’m glad I read it!
  5. Eleanor Oliphant is Completely Fine by Gail Honeyman: This book was really funny, entertaining, and sad at the same time. I read it in less than a week because it really kept my attention!
  6. For the Children’s Sake by Susan Schaeffer Macaulay: I loved this book! The author references Charlotte Mason quite a bit. I thought this book was going to only be relevant for parents that want to homeschool but it wasn’t! It had so many great thoughts and ideas about raising and teaching kids. I definitely want to reference back to this book often.
  7. Don’t Make Me Count to Three by Ginger Hubbard: After moving back home from Seattle with Oliver I kind of went on a parenting book kick since I was finally able to more traditionally “parent” after being apart from Eliza so much for 6 months. I didn’t agree with everything the author wrote but it was an interesting perspective.
  8. The Read Aloud Family by Sarah Mackenzie: This book was a great read! It discussed the importance of reading aloud to kids of all ages. The author gave tips for helping kids to think and process what they are reading/having read to them. The book probably didn’t quite have to be 288 pages but other than that I would definitely recommend it! It inspired my goal of reading 1000 children’s books to our kids this year.
  9. Mere Motherhood by Cindy Rollins: This is a memoir of a homeschool mom. I bought this book but probably could have gotten it from the library. The author’s last couple chapters where she sums up what was truly important in life after homeschooling nine kids were my favorite!
  10. For the Love of Discipline by Sara Wallace: This book is probably my favorite parenting book I have ever read! I will probably buy it and reference it again. The first half talked about the “why” behind discipline and the second half of the book had practical tips for behaviors.
  11. It’s Not Supposed to Be This Way by Lisa TerKeurst: I’m so glad I read this book when I did! I wrote a whole blog post about this book here.

That’s it! First up on my list for 2020 is to finish Risen Motherhood. If you have any book recommendations, I would love to hear them! I love seeing other people post what they read through the year too because it gives me inspiration and more motivation to meet my goal! Happy reading!

Christmas 2019

We had probably one of the best Christmases ever this year being at home. We were 2 weeks in to a 6 week hospital stay for Oliver’s transplant on Christmas last year. We still have to be extremely careful that Oliver does not get sick so he still was not able to attend every Christmas event, but we modified things so he could do as much as possible!

Some highlights:

  1. The Lighted Christmas Parade! This was Oliver’s dream come true! He loves anything to do with tractors, trucks, etc. and he also loves lights. He was so fascinated by the lights and tractors. We were able to watch from a not very crowded spot so Oliver wouldn’t be in contact with anyone else.
  2. The Nutcracker! Eliza and I got to see the Nutcracker Ballet at Mt. Baker Theater with family and she LOVED it! She couldn’t stop talking about it the next day. I’m probably always going to be just a little bit stressed out going into crowds/busy places and hearing so many people coughing and sneezing and this was no exception but thankfully Eliza did not seem to catch anything from going!
  3. Matching Christmas Pajamas! I was going back and forth of whether or not to buy matching Christmas pajamas and I’m SO glad I did! We wore them so many nights and almost all day on Christmas day. The kids loved matching and I want to continue this tradition in years to come!
  4. Bringing Eliza to church for the first time in nearly a year and a half. We always need a babysitter when we go to church because Oliver can’t be in crowds. I wanted so badly to take our entire family to Christmas Eve service this year, but we just couldn’t risk it with Oliver. Instead we took Eliza to church the Sunday before Christmas and kept her in the row with us wearing a mask. She loved the worship and fell asleep on our laps during the service.
  5. Getting to have Christmas parties with friends and family. We even hosted Christmas for my side of the family!
  6. Spending a quiet Christmas morning with our family. We made breakfast, opened gifts, and then were able to have a quiet day at home in our Christmas pajamas. I was so incredibly thankful for this gift.

We don’t know what 2020 holds for us, especially for Oliver but we are so thankful for the huge blessing that Christmas this year was. We will continue to celebrate that Jesus came to save us so that we can spend eternity with him, no matter what comes our way.

Matching jammies at home!
Eliza loved The Nutcracker!
Opening new rain boots on Christmas morning!
I hope Oliver remembers this Christmas and forgets last year’s!