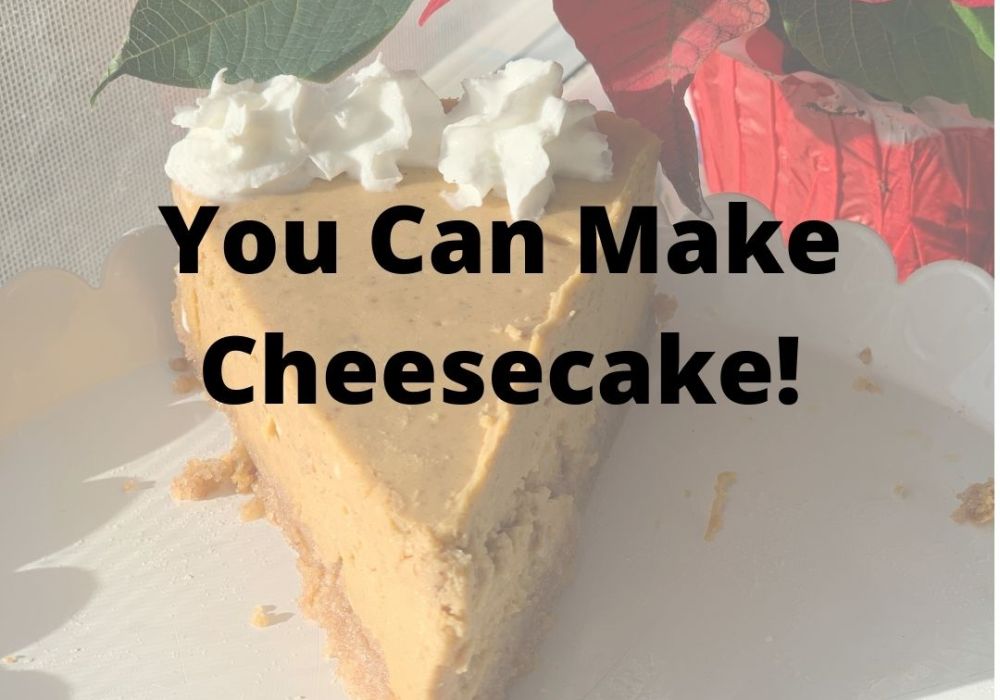
You Can Make Cheesecake!

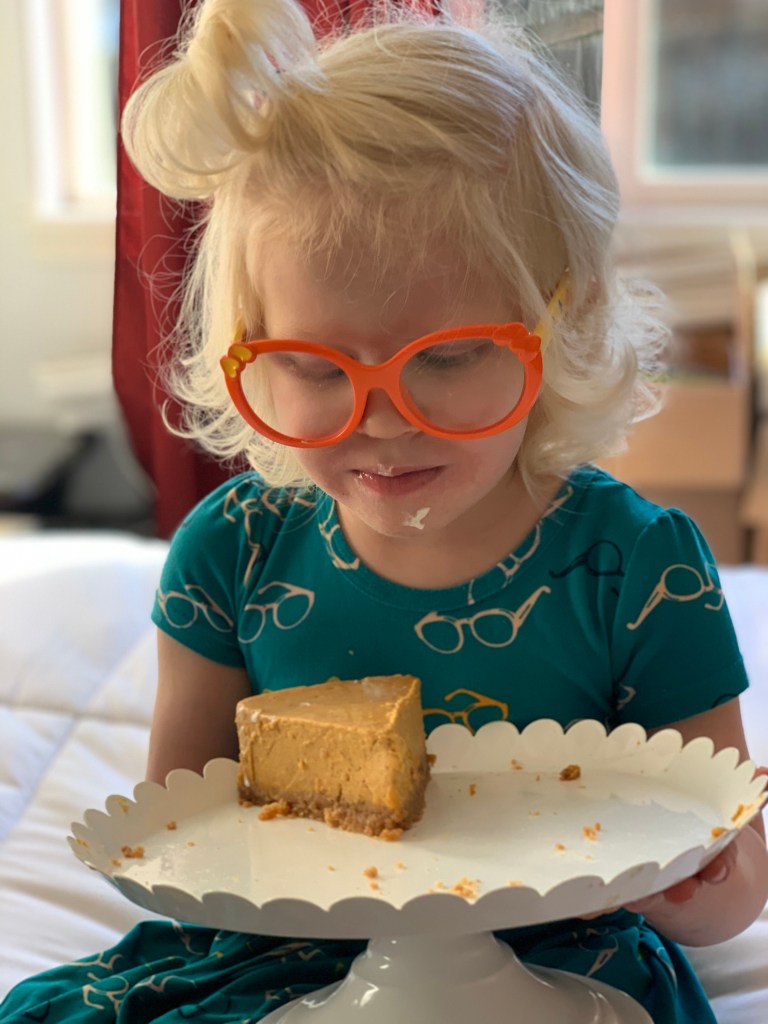
Cheesecake is by far my favorite dessert! I feel like it gets a bad rap for being difficult to make and I’m hoping I can show you how simple it can be! Pretty much any special occasion I offer to make a cheesecake because I feel like I can’t justify regularly making an entire cheesecake for our family of 4. I started making my own a couple years ago and have learned a LOT through trial and error. The biggest thing I learned though is that cheesecake is NOT as hard as it looks like to make! You can start getting really fancy and add special cheeses but I stick to the regular Philadelphia cream cheese recipes and they taste so good!

Eliza mostly liked the whipped cream on this pumpkin flavor cheesecake!

This post contains Amazon affiliate links, I may earn a small commission at no cost to you if you purchase through these links

Tips for making cheesecakes:

  1. I get most of my cheesecake recipes from Baker By Nature. I’ve never tried one I didn’t like. The White Chocolate Raspberry one is amazing! Once you have the basic recipe figured out though, it is really easy to modify flavors. You can also just do a plain cheesecake and put whatever toppings on you want too!
  2. Let your ingredients get to room temperature (including sour cream, eggs, cream cheese, and lemon juice). This makes the very smoothest cheesecakes without any clumps!
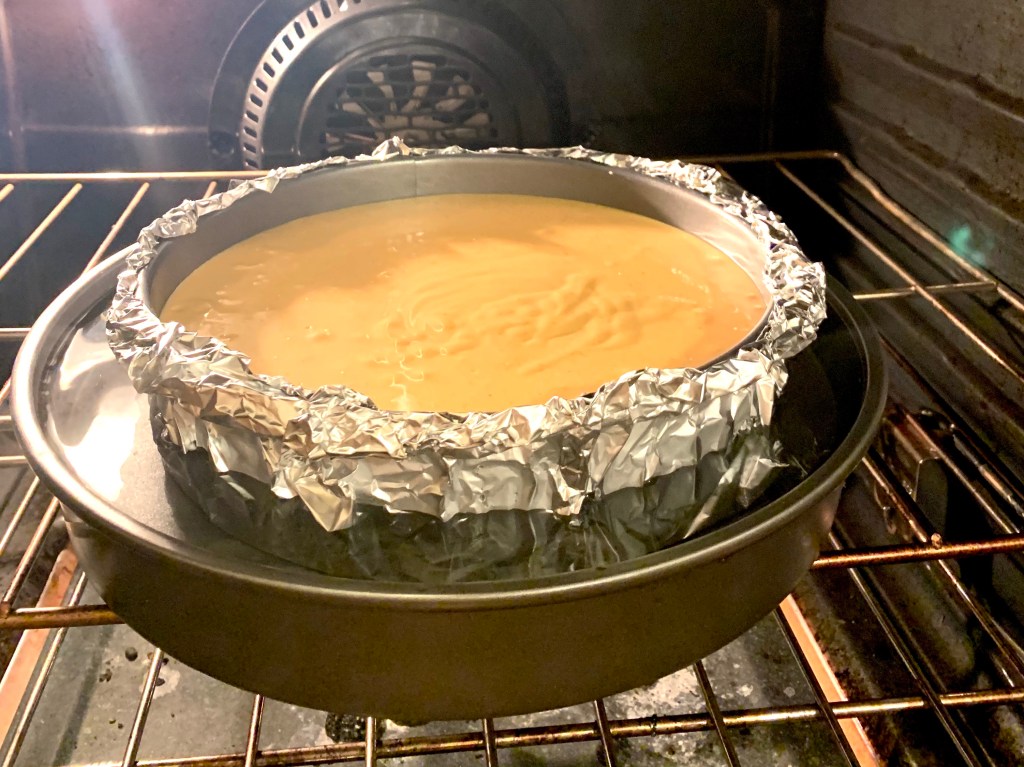
  3. Use a water bath. This is a slightly larger pan placed around the cheesecake pan filled with boiling water as you put it in the oven. This prevents the cheesecake from cracking. Do you HAVE to do a water bath? Nope! A cracked cheesecake taste just as good as a non-cracked one – they just don’t look quite as pretty!
  4. After they are done baking, turn the oven off and don’t open the oven door for at LEAST an hour or even longer. This allows the cheesecake to cool slowly so it won’t crack!
Pumpkin Cheesecake wrapped in foil + water bath!

Tools for making cheesecakes:

  1. You need a springform pan. These range in price from $8-20 or I’m sure you could pick one up for around $2 at a thrift store. A springform pan has a little hinge that takes the side off the pan since you can’t dump cheesecakes upside down to remove them from the pan without damaging them.
  2. You also need some sort of pan to go around the springform pan. I just use a 10″ cake pan but you can use any sort of pan that is wider than the cheesecake pan.
  3. WIDE Aluminum Foil to wrap the springform pan. I made like 10 cheesecakes before I realized regular foil wasn’t cutting it and I needed to buy extra wide foil. I would wrap and wrap and wrap the edges of the springform pan with regular foil but ALWAYS got leaks and soggy cheesecake. Once I bought foil wider than the pan, I just use a single layer and have never had a leak!
  4. A blender. You can use a KitchenAid or hand-held electric mixer too but I have found that the blender makes the smoothest cheesecakes.
The batter mixed in the blender can be poured easily into the pan!

Last tip: If you don’t want the hassle of the springform pan and water bath, cheesecake bars taste *almost* as good and don’t need any special tools!

White Chocolate Raspberry Cheesecake
Peppermint Mocha Cheesecake

Eliza’s Favorite Craft Supplies

I know I JUST did a post about preschool toys, but this is the time of year to do these lists! These are all fun Christmas gift ideas if you are looking for non-toy ideas!

I love doing crafty things…knitting, crocheting, paint (by number), latch hook, cross stitch, cake decorating, etc. I especially love doing crafts with Eliza since she has a relatively long attention span for a 4-year-old. I’ve arranged these from least messy to most messy. (Seth rolls his eyes when I buy a 1800 Perler bead pack or finger paint because he KNOWS it will end in some sort of craft disaster haha!).

We recently put a lock on our craft closet due to a late-night incident involving sparkle Elmers glue all over the carpet in the kids’ bedroom…

Everyone has a different level of how much crafty mess they can handle so the further down the list you get, the more mess you can expect!

This post contains Amazon affiliate links, I may earn a small commission at no cost to you if you purchase through these links

  • Water Wow: These are magical boards by Melissa and Doug that change color when you add just water! They come with a little brush you can fill. The best part is they turn back to white once they are dry so they can be used over and over again! Eliza is actually almost getting too old for these, but they are a fantastic quiet time activity with no mess! (Be warned, 1-2 year olds will try to suck the water out of the tip of the brush but I figure that’s ok).
  • Paint by Sticker: Eliza is almost 5 and just discovered these. It is similar to a paint or color by number but uses stickers instead! These take quite a bit of patience and concentration but again have virtually zero mess or cleanup involved! I think kids ages 4-12 would love these!
  • Kumon Scissors and Mazes: Pretty much any Kumon brand book is great (check the recommended ages on the top right of the books for difficulty). Eliza especially likes the scissors skills books and the maze books. The only downside of Kumon books is I wish they had tear-out pages!
Eliza learning to use scissors with her Kumon scissors skills book
  • Colored Masking Tape: We’ve used this to make roads for hot wheels cars, design tape outfits for stuffed animals, make pretend bandages for dolls, and make designs on our windows. This is so versatile and really nice to have on hand!
  • Roll of White Paper: You can use this indoors or outdoors! We like to roll ours down our hallway and let the kids color all over the paper. You can also use this on an easel to have fresh paper to pull down. This is great for markers, pencils, pens, kwik stix, colored masking tape, and so much more!
  • Dot Stickers: These are the kind of stickers you would use to label garage sale things and our kids LOVE them! They are also fantastic for learning counting, sorting, etc.
  • Construction Paper + Markers: This is pretty standard for kids but again so versatile. Eliza likes doing “Art Hub for Kids” videos on youtube to copy drawings of her favorite cartoon characters!
  • Kwik Stix: These are “tempra paint sticks” which are MUCH less messy than paint. They are kind of a waxy blend between a crayon and a marker. Our kids love using them because they are very easy to draw with and are very brightly colored.
  • Do-A-Dot Markers: There are zillions of free dot marker coloring pages if you google them. I’ve used dot markers to teach both letter shapes and counting. The kids also like just using them for fun too!
  • Wonder Stix: I recently discovered these to use instead of Expo markers for white boards! They are more of a waxy texture and don’t smudge as easily as white board markers. White board markers also stain really bad and are impossible to get out of clothes. These wonder stix also work on regular paper and windows too.
  • Play Doh: We’re getting into the messier territory now…keep play-doh away from carpet! Eliza and Oliver looove mixing the colors together too so I usually only get 1-2 colors out at a time. Cookie cutters, rolling pins, forks, spoons, etc are all great additions to playing with play-doh without having to buy specific “play-doh toys”
  • Sparkle Glue + Tissue Paper: Eliza LOVES Elmer’s sparkle glue and gluing tissue paper. This is solidly the “messy” category now. Glitter glue is fun because you can use it to “draw” designs or a word/name and glue sequins, rice, beans, feathers, etc. on to a page!
  • Easel + Paint: We have a Melissa and Doug easel that the kids can use to paint. My favorite place for the kids to use this is outside though because no matter how hard I try, paint always seems to get out of control. I’m sure this will get easier as the kids get older but for now I only get this out when I’m ready to really invest time in set-up and clean-up!
  • Water Beads: Water beads are full of so much squishy fun (even for me) but they are slippery and will bounce all over the house unless you have incredibly careful kids. My favorite place to use these is outside in the water table. They are biodegradable so you don’t have to feel bad if some of them end up in the grass! You do need to be REALLY careful with these around toddlers though because they are dangerous if eaten since they swell up with liquid.
  • Perler Beads: These aren’t actually messy unless they spill…which they will! Eliza loves doing patterns like these but still needs a little help with more complicated designs. There are pretty much unlimited patterns you can print from the internet and this is another great quiet-time activity!

Crafting is a huge part of our homeschool preschool! I would love to know if there are any craft materials we are missing out on that I didn’t list!

Rainbow Pumpkin Seeds for Learning and Play!

Making rainbow colored pumpkin seeds is a fun fall preschool activity that we did for the first time this past weekend! They are made basically the same way as rainbow rice (which we have and keep in a big Sterilite container for a sensory bin – thank you, BusyToddler!).

Steps to make Rainbow Pumpkin Seeds:

  1. Take the seeds out of the pumpkin and wash them. I got two small pie-pumpkins from Trader Joes to roast and make pumpkin bread. Eliza was in charge of scooping out the seeds/pulp and putting them in a bowl of water to wash them off!

2. Next, we spread the seeds on a cookie sheet and baked them at 350 for about 15 minutes.

3. Meanwhile, we prepared little containers with around 1 cup of water, 1 tablespoon of vinegar, and a squirt of food coloring! Exact measurements are not necessary.

4. We evenly distributed the seeds in each cup and let them soak for about an hour (again, exact measurements not necessary).

5. After about an hour, we used a slotted spoon to move the seeds back to a paper towel-lined cookie sheet.

6. I was going to just let them air-dry but they weren’t drying fast enough for me so I ended up putting them back in the oven at 350 for another 15 minutes and they were perfect when they came out!

That is it! Super easy, and once they are dry they won’t stain your hands/clothes. Eliza and Oliver will use these for craft projects and preschool counting activities! It was a really fun way to explore pumpkins for a preschooler!

Easy At-Home Composting!

We compost all our food scraps, yard waste, etc. at our house! You don’t need to live on a big farm to effectively compost – our lot is about 10,000 sq feet (1/4 of an acre). We do have a garden that we put our compost in once it is ready, but you could also use the compost for flower beds!

Eliza taking out the compost bucket!

Composting is great because it reduces your carbon footprint (the trucks don’t have to use fuel to haul away the weight and it doesn’t take up space in the landfill), and it reduces or eliminates the need for chemical fertilizers in your garden.

I’m no composting expert, but I know composting can seem really overwhelming to start. This is what our family does and it is VERY simple:

This post contains Amazon affiliate links, I may earn a small commission at no cost to you if you purchase through these links

  1. We have this 0.8 gallon trash can with a removable insert in our kitchen right next to our garbage. We put any food scraps (watermelon rinds, moldy food from the fridge, apple cores, etc.) in it instead of the garbage. We don’t put any meat/bones/animal fat in – those go in the garbage. We empty this about every other day. We haven’t had any issues with it smelling bad because we empty it regularly and the lid actually seals really well! We also add yard leaves, grass clippings, etc. to the bin.
  2. We used to just have a big pile of compost in the corner of our yard but it smelled bad and attracted rodents. Growing up, I lived on 3 acres and we had an open-air compost pile that worked fine because it was far enough away from the house/where people hung out! This past year we invested in this stand-up compost bin with a lid! It is crazy how much faster the bin breaks down organic matter vs having it just sit in the open air.
  3. That bin has openings on the bottom that we can shovel the compost out once we need it! We add the compost to our garden in the spring before we plant. Now is a great time to start composting to get ready for spring gardening!
Kitchen compost bin
Outside compost bin

If you aren’t quite ready for a big huge bin, they have smaller and cheaper options like this one that would work too! You just might end up composting maybe half of your food waste instead of all of it.

You will want to have roughly the same amount of green (food) and brown (yard waste) materials in your compost pile. Sometimes you might need to add a little water, but we haven’t needed to in our compost pile. The EPA has a great beginner website for composting!

It is really interesting (and slightly gross) to open the compost bin and seeing how many different types of insects/worms/fungi are inside! The whole thing looks like it is alive with how much movement is going on in there!

I’d love to hear if you compost and what successes or failures you have had with composting!

Side taken off for easy shoveling access!
Can you see all the creepy crawlies in there?! (Especially visible along the black plastic)

Rock Polishing At Home

It all started out with a free rock polishing kit. I’m part of a “Buy Nothing” Facebook group where people give things away they no longer want/need. The kit came with the tumbler and enough polishing powder for one batch of rocks. I polished my first batch of rocks over the course of about 7 days and they turned out pretty cool! The main downside was the polisher was extremely loud so we had to keep it in the garage.

My original free one. (You get what you pay for)

This post contains Amazon affiliate links, I may earn a small commission at no cost to you if you purchase through these links

I thought rock polishing would be such a fun preschool/homeschool activity for years to come, but I was out of polishing powder. I did some research online and ended up buying 4.5 pounds of rock polishing powder and ceramic pellets. I was set! Until the VERY next time I used the free rock polisher the rocks banged holes in the plastic and it leaked ALL over the place. (See the duct tape in the picture above). I tried to fix it with duct tape several times but it kept leaking.

Now I had over $20 of polishing powder but no rock tumbler…so I did more research online and ended up getting this National Geographic Hobby Rock Tumbler Kit. Now I’m really committed to rock polishing (haha!). The kit comes with some unpolished rocks and some polishing powder to start with. Here are pictures of the rocks that came with the kit:

Before
After!

The rocks included in the kit were obviously more colorful than the ones we find laying around our yard. I know you can buy more unpolished rocks from Amazon if you wanted to do more of those type of rocks. The main reason I wanted to get the polisher was to collect rocks when our family does trips! Hopefully as a family we will be able to learn more about the different rock types (and which ones polish better!)

Functional Rock Tumbler!

To polish the rocks we fill up the tumbler about 1/2 full of rocks, add about a tablespoon of polishing powder, then just cover the rocks with water. The tumbler spins them around for about a week, then we rinse out the rocks and add the next step of polishing powder. The grit goes from coarse to ultra-fine, finishing off with aluminum oxide.

Unpolished rocks
After Step 1 (The rocks are still slightly wet so they look shinier than they really are)
After Step 2
After Step 3
Final after step 4! Some got much more shiny than others. These are completely dry, so this is what they actually look like!

I’m interested to experiment to see if longer polishing time would lead to shinier rocks or if I need to put some sort of glaze on them? Either way, this is a fun project for homeschool kids!

Also just your friendly reminder that it is against the law to remove anything from National Parks. It comes with a hefty fine – so do your rock collecting outside the parks! 🙂

Easy DIY Slip and Slide!

I don’t know what the deal is, but summer is finally here in the PNW and Slip and Slides (and kiddie pools for that matter) seem to be sold out everywhere! I looked at three different stores with zero luck this past week and the cheapest one I could find was either $50 or wouldn’t arrive until September!

This summer is so special because Oliver is FINALLY allowed to play in hose water and outside in the dirt after transplant. Last summer, he was able to go in the kiddie pool, but we had to hand fill it up bucket-by-bucket from our kitchen sink to make sure the water was filtered and drinkable. This summer we can turn on the sprinkler and let him run outside like a regular toddler! We still have to be really careful with keeping him out of the shade or with sunscreen on but other than that he is free to run!

After a quick google search, I realized we would be able to make a slip and slide ourselves for much cheaper than the ones I was finding online. We had attempted to use a blue camping tarp a month ago for a slip and slide and it was a huge fail. Even though we have a pretty decent size hill in our back yard, the tarp was way too textured and not slippery at all.

Here is what you need for a DIY slip and slide:

  • Plastic Painter’s Drop Cloth (I got a 3.5 mil thick 10x25ft one from Lowes)
  • Plastic Stakes
  • Pool Noodles (optional)
  • Metal Grommets (optional)
Slip and Slide Anchored In
8 pack of 8-inch plastic paver spikes
Grommets installed to preserve the plastic
Pool noodles installed at the top to create a border

I folded the plastic painter’s drop cloth in half so it was double- thick and spread it out down our hill. They sell plastic drop cloth that is thinner and cheaper but I would be worried about it ripping. The 3.5 mil we got seems really sturdy for our kids. It cost about $12 for the roll.

I anchored the top with pool noodles on each side and put the plastic stakes through them. It would be great to have pool noodles all the way down on both sides but they were $1.75 at Lowes and I know you can get them from the dollar store so I wasn’t willing to buy more than two for right now.

Seth installed metal grommets where the stakes went in so the plastic will not rip and we can use the slip and slide over and over again!

If you have a flat yard you could just add a squirt of soap to make the slide more slippery! Our kids tend to be more timid than daredevils so they didn’t want the slide too slippery. Haha! We put the sprinkler on low right at the top of the hill and it was the perfect amount of water!

Let me know if you end up making one of your own slip and slides! I just love summer!  

Fireplace Renovation!

Seth and I have a long list of house projects we want to do and we got a big one done over the last 2 months!

During this blog post I’m going to say that “we” did this project, but I want to make sure you know that Seth (and my dad) did 95% of this project. 😉

Original fireplace!

Step 1: Demo!

We originally were going to replace the entire fireplace unit until we found out it would be over $5000. After discussing it, we decided to save our money and keep the same fireplace unit. We painted all the gold parts black. We took hammers and crow bars and just started hitting! We taped plastic to the ceiling to make a “dust tent” to try to minimize demo dust.

Step 2: Beam!

We looked at a lot of different options for mantle beams and ended up deciding on an 8″x8″ solid wood beam from Westside Building Supply. The beam cost $120 and my dad used a beam cutter to cut it to the correct length. The beam set into the wall about 2-3″.

Fireplace prepped for the beam
The beam is in!

Step 3: Stacked Stone

We bought about $100 worth of stone from Northstar Stone & Landscape Supply. My dad is a contractor so he was able to show Seth how to place hardy backer against the 2x4s, place metal lath, then place a scratch coat to prep it for the stone.

Placing the hardy backer and metal lath
Ready for the stone!
Measuring and cementing the stone

Step 4: Staining the Beam

Once the stone was done, we chose some stain did two coats of stain. It turned out a little bit darker than we were planning because we did not realize we were supposed to wipe the stain off as soon as we put it on! We were still really happy with how it turned out. Once everything was dry we put the doors back on to the fireplace and decorated the mantle! In total the project cost about $300 since we did all the labor ourselves!

Next plans: We are hoping to place this exact same stone on the bottom 1/3 of our house in the front. Our plan is to take off the existing siding and use the same methods to make the front of our house look a little bit more modern. It looks like we will be having a pretty long unplanned vacation thanks to COVID-19 so hopefully we will be getting this done in the next couple months!

Finished project!