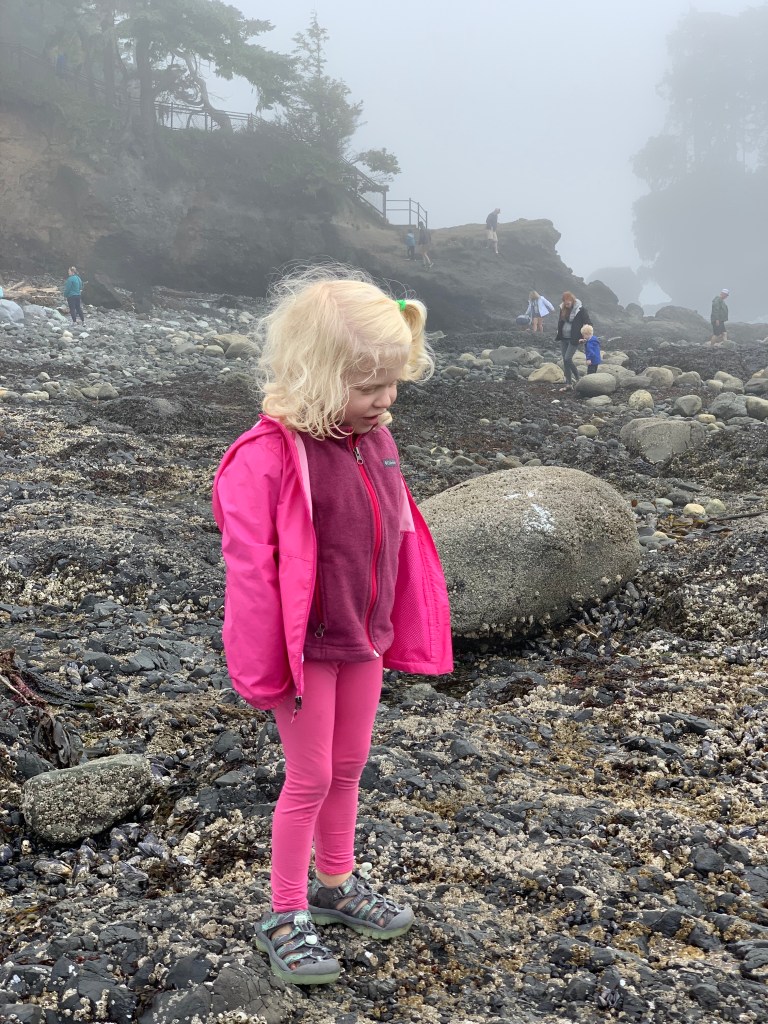
We just finished unpacking from our 3rd camping trip to Salt Creek Recreation area (near Port Angeles, WA). I wanted to share about our trip in case anyone else is looking for a fun weekend camping trip in NW Washington! This is such a fun campground for kids since it has a playground, World War 2 bunkers, and endless tide pools to explore.
We left Bellingham early at 6:30am to catch the 8:45am ferry out of Coupeville. We arrived at Salt Creek around 10:30am and were able to snag a first-come, first-serve camp site (even though it was 4th of July weekend!). The campground has 92 sites and about half are reservable and half are first-come, first-served. (We’ve tried to get reservations before and have never had success, they are always really booked!)
We set up our tent and bug tent on Friday and took the kids down to the tide pools to explore. After a quick afternoon nap, the kids took their strider bikes to explore the World War 2 bunkers (previously Camp Hayden) and went to the playground. The campground also has sand volleyball courts, horse-shoe pits, a basketball court, and a baseball field! Camping at Salt Creek is $32/night and they only accept cash or check. There are both pit toilets and flush toilets depending on how far you want to walk from your camp site!
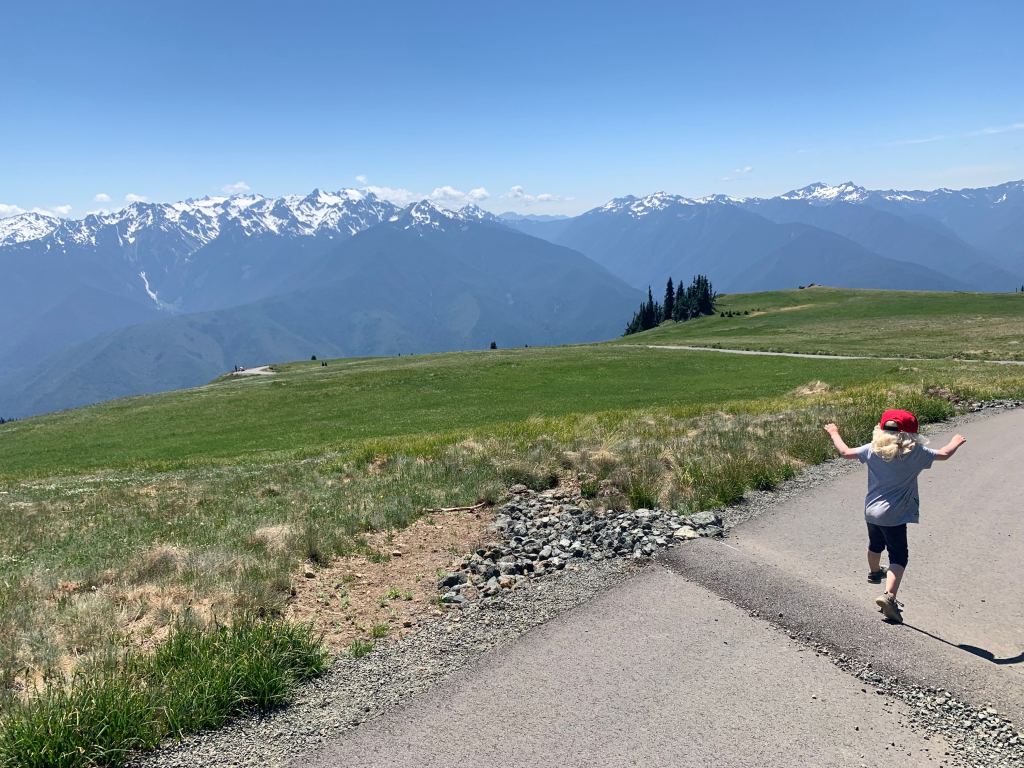
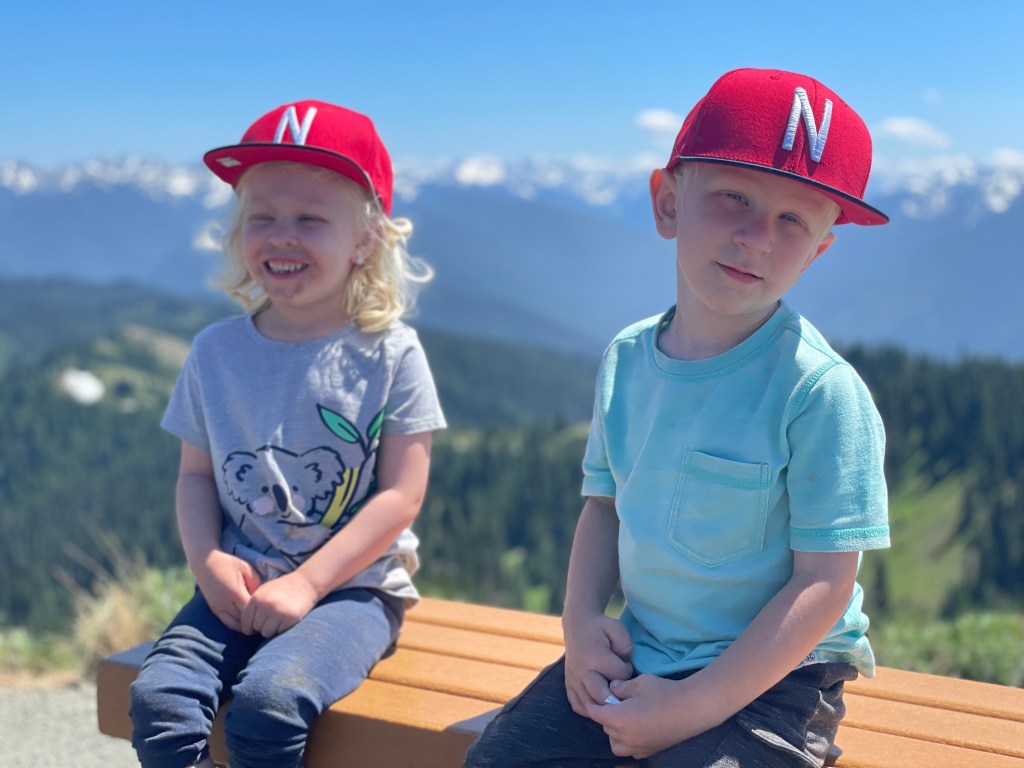
Saturday we spent the day in Olympic National Park. We did a 3.2 mile hike to the top of Hurricane Hill. The 360 views form the top are incredible! We picked up Junior Ranger booklets from the ranger station which the kids worked on while we were in the park and at the campsite the next morning. We have an annual National Park pass, otherwise the entry fee would be $30 for Olympic National Park. Hurricane Hill is paved the entire way so would be accessible for a stroller or technically a wheelchair – but you would want to make sure you had really good brakes on the wheelchair since it has 650 feet of elevation gain.
Sunday we packed up our campsite and spent the afternoon biking the Olympic Discovery Trail in Port Angeles. This trail is 135 miles long between Port Townsend and La Push. Around 90 miles of the trail has been developed into a paved path and I think they are working on completing more of it. We biked 10 beautiful miles along the water! We also stopped by the Olympic National Park Visitor Center to turn in the kids’ Junior Ranger packets to get their Junior Ranger badges!
I totally recommend Salt Creek for a weekend trip! None of us got a single mosquito bite which was a nice surprise! It was a lot foggier/cooler at our campsite and about 2 minutes after we drove out of the park it was totally blue skies and sunny!
This trip was kind of a trial run for a much longer camping trip we have planned later this summer. We were using our 6-person tent for the first time and hadn’t used any of our camping equipment since last fall. Happy Camping!
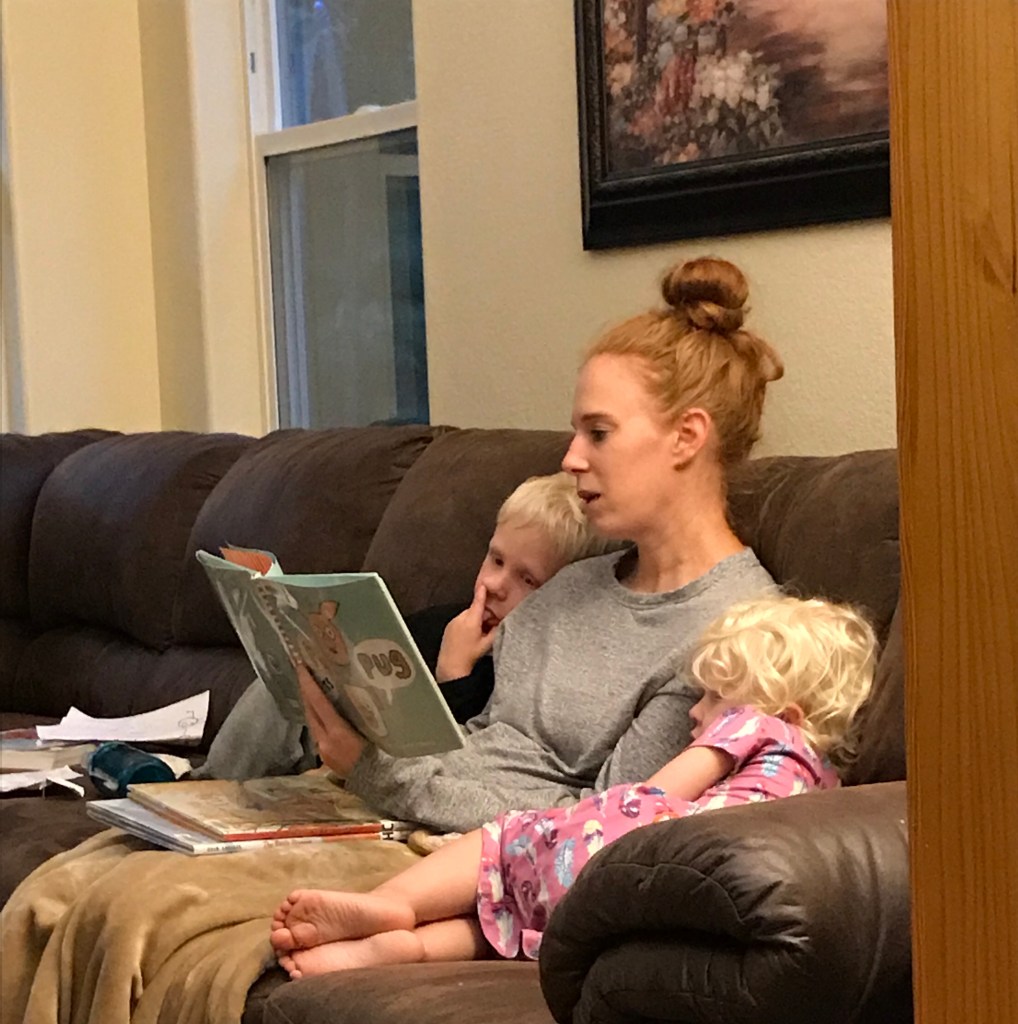
I have a goal each year of reading one book each month. 2020 unexpectedly gave a lot of us extra time for reading so I ended up reading 17 books! I would love to read more, but I spend a good amount of time reading aloud to the kids. While the kids are little, I think my goal is going to stay at 1 book a month. I’ve tried (and failed) several times to get into audiobooks – I just am not really a noise person. I almost never have music or the tv on in the background. I’ll keep trying audiobooks every so often though because I feel like they could be fantastic if I could get the hang of listening to them!
Like always, I kept track of the books that I read in a little notebook. I write the title, author, number of pages, and date completed. I usually write 1-2 sentences about what I thought of the book. This helps me a ton if anyone ever asks what I thought of a book or for a book recommendation!
My favorite fiction book from this year: The Giver of Stars by JoJo Moyes
My favorite nonfiction from this year: Teaching from Rest by Sarah Mackenzie
Least favorite: Raising Grateful Kids in an Entitled World (explanation below!)
This post contains Amazon affiliate links, I may earn a small commission at no cost to you if you purchase through these links
Without further ado, here are the books I read in 2020:
Risen Motherhood by Emily Jensen & Laura Wifler: This book was great at applying the gospel to different aspects of motherhood. It was a bit repetitive but still well worth reading. My favorite chapter was “The Gospel and Our Children with Differences.”
Raising Grateful Kids in an Entitled World by Kristen Welch: I wanted to love this book, but it really rubbed me the wrong way. Specifically, there was a point where she said, “If you want to feel grateful, go tour a cancer ward.” Our family spent a ton of time on the pediatric cancer floor and I would have been appalled if someone just came touring through to feel better about themselves! Umm…let’s not just be grateful because we have it “better” than others. I think gratefulness in kids begins with gratefulness of their parents and kids will emulate what they see. Overall I’d pass on this one even though I thought I would like it!
Pure: Inside the Evangelical Movement that Shamed a Generation and How I Broke Free by Linda Kay Klein: This book described the damage done by the “purity culture” in the evangelical church especially through the 90s. A lot of the research the author cited was fairly anecdotal but it is important to realize how much hurt and shame came out of that movement.
A Man Called Ove by Frederik Backman: My first fiction book after a huge stretch of nonfiction! This book was a bit darker/heavier than I was anticipating but I see why so many people loved it!
Where the Crawdads SingBy Delia Owens: This book started a little slow for me but really picked up towards the middle and I couldn’t put it down! I would recommend this one!
The Things We Cannot Say by Kelly Rimmer: This was a beautiful and melancholy book intertwining WW2 Poland with today. Every time I read a WW2 book it just blows me away the trauma and pain people lived through. I would definitely recommend this one!
Having a Mary Heart in a Martha Worldby Joanna Weaver: The first few chapters made this book feel a bit dated (written over 20 years ago) but as the chapters went on there were some good points about finding rest and stability in God while continually serving everyone around you.
Never Split the Difference by Chris Voss: This book had a lot of similarities to the book I read last year called Influence. The stories from the author’s time in the FBI were interesting. It had good advice about disagreeing with someone without making the other person defensive or angry.
Raising Worry-Free Girls by Sissy Goff (no relation to Bob Goff): This book is good not just for moms but for anyone who has or knows someone with anxiety. It is written from a Christian perspective and contains practical advice for anyone that struggles with anxiety or worry.
Teaching from Restby Sarah Mackenzie: This was probably my favorite nonfiction read of the year! It was wonderfully short and discussed both priorities in homeschooling along with practical scheduling ideas. I would recommend it to any homeschool mom! (Sarah Mackenzie is the author that also wrote Read Aloud Family)
The New Husband by DJ Palmer: I picked this one up from a “free library” on our Teton trip this summer! It was basically the plot of any run of the mill suspense movie. It is never one that I would normally read but was fine for reading in the hammock in the Tetons!
Made for Brave by Alyssa Galios: This book will make you cry guaranteed. It is a true story memoir of a young mom that loses her husband to cancer. She wrestles with questions like, “how can a good God allow bad things to happen?” I would definitely recommend this book!
Daisy Jones and the Six by Taylor Jenkins Reid: This book was written like the transcript of an interview which was a really unique way to read! It was a really engaging fictional story about a band outside of my normal genre of reading.
Homeschool Bravely by Jamie Erickson: This had a similar vibe to Teaching from Rest but was quite a bit longer. It stressed that education is going to look different and work differently for every family. It was definitely pro-homeschool/anti-public school though which was a downside. I think for some families public school is 100% right and for some families something different is right. I’d take it or leave it with this one!
Before We Were Yoursby Lisa Wingate: A heart wrenching story about the orphan trade in the US in the 1940s/1950s in Tennessee/Georgia. I had a little trouble following who was who at certain times since they kept some people’s identities hidden until the end of the book, but I would definitely recommend this one!
The Brave Learner by Julie Bogart: This was another one that I really wanted to love, but it fell a little flat. The author is very type-B/permissive parent. I appreciated some of the ideas for routine that she had, but I’m still not going to set up a permanent art table in the middle of my living room or let my kids draw all over my couch and walls and just shrug that off as “kids learning.”
The Giver of Stars by JoJo Moyes: Who knew a book about a traveling librarian could be so riveting! This one really kept my attention all the way through! I would definitely recommend it!
I would love to hear any book recommendations you have for me to add to my 2021 list!
In January, 2020, I made a goal of reading 1000 picture books aloud to the kids in 2020! We finished our goal on December 28, 2020! I chose 1000 because it averaged out to around 3 books per day/20ish books per week which was just slightly above our average anyway. I kept track of the books in just a regular cheap notebook. In retrospect it probably would have been faster/easier to just keep track on the computer!
Keeping track of the books
We used to go to the library every other week to check out 50-60 books, but when the libraries shut down in March we had trouble getting new books! We flew through our home library (we don’t keep a ton of books because there aren’t too many books that I like to read over and over) and then ended up finding out about The Book Bundler company that sells boxes of used books relatively cheap. The books were definitely hit and miss, but enough to last until the libraries opened again!
Book Bundler Haul
Curbside pickup has been a game changer for books! I put books on hold that I know are available at the library and they usually have them ready to put in the trunk of my car within 24 hours! I’m able to be more selective with the books instead of the kids just randomly pulling them off the shelves (although I do miss that too).
Library Book Haul
I don’t think I’ll keep track of our picture books for 2021 just because it is somewhat tedious to write down that many titles. Eliza just turned 5 and is starting early reading skills (sight words, BOB books, etc.) so having this year of consistent picture book reading hopefully will help her continue to improve her reading skills! We will also most likely spend more time on chapter book read-alouds now that Eliza (and Oliver) are happy to sit and listen to them. I’m proud of our family for reaching our goal for this year though!
Some books were fantastic, others were duds, but overall the kids got exposed to a lot of vocabulary, a variety of plots, and hopefully a love of reading!
I know I JUST did a post about preschool toys, but this is the time of year to do these lists! These are all fun Christmas gift ideas if you are looking for non-toy ideas!
I love doing crafty things…knitting, crocheting, paint (by number), latch hook, cross stitch, cake decorating, etc. I especially love doing crafts with Eliza since she has a relatively long attention span for a 4-year-old. I’ve arranged these from least messy to most messy. (Seth rolls his eyes when I buy a 1800 Perler bead pack or finger paint because he KNOWS it will end in some sort of craft disaster haha!).
We recently put a lock on our craft closet due to a late-night incident involving sparkle Elmers glue all over the carpet in the kids’ bedroom…
Everyone has a different level of how much crafty mess they can handle so the further down the list you get, the more mess you can expect!
This post contains Amazon affiliate links, I may earn a small commission at no cost to you if you purchase through these links
Water Wow: These are magical boards by Melissa and Doug that change color when you add just water! They come with a little brush you can fill. The best part is they turn back to white once they are dry so they can be used over and over again! Eliza is actually almost getting too old for these, but they are a fantastic quiet time activity with no mess! (Be warned, 1-2 year olds will try to suck the water out of the tip of the brush but I figure that’s ok).
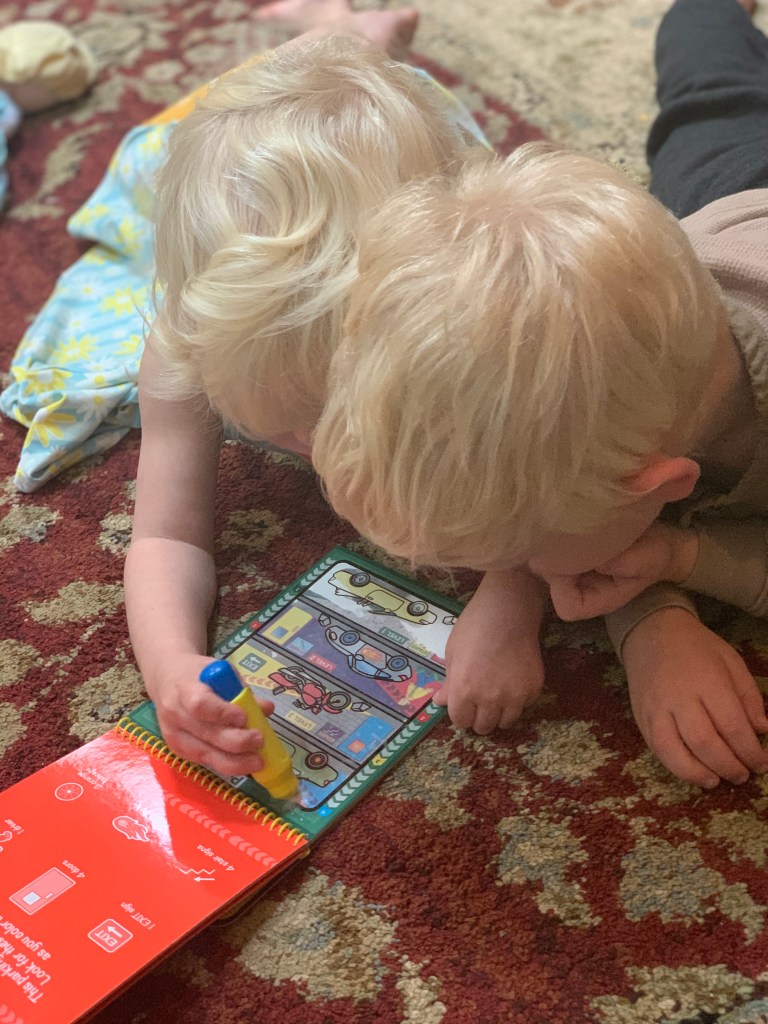
Paint by Sticker: Eliza is almost 5 and just discovered these. It is similar to a paint or color by number but uses stickers instead! These take quite a bit of patience and concentration but again have virtually zero mess or cleanup involved! I think kids ages 4-12 would love these!
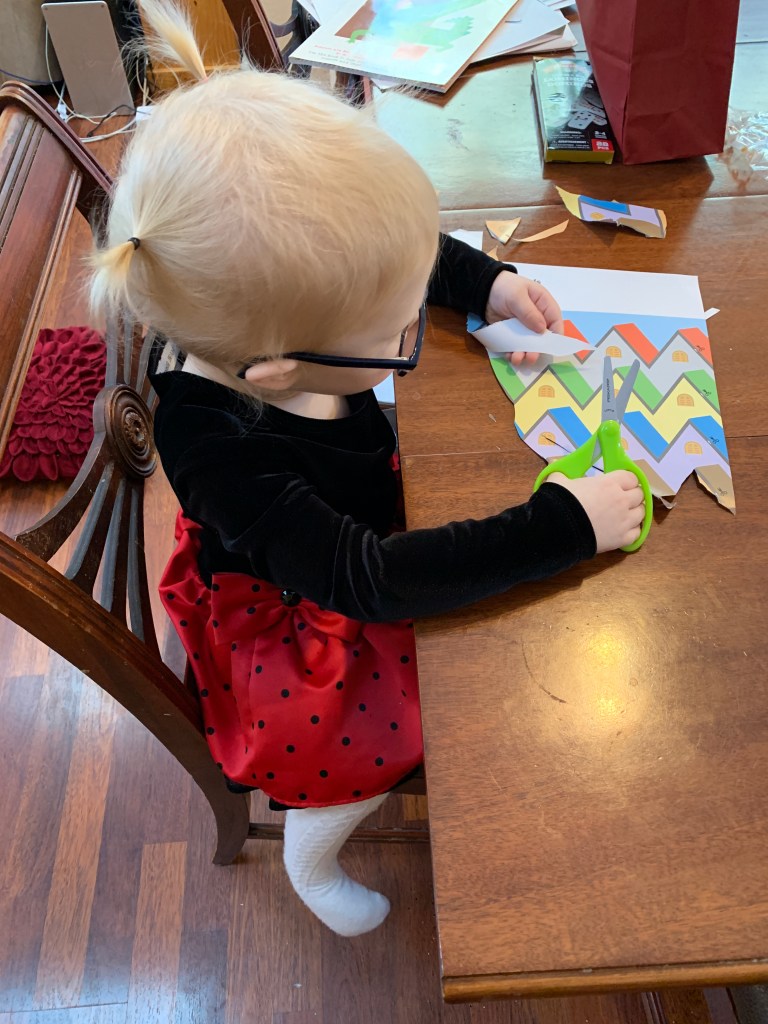
Kumon Scissors and Mazes: Pretty much any Kumon brand book is great (check the recommended ages on the top right of the books for difficulty). Eliza especially likes the scissors skills books and the maze books. The only downside of Kumon books is I wish they had tear-out pages!
Eliza learning to use scissors with her Kumon scissors skills book
Colored Masking Tape: We’ve used this to make roads for hot wheels cars, design tape outfits for stuffed animals, make pretend bandages for dolls, and make designs on our windows. This is so versatile and really nice to have on hand!
Roll of White Paper: You can use this indoors or outdoors! We like to roll ours down our hallway and let the kids color all over the paper. You can also use this on an easel to have fresh paper to pull down. This is great for markers, pencils, pens, kwik stix, colored masking tape, and so much more!
Dot Stickers: These are the kind of stickers you would use to label garage sale things and our kids LOVE them! They are also fantastic for learning counting, sorting, etc.
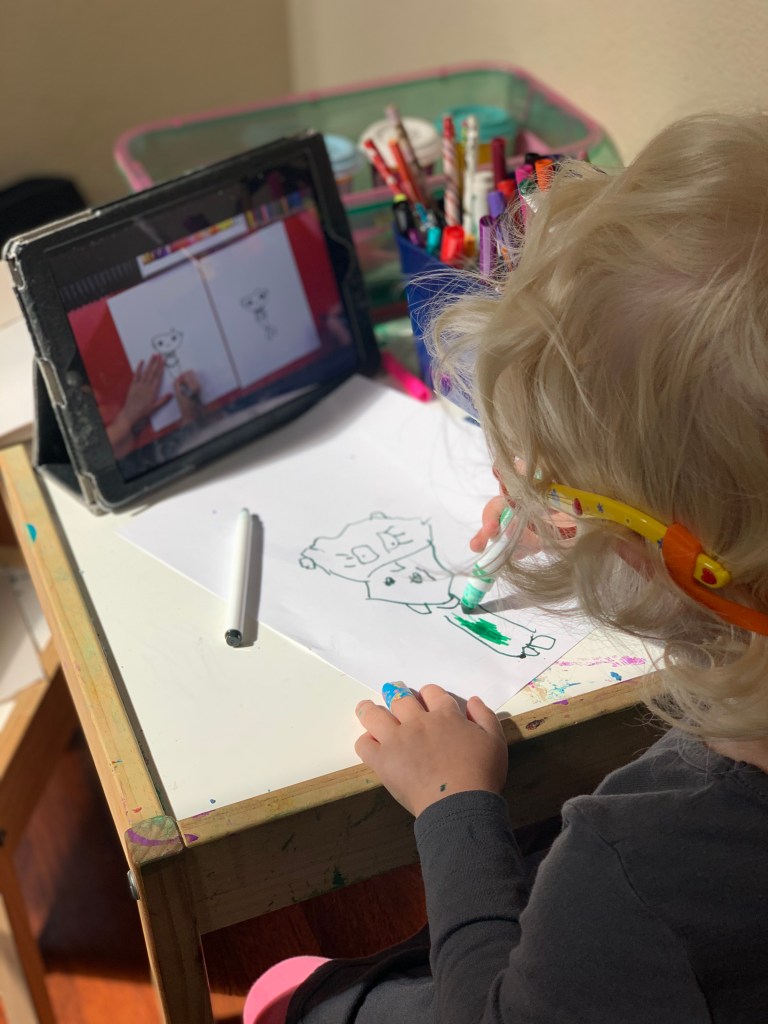
Construction Paper + Markers: This is pretty standard for kids but again so versatile. Eliza likes doing “Art Hub for Kids” videos on youtube to copy drawings of her favorite cartoon characters!
Kwik Stix: These are “tempra paint sticks” which are MUCH less messy than paint. They are kind of a waxy blend between a crayon and a marker. Our kids love using them because they are very easy to draw with and are very brightly colored.
Do-A-Dot Markers: There are zillions of free dot marker coloring pages if you google them. I’ve used dot markers to teach both letter shapes and counting. The kids also like just using them for fun too!
Wonder Stix: I recently discovered these to use instead of Expo markers for white boards! They are more of a waxy texture and don’t smudge as easily as white board markers. White board markers also stain really bad and are impossible to get out of clothes. These wonder stix also work on regular paper and windows too.
Play Doh: We’re getting into the messier territory now…keep play-doh away from carpet! Eliza and Oliver looove mixing the colors together too so I usually only get 1-2 colors out at a time. Cookie cutters, rolling pins, forks, spoons, etc are all great additions to playing with play-doh without having to buy specific “play-doh toys”
Sparkle Glue + Tissue Paper: Eliza LOVES Elmer’s sparkle glue and gluing tissue paper. This is solidly the “messy” category now. Glitter glue is fun because you can use it to “draw” designs or a word/name and glue sequins, rice, beans, feathers, etc. on to a page!
Easel + Paint: We have a Melissa and Doug easel that the kids can use to paint. My favorite place for the kids to use this is outside though because no matter how hard I try, paint always seems to get out of control. I’m sure this will get easier as the kids get older but for now I only get this out when I’m ready to really invest time in set-up and clean-up!
Water Beads: Water beads are full of so much squishy fun (even for me) but they are slippery and will bounce all over the house unless you have incredibly careful kids. My favorite place to use these is outside in the water table. They are biodegradable so you don’t have to feel bad if some of them end up in the grass! You do need to be REALLY careful with these around toddlers though because they are dangerous if eaten since they swell up with liquid.
Perler Beads: These aren’t actually messy unless they spill…which they will! Eliza loves doing patterns like these but still needs a little help with more complicated designs. There are pretty much unlimited patterns you can print from the internet and this is another great quiet-time activity!
Crafting is a huge part of our homeschool preschool! I would love to know if there are any craft materials we are missing out on that I didn’t list!
Gift-giving is one of my top love languages and Christmas is definitely my favorite holiday of the year! I’ve already started shopping for this year – I keep seeing that shipping will most likely be delayed this year so it is a good idea to start early!
This post contains Amazon affiliate links, I may earn a small commission at no cost to you if you purchase through these links
Our kids have no shortage of toys thanks to cancer treatment and all the generous people and organizations that helped us through that difficult time. We have a playroom with lots of different choices, but there are certain toys our kids pull out again and again and play with for HOURS. These are open-ended toys (can be played with lots of different ways) and are perfect for pretty much from when they stop trying to eat the toys and older!
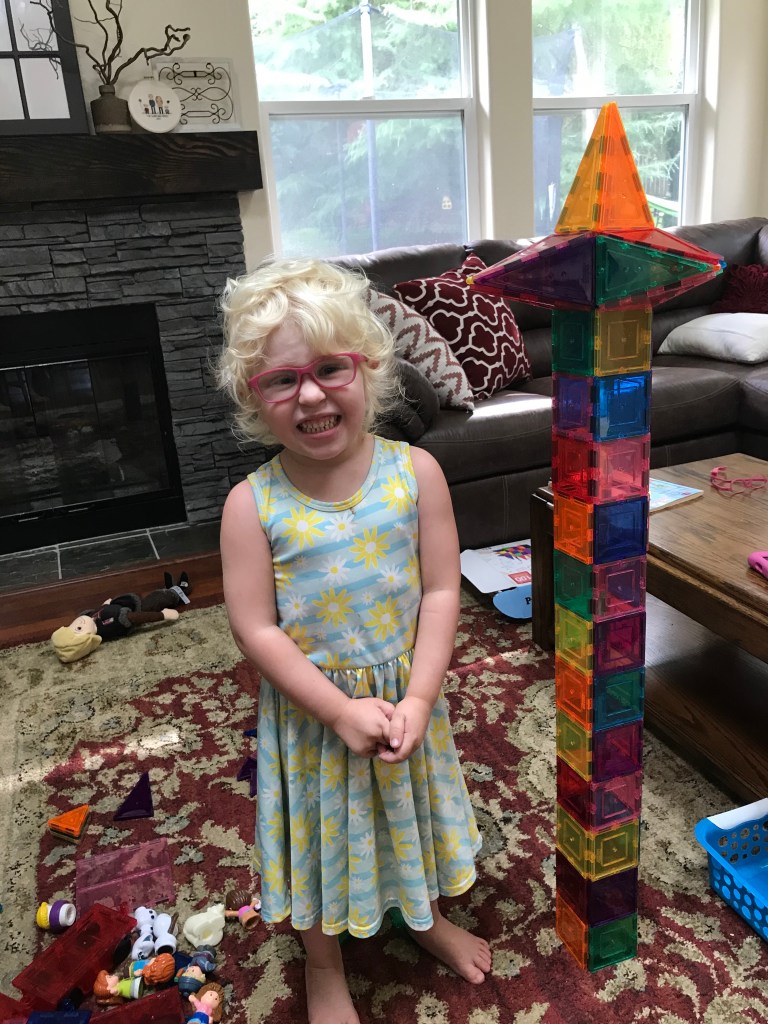
#1. Picasso Tiles! These are magnetic tiles that stick together on any side to build towers, rocket ships, houses, jails, and anything else you can think of! The most popular brand is MagnaTiles but these are about double the price. Picasso Tiles average out to about $0.50 per tile and Magnatiles are usually around $1.00 per tile. From what I have read, Picasso Tiles and MagnaTiles are interchangeable if you buy some of each, but we just own Picasso Tiles.
We have like 100 of these pictures because every time Eliza builds a tower she wants us to take a picture of it 🙂
#2. Little People Sets (by Fisher Price): These are great because they can be chewed on by a baby, but Eliza at almost 5 still LOVES playing with them. The best part is that they fit exactly inside a PicassoTile square so the kids spend a lot of time making little houses or towers for their Little People. There are so many different Little People sets – Frozen Castle, Barnyard, Nativity Scene, etc. The kids spend the most time just playing with the people themselves though, even more than the sets they come with. They sell sets of just people or animals too. I saw at Walmart that you can even buy individual ones!
#3. Wooden Alphabet Blocks: We bought these when I was pregnant with Eliza for our maternity pictures. They seem like such a simple thing compared to other more glamorous toys but these get played with a lot too! We’ve also been able to use them for preschool for identifying letters and colors!
Oliver playing with blocks and Hot Wheels together
#4. Hot Wheels Cars: This one is the only one that is more than an Oliver toy than an Eliza toy. She isn’t super interested in playing with cars, but Oliver plays with them all. the. time! He lines them up in rows, races them down the hallways, takes them with him in his car seat…he basically always has a Hot Wheels car with him. We have Hot Wheels tracks too that the kids get out every once in a while, but what they really like playing with is just the cars themselves! These happen to fit perfectly in the Picasso Tile cubes too so they mix really well together!
#5. Counting Bears: You might remember having these in your classroom as a kid. We use these for preschool and have used them for Eliza’s vision therapy, but the kids ask to play with them a lot! This set comes with colored bears, cups, dice, grabbers, and a carrying case. The kids make up games together (with rules that always seem to benefit Eliza haha), toss them into the cups, count them, make up stories with them, and a lot more. The only downside of counting bears is that they are definitely a choking hazard for little kids AND they can sometimes get lost more easily than some other toys.
Eliza playing counting bears with her patch on
#6. Disney Brand Plush: We have a variety of stuffed animals but this Disney Stuffed Elsa is Eliza’s “lovey.” She has Elsa, Anna, and Rapunzel from the Disney collection (and don’t tell her, but she is getting Ariel for her birthday) and they all have a special place in her bed. If she gets hurt or is tired, she always wants Elsa. She got Kristoff for finishing her last day of chemo last year and then wrapped and gave him to Oliver for his birthday because Oliver LOVES Kristoff…which was pretty much the sweetest thing ever! Just make sure if you are ordering from Amazon it is from the actual Disney store; there are quite a few knock-offs on there. You can also just order from the Disney website!
Construction paper clothes for Eliza’s Elsa doll
#7. Grocery Cart: We swooped up a kiddy grocery cart from a side of the road free-pile when Eliza was learning to walk. The kids have gotten endless hours of play from it. One downside is it does take up a good amount of real-estate in the playroom but I can never bring myself to get rid of it because of how often it is used. It is also really useful for cleaning up the living room because the kids can pile the toys in there and just cart them back to the playroom at the end of the day!
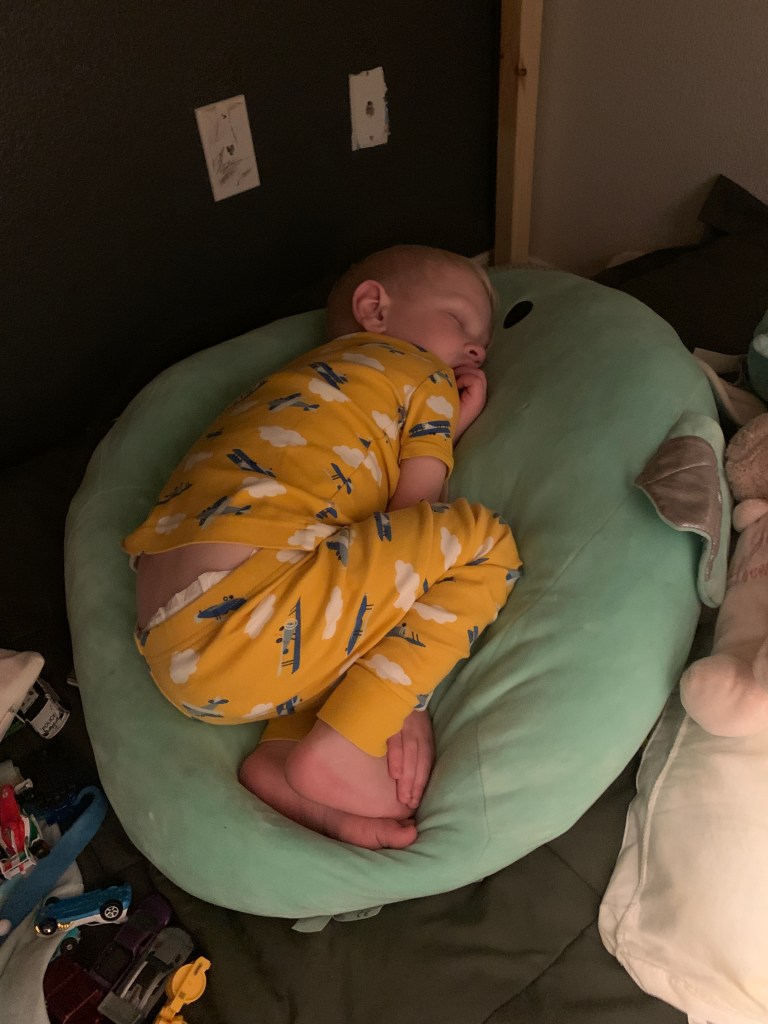
#8. Squishmallows: Eliza and Oliver both got big Squishmallows for Christmas last year and Oliver decided his big Squishmallow would be his lovey (haha). He literally sleeps on top of it every single night and we honestly could probably just get rid of his bed and just keep the Squishmallow. We ended up buying him a mini-version of his big one to take in the car for Seattle trips. We even brought his Squishmallow to the Tetons this summer because we knew he would for sure sleep on top of it in the tent! Eliza has gotten a couple mini-squishmallows for prizes from her vision therapist and she loves them too.
Oliver’s regular sleeping spot (and his Hot Wheels cars in the lower left)Mini Squishmallows
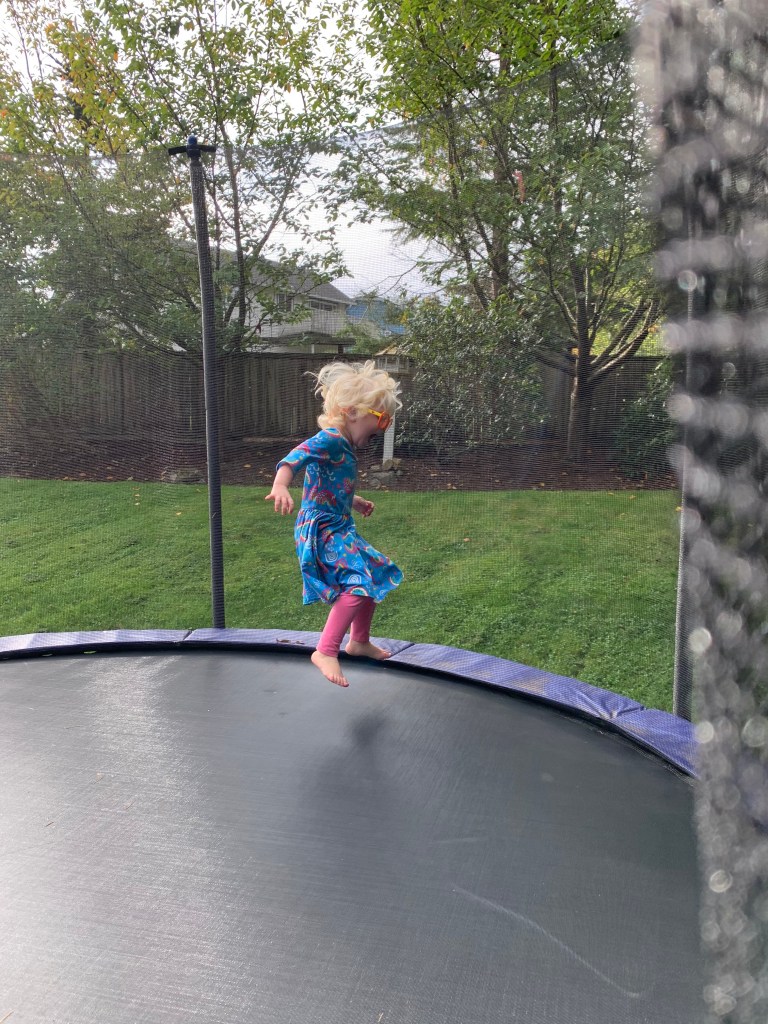
#9. Trampoline: This was definitely a quarantine panic purchase this past March. We ordered one just in time and then they started to sell out everywhere! I know there are mixed feelings about trampolines and their safety. I think almost all trampolines come with nets now and our kids can only jump about 2 inches high so I think at least while they are small it should be safe enough! The kids have spent hours and hours running and jumping on the trampoline. This was especially helpful when the parks and trails were closed, but they still go out almost daily to get their wiggles out!
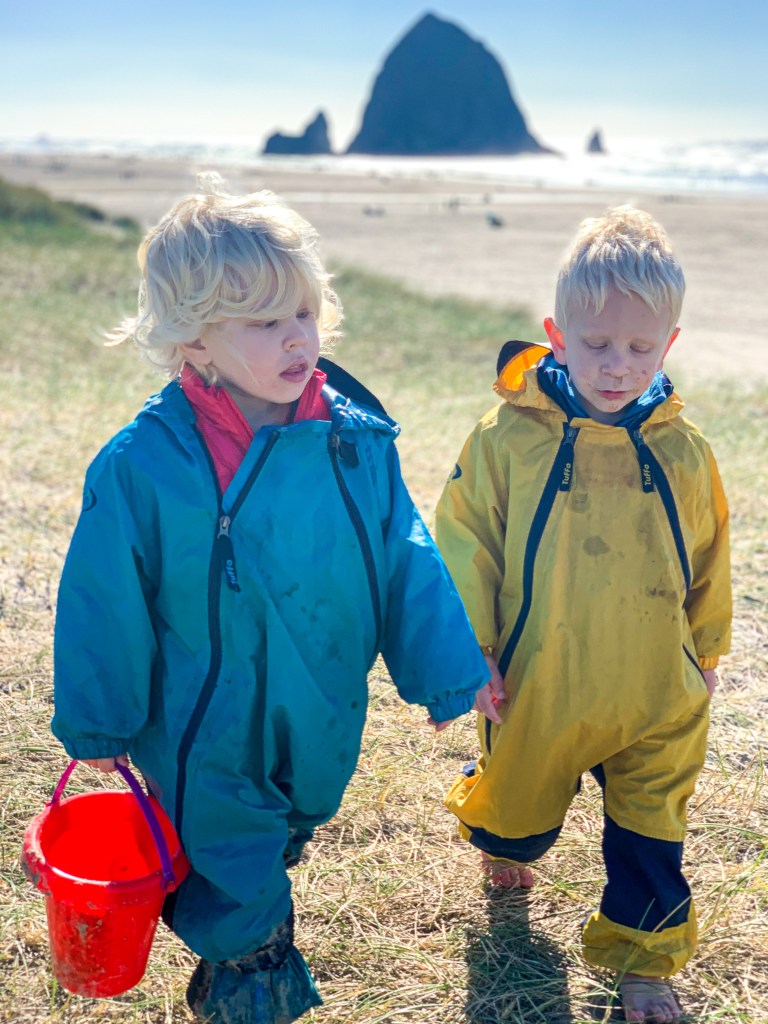
#10. Tuffo Rain Suit: This last one isn’t technically a toy, but we LOVE our Tuffo Rain Suits! I’ve given them as gifts many times and our kids play in them all Fall, Winter, and Spring! I’d say they run slightly big, so no need to size up! These rain suits allow the kids to play outside no matter the weather all year round! They even work well in snow if you bundle up underneath!
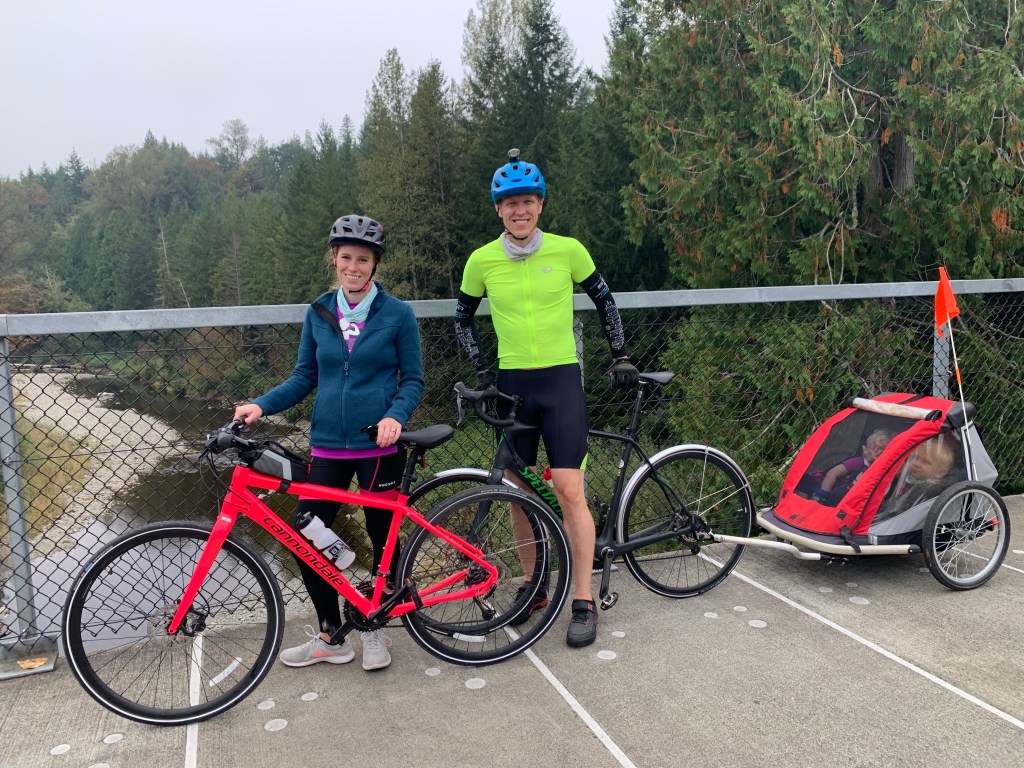
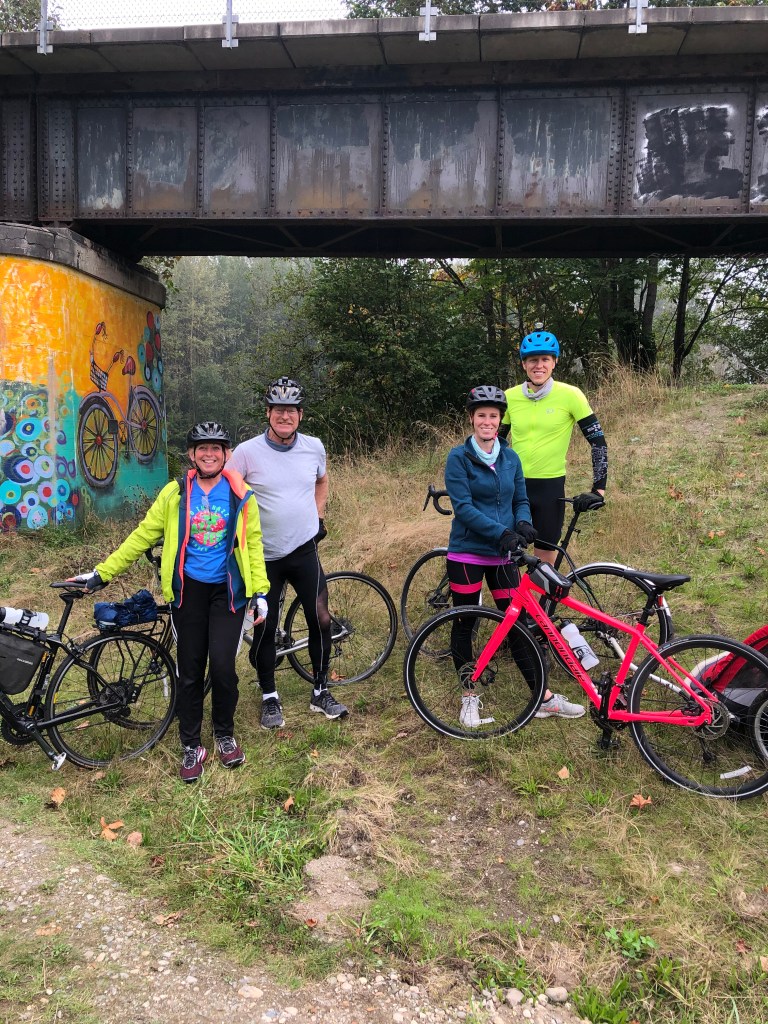
The nice weather of summer/fall seems to be coming to an end, but there are plenty of outdoor things to do in late fall/winter! We recently biked a good chunk of the Centennial Trail in Snohomish County.
North Trailhead (do not recommend that port-a-potty though!)
It is a little bit of a drive to get there (about an hour from Bellingham), but it is a 30-mile (one way), completely paved and off the road biking trail! It is perfect for kids! Our kids are not very confident on bikes yet so Seth still tows them in our bike trailer (close to 100 pounds!)
We biked from the Nakashima Heritage Barn to Arlington and back to the Nakashima Barn/North trailhead for a total of about 18 miles round-trip. The trail goes right by Twin Rivers Park in Arlington which is a great stop if it isn’t too busy. There is a big playground there with an awesome splash pad open during the summer.
To get to the park entrance, take exit 208 for SR 530 toward Arlington. After 3.7 miles, turn left on to SR 9 (this is an easy turn to miss on your way home). After 7.7 miles the trail head is on the left!
The whole path is so peaceful and beautiful. It would be great for walking a dog or running too if you were not wanting to go as far.
With so many things likely being closed down this winter, hopefully this gives you another idea for getting outside!
My parents came along too!
We have been wearing neck gaiters while biking because they are easier than a mask to take on and off quickly when passing others!
We’ve been having such gorgeous fall days that we decided to head up to Mt. Baker this past weekend to take advantage of probably one of the last rain-free weekends of the season!
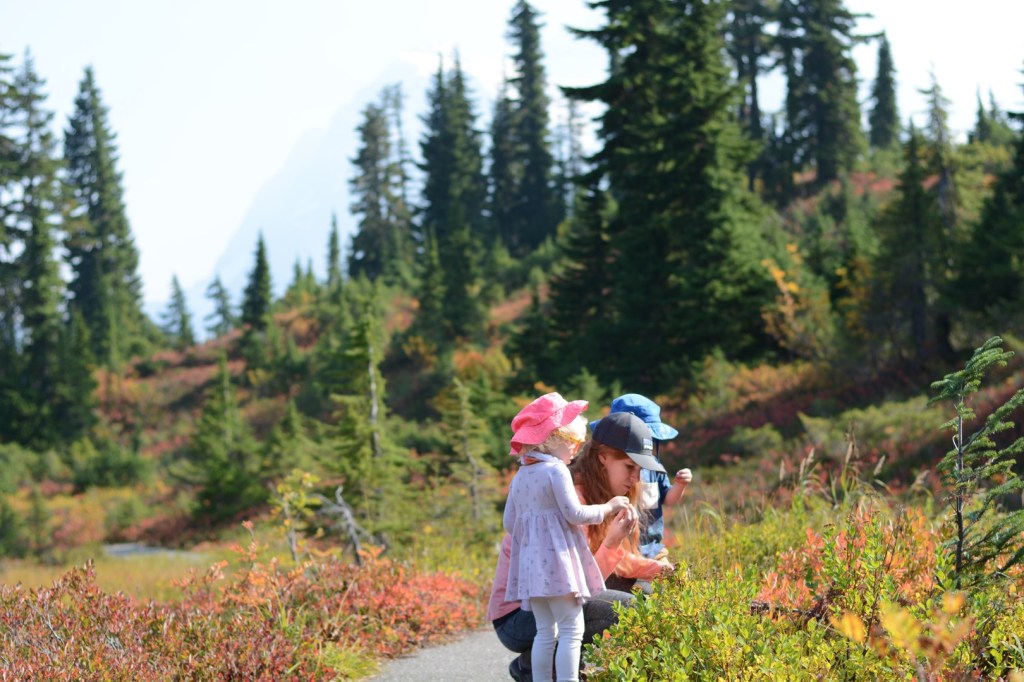
It was actually the first time we had been up to the mountains this summer, which is pretty abnormal for our family, but between Artist Point being closed really late this summer and smoke, we really didn’t have a chance to go. We started the day pulling off at Picture Lake and walking around the quick half-mile loop. This trail is ADA accessible and fantastic for little hikers!
Trail around Picture LakeSo many wild blueberries!Hiking with kids is often slooowwwww…but you definitely see a lot along the way!
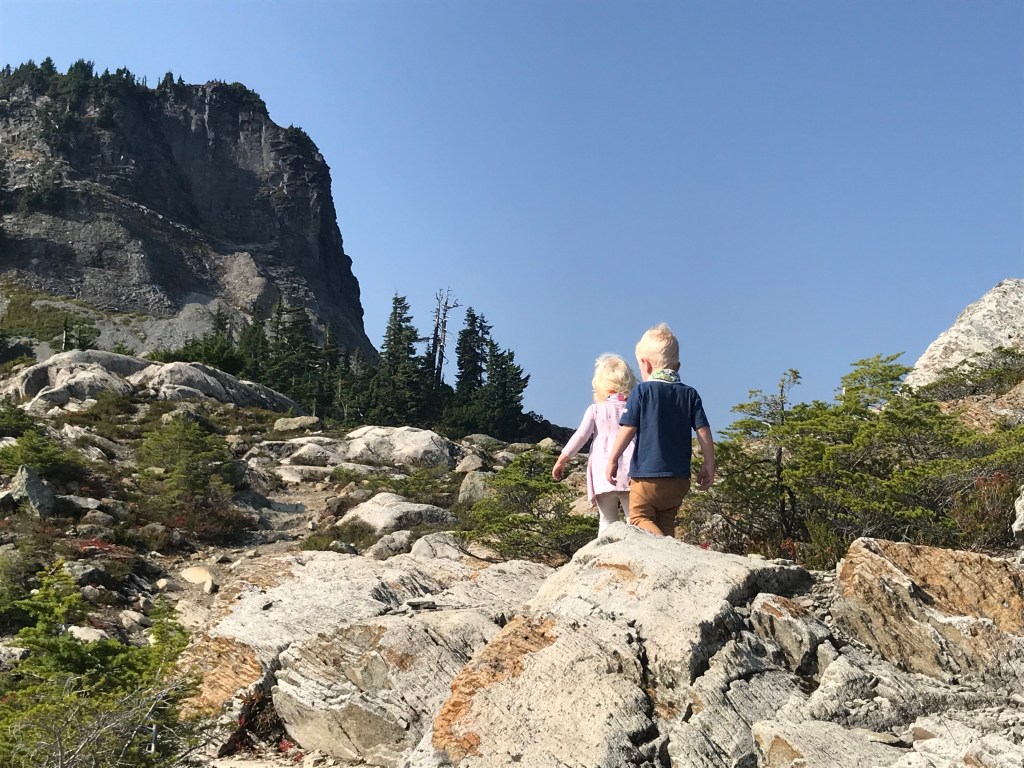
We drove up to the Artist Point parking lot and debated whether or not to do a full hike. Our kids weigh about 35 pounds each and I didn’t want to end up carrying them really far. We started down the Table Mountain trail which is rocky and not too steep to begin with. The kids were doing awesome hiking so right before we got to the steep part of the trail, Seth ran back to the car to get our kid carriers and water/snacks.
The lower/flatter part of Table Mountain Trail
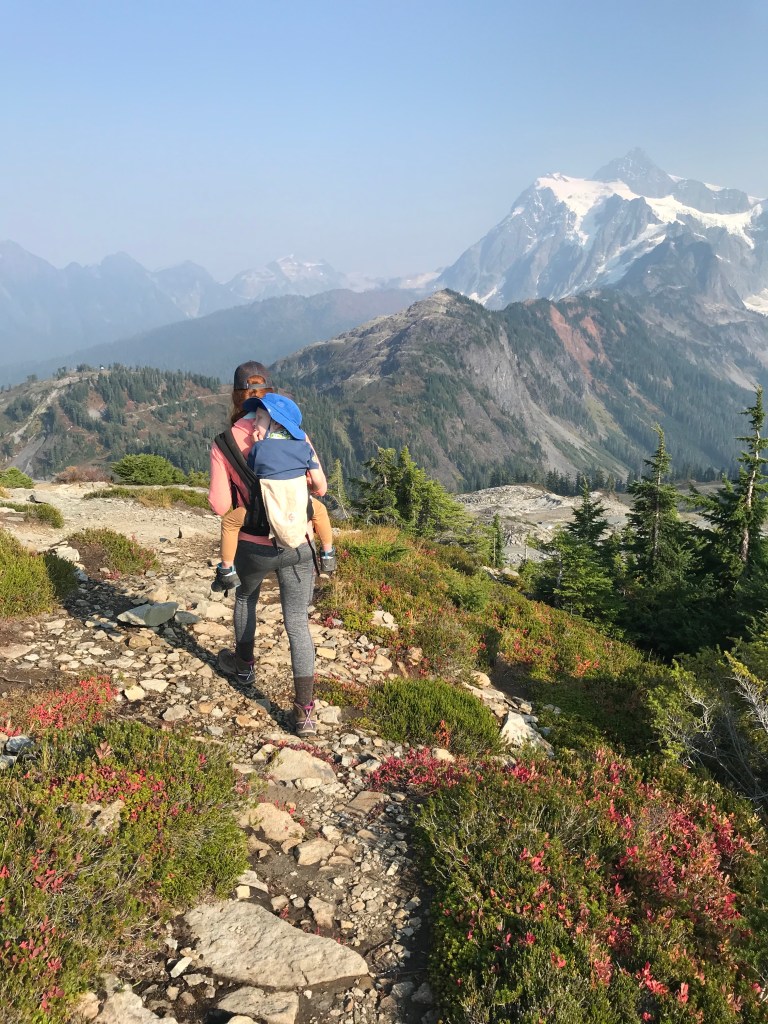
We went up Table Mountain two summers ago too but carried the kids 100% of the way (and they both weighed a lot less then!). Seth got back with all of the supplies fairly quickly and we loaded the kids up in the packs. This trail is NOT GOOD FOR LITTLE KIDS unless they are in a backpack! It is less than a mile from the parking lot to the top, but gains over 700 feet of elevation. There are pretty intense, rocky switchbacks right on top of each other for the last 1/8 mile or so.
You can see the top of Table Mountain in the upper left of this picture
We made it to the top with the kids and found a great place to have a snack. The views from the top are incredible! If you have kids that like to run away from you this might not be a good hike either because there are pretty significant drop-offs on the sides of Table Mountain. The top is relatively flat though!
Beautiful views at the top!
Artist Point is a beautiful place to visit even if you don’t do any hiking! We want to do some longer hikes, but we are trying to feel out how far our kids will be able/willing to go without being carried the whole way!
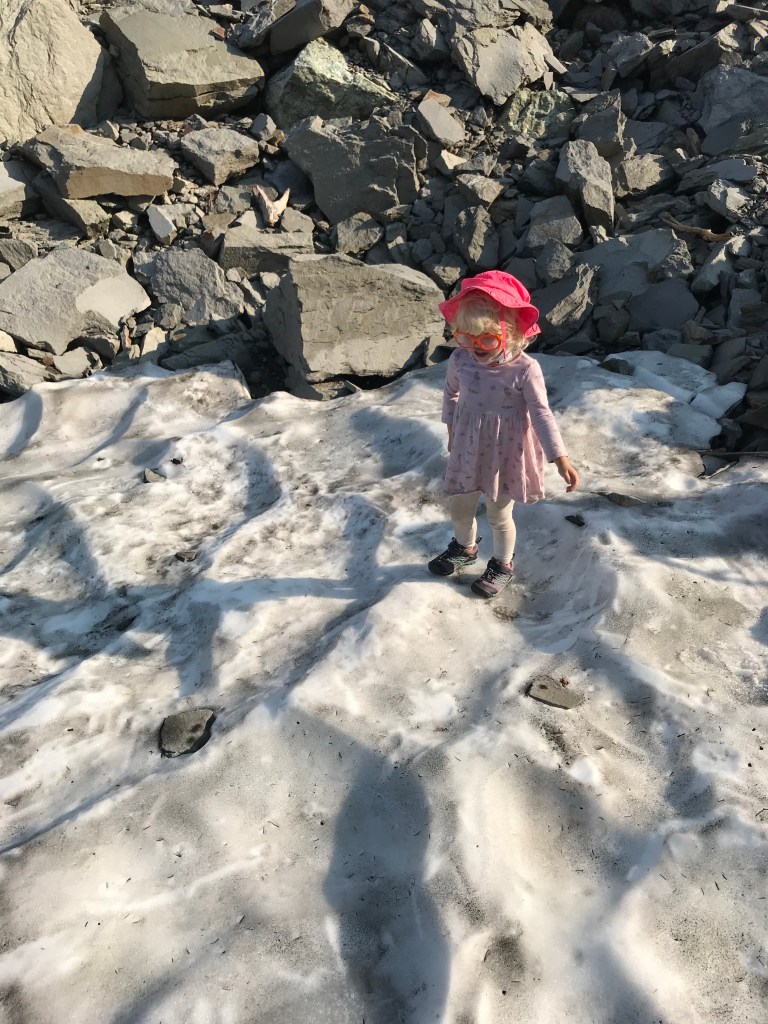
Eliza REALLY wanted to find snow because she remembered finding it last year…there was one very small patch still left next to the trail!
We compost all our food scraps, yard waste, etc. at our house! You don’t need to live on a big farm to effectively compost – our lot is about 10,000 sq feet (1/4 of an acre). We do have a garden that we put our compost in once it is ready, but you could also use the compost for flower beds!
Eliza taking out the compost bucket!
Composting is great because it reduces your carbon footprint (the trucks don’t have to use fuel to haul away the weight and it doesn’t take up space in the landfill), and it reduces or eliminates the need for chemical fertilizers in your garden.
I’m no composting expert, but I know composting can seem really overwhelming to start. This is what our family does and it is VERY simple:
This post contains Amazon affiliate links, I may earn a small commission at no cost to you if you purchase through these links
We have this 0.8 gallon trash can with a removable insert in our kitchen right next to our garbage. We put any food scraps (watermelon rinds, moldy food from the fridge, apple cores, etc.) in it instead of the garbage. We don’t put any meat/bones/animal fat in – those go in the garbage. We empty this about every other day. We haven’t had any issues with it smelling bad because we empty it regularly and the lid actually seals really well! We also add yard leaves, grass clippings, etc. to the bin.
We used to just have a big pile of compost in the corner of our yard but it smelled bad and attracted rodents. Growing up, I lived on 3 acres and we had an open-air compost pile that worked fine because it was far enough away from the house/where people hung out! This past year we invested in this stand-up compost bin with a lid! It is crazy how much faster the bin breaks down organic matter vs having it just sit in the open air.
That bin has openings on the bottom that we can shovel the compost out once we need it! We add the compost to our garden in the spring before we plant. Now is a great time to start composting to get ready for spring gardening!
Kitchen compost binOutside compost bin
If you aren’t quite ready for a big huge bin, they have smaller and cheaper options like this one that would work too! You just might end up composting maybe half of your food waste instead of all of it.
You will want to have roughly the same amount of green (food) and brown (yard waste) materials in your compost pile. Sometimes you might need to add a little water, but we haven’t needed to in our compost pile. The EPA has a great beginner website for composting!
It is really interesting (and slightly gross) to open the compost bin and seeing how many different types of insects/worms/fungi are inside! The whole thing looks like it is alive with how much movement is going on in there!
I’d love to hear if you compost and what successes or failures you have had with composting!
Side taken off for easy shoveling access!Can you see all the creepy crawlies in there?! (Especially visible along the black plastic)
I’m a dental hygienist and I’ve heard this more than once from parents! I’m not trying to judge anyone, but it is extremely important that parents have tools and strategies for brushing their kids’ teeth because it is so important!
I brought Eliza to her 4 year well-visit with her pediatrician and they had me fill out one of those questionnaire forms to see if your child is on track developmentally. First of all, I understand they need to screen kids somehow, but those forms seem to just make parents of kids with any type of special needs feel bad…I wish they could have adjusted forms for us. Second of all, I was APPALLED when one of the questions asked, “Does your 4 year old brush their teeth by themselves?” I circled no and wrote a lengthy explanation of why (which I’m sure the nurse just rolled her eyes and entered “no” in the computer and shredded the form).
I was appalled because according to the American Academy of Pediatric Dentistry, parents should be brushing their kids’ teeth themselves or at least closely supervising until they are at least 6 years old. Some kids will need help longer!
Eliza says she is going to be a dental hygienist when she grows up.
You can start using a fluoride toothpaste when the first baby tooth comes out but you only use a teeny smear of toothpaste (think grain of rice). The toothpaste commercials showing 2″ of toothpaste are just trying to get you to use more than you need to at a time. Even for adults, a pea sized amount is plenty and a tube of toothpaste should last you a really long time!
A baby should go to the dentist when their first tooth comes through the gums (and then every 6 months after that). Age 1 is the latest a baby should have their first dental visit! You can go to either a pediatric dentist or a family dentist – a pediatric dentist may be a good choice if you think your child will have a difficult time keeping their mouth open or sitting still for a short exam.
Teeny little bit of toothpaste!
But what if my kid won’t let me brush their teeth? It is kind of like asking “what if your kid won’t let you buckle them in their car seat?” …you have to. Some people mistakenly think cavities in baby teeth aren’t a big deal since big teeth will just grow in but they are very important in maintaining space for adult teeth, helping your child learn to eat and speak, and decay can spread from one tooth to another (from baby to permanent teeth in the mouth).
Some tips to help:
Start early! If a kid is used to having their teeth brushed from the time they are a couple months old, it will be less of a battle as they get older!
Make it fun! Have a fun-tasting toothpaste (kept out of reach, obviously), a character on a toothbrush they like, or sing a fun song while you brush. Our kids have the Oral-B kids electric toothbrushes from Costco now that they are both 3 and older!
Show them that you brush your teeth too, that it is a regular part of getting up in the morning and going to bed at night.
Don’t ever threaten kids with “if you don’t brush your teeth, you will get a cavity and it will HURT” That is just totally setting you up for a meltdown disaster when you eventually need to take them to the dentist (or when they are an adult and are terrified to go in!)
Brushing should be twice a day, but the most important time is before bed, because bacteria goes crazy at night when we are sleeping and not producing as much saliva!
Brushing needs to be the LAST thing before going to bed. Absolutely no milk, bedtime snacks, etc. after teeth brushing. If our kids need another bedtime snack, we brush their teeth again. (An exception is nursing babies – just make sure their teeth are brushed and they don’t have any other snacks before bed/their long sleep stretch). No bottles or sippy cups with milk in bed or laying around the house during the day!
And just so you don’t think we have it all together…Oliver (who just turned 3) still HATES having his teeth brushed. He’s happy if we let him do it himself, but can’t stand when we do it for him (which we do). There are sometimes tears, but hopefully he will grow out of it soon!
It all started out with a free rock polishing kit. I’m part of a “Buy Nothing” Facebook group where people give things away they no longer want/need. The kit came with the tumbler and enough polishing powder for one batch of rocks. I polished my first batch of rocks over the course of about 7 days and they turned out pretty cool! The main downside was the polisher was extremely loud so we had to keep it in the garage.
My original free one. (You get what you pay for)
This post contains Amazon affiliate links, I may earn a small commission at no cost to you if you purchase through these links
I thought rock polishing would be such a fun preschool/homeschool activity for years to come, but I was out of polishing powder. I did some research online and ended up buying 4.5 pounds of rock polishing powder and ceramic pellets. I was set! Until the VERY next time I used the free rock polisher the rocks banged holes in the plastic and it leaked ALL over the place. (See the duct tape in the picture above). I tried to fix it with duct tape several times but it kept leaking.
Now I had over $20 of polishing powder but no rock tumbler…so I did more research online and ended up getting this National Geographic Hobby Rock Tumbler Kit. Now I’m really committed to rock polishing (haha!). The kit comes with some unpolished rocks and some polishing powder to start with. Here are pictures of the rocks that came with the kit:
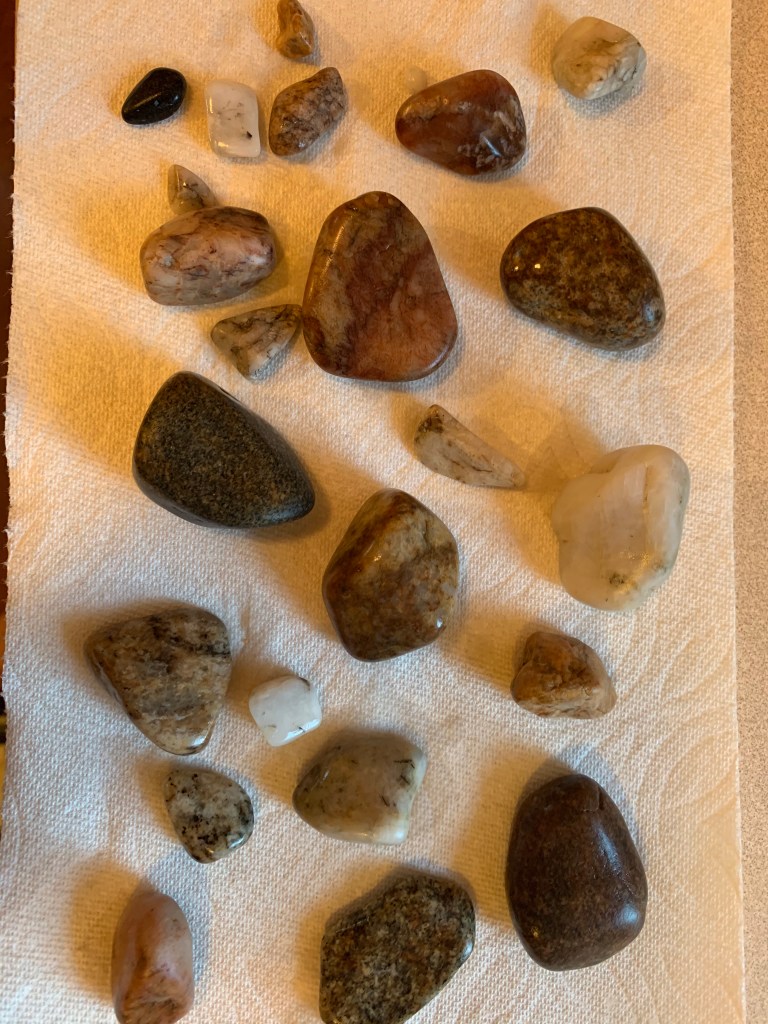
BeforeAfter!
The rocks included in the kit were obviously more colorful than the ones we find laying around our yard. I know you can buy more unpolished rocks from Amazon if you wanted to do more of those type of rocks. The main reason I wanted to get the polisher was to collect rocks when our family does trips! Hopefully as a family we will be able to learn more about the different rock types (and which ones polish better!)
Functional Rock Tumbler!
To polish the rocks we fill up the tumbler about 1/2 full of rocks, add about a tablespoon of polishing powder, then just cover the rocks with water. The tumbler spins them around for about a week, then we rinse out the rocks and add the next step of polishing powder. The grit goes from coarse to ultra-fine, finishing off with aluminum oxide.
Unpolished rocksAfter Step 1 (The rocks are still slightly wet so they look shinier than they really are)After Step 2After Step 3Final after step 4! Some got much more shiny than others. These are completely dry, so this is what they actually look like!
I’m interested to experiment to see if longer polishing time would lead to shinier rocks or if I need to put some sort of glaze on them? Either way, this is a fun project for homeschool kids!
Also just your friendly reminder that it is against the law to remove anything from National Parks. It comes with a hefty fine – so do your rock collecting outside the parks! 🙂