5 Day Car Camping Meal Plan

Camping food can be so delicious and it also can be a big disaster. We have car camped enough to have experienced both. We were really happy with our meals on our Teton trip so I thought I would share them to give you ideas for future car camping trips!

When I planned our Teton trip, I tried to choose meals with a minimum amount of refrigeration requirements. We have a big Yeti cooler which is great, but with the temperatures reaching 90+ outside, our cooler just baked inside the bear box and needed the ice refilled about every other day. I mainly wanted to use our cooler for the kids’ milk, eggs, and cheese sticks.

We’ve also tried cooking over the fire many times and have never had a lot of success. We finally bought a double-burner propane stove and it has been a GAME CHANGER for our camping meals! We also have a griddle that fits right on top of the two burners for pancakes, bacon, etc. Now we mostly just use the fire for s’mores after dinner is all cleaned up!

Breakfast was the same each day: a hard boiled egg for each person and a bowl of plain quick-cook oats sweetened with honey. Lunch was also the same every day: peanut butter and jam sandwiches, cheese sticks, and apples. We would pack our lunches as we were cleaning up breakfast to avoid hauling all our cooking supplies out again at lunch.

Dinners:

Day 1: Kodiak Cakes pancakes, bacon, and hash browns. This was the only meal we regretted a little because the bacon was SO greasy/messy and we had to be really careful how we cooked and cleaned up since there were bears in our camp twice while we were there. The Kodiak cakes are awesome because you just have to mix them with water and they have a decent amount of protein. Costco has awesome dehydrated hash brown cartons that you just add water and fry right up!

Day 2: Spaghetti and (pre-cooked) Sausage: I brought spaghetti noodles, a can of sauce, and pre-cooked sausage. If I made this at home, I would have just used regular sausage, but since we were camping I wanted already cooked sausage (kept in the cooler, of course) to add an extra layer of food safety.

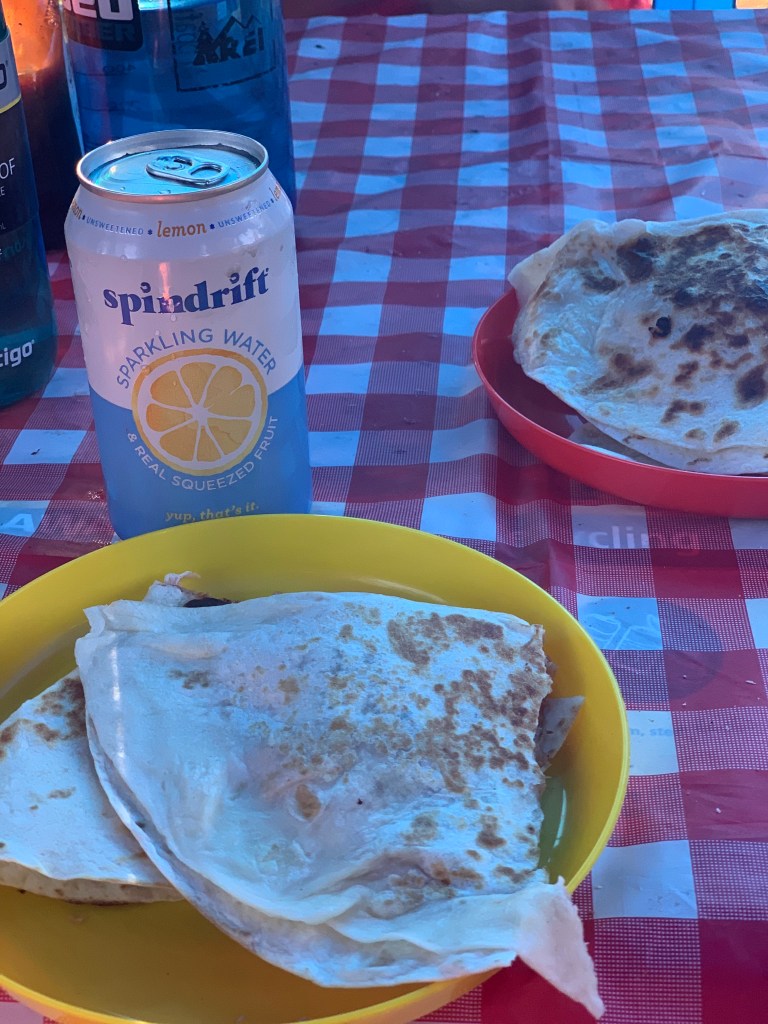
Day 3: Quesadillas with chicken and black beans: These were SO easy, I actually make these at home for dinner sometimes (with freshly cooked chicken). I just mixed up canned chicken, black beans, cheddar cheese, and BBQ sauce and put it in a tortilla. I fried them dry on the griddle for about 2 minutes on each side! The kids had just plain quesadillas!

Day 4: Breakfast Burritos: I made scrambled eggs and we added cheese, the rest of the sausage from day 2, a new batch of hash browns, and salsa!

Day 5: Chili: Towards the end of the week I really wasn’t wanting to rely on our cooler anymore, so we had a can of chili and added tortilla chips and cheddar cheese on top.

We also had two days worth of Mountain House meals on standby just in case one of the meals wouldn’t have worked out for some reason!

There was no dishwashing station at our campground so our dual dish containers were fantastic for doing dishes after eating! We boiled water in our kettle to have hot water for washing the dishes.

When I was researching camping meals, there were some crazy gourmet recipes out there that I wouldn’t even make at home – much less camping! We like to keep things pretty simple when we car camp! Let me know if you have any other easy go-to camping meals!

Nerdy Date Night Ideas

This post contains Amazon affiliate links, I may earn a small commission at no cost to you if you purchase through these links.

Seth and I love quality time date nights instead of just watching a show for two reasons: 1. We are able to talk/communicate more and 2. We RARELY can agree on a show haha. If you know us in person, you know Seth and I are both kind of nerdy anyway and we’ve come up with some fun (for us!) and different date night ideas that don’t require a babysitter!

  1. Paint by numbers for adults: We discovered these when we were spending endless hours at the Ronald McDonald House in Seattle unable to go out in public because of Oliver. These things take forever and make you look like a decent artist (haha!). You get a lot of hours of entertainment out of a little money with these! We usually put a no-brainer show on in the background like Survivor. I personally wouldn’t ever hang one of these up in my house, but it is a really similar vibe of doing a puzzle.
Paint by number right out of the box
Halfway done

2. Sudoku Racing: I think this started on an airplane flight one time when Seth and I had those airline magazines with Sudoku in them. Since they were the same puzzle, we raced to see who could get it done the fastest. The fun part is that Seth and I are pretty equally matched so it is about 50/50 who wins each time. We buy matching Sudoku books from the dollar store and race to see who gets done first. You could also do this with crossword puzzles, word searches, etc.

3. Puzzles: These are a little trickier with little kids running around but is really similar to doing a paint-by-number. We have a big piece of plywood that we do the puzzle on so we can move it to a place the kids can’t reach during the day. We are able to talk to each other and usually have a no-brainer show on in the background. We did this National Park puzzle during quarantine (but PNW instead of California) and it was really fun! If you get REALLY into it, you can set a timer and see how fast you can complete a 1000 piece puzzle. We haven’t gotten quite that intense yet. 😉

4. Cribbage, Dutch Blitz, Code Names Duet and Qwixx: These are our go-to two-player card games. I’d say Seth beats me slightly more often at Cribbage and we had to take a break from Dutch Blitz for a while because I was beating Seth too often…they are both definitely worth learning for a date night!

5. Escape Room Board/Card Game: First of all, if you have never done an escape room, I HIGHLY recommend doing one. They are so much fun! Since so many places are shut down right now, the next best thing is to do an escape room board game. These obviously can only be played one time because once you play it, you know the answers to all the riddles, but a lot of them can be set up to be played again by someone else if you want to re-gift it. These can be fun for groups of 2 to 6!

7 years married!

7 Days in Grand Teton National Park!

First of all, I would HIGHLY recommend Grand Teton National Park for a family camping trip! It was gorgeous, not crowded, had perfect weather, and very few bugs! This was our first real family vacation since two years ago when the kids were diagnosed and it was basically everything we dreamed of!

The kids earned their Junior Ranger badges!

Day 1: We left at 8am Friday morning and drove 15 hours straight to Jenny Lake. Seth REALLY wanted to camp at Jenny Lake after doing extensive research on the park and learning that it was the most popular spot. The whole campground is first-come first-serve so he wanted to be first in line to get a spot. We lost an hour driving (due to time zone change) and spent a total of about 60 minutes stopping for gas/food/bathroom. Our kids did awesome in the car playing with dollar store toys that I got the day before. They had a total of about 2 hours of iPad time during the 15 hour drive.

We arrived at Jenny Lake at 2am Mountain Time and we were SECOND in line for a campsite which just completely blew my mind. Who are these people?? The next people pulled behind us in line at 2:45am! We slept in the car for about 5 hours and then at 8am got what I would argue to be the very best spot in the whole campground! (Spot #7)

This was the view from our campsite

Day 2: We were obviously pretty tired from our drive and short night. The people in spot 7 didn’t leave until their checkout time of 11am so we drove around getting a $12 permit for our inflatable raft and boat inspection and buying our National Park Pass since the booth was closed when we arrived at 2am. At 11am we set up camp and Oliver and I took an amazing 2 hours nap! Seth took Eliza swimming in Jenny lake which was about a 2 minute walk away from our campground.

Our wonderful campsite! Our tent is peeking through the trees and our eating area is to the right.

Day 3: We got up in the morning totally refreshed and went on a 16 mile bike ride. Grand Teton National Park has an amazing bike trail separate from the road that has incredible views. We got ice cream and headed back to the campsite. In the afternoon we took our inflatable raft across Jenny Lake and Eliza got to swim some more! A bear walked right through our campground!

The bike path was so pretty!

Day 4: We headed out in the morning for a hike around Moose Pond. This hike was 4.5 miles total which was a little more than our kids could handle in 85 degree weather and we were running out of water so when we got to a parking lot area around mile 3.5, Seth ran back to the campsite and got the car to bail us out for the last mile. They hiked almost all of the first 3.5 miles though! In the afternoon we relaxed at the campsite.

Moose Pond Trail

Day 5: We took our boat down the Snake river! There are multiple sections of varying difficulty and we did the “beginner” which moved at about the pace of a lazy river. Seth locked his bike at the exit area so when we were done rafting he biked back to get the car from the start to pick us up. Both kids fell asleep in the raft and we were able to see lots of fish and birds from our boat! It took about 3.5 hours to go 5 miles down the river. After the river we stopped at Mormon Row which is a collection of historic houses and barns. We saw prairie dogs and even bison off in the distance.

View from Snake River
Mormon Row

Day 6: This was probably my favorite day! We took the boat out to String and Leigh Lake. String Lake is only about 4 feet deep all the way across so the water is really warm and totally clear! The water is fed through a stream and drains to another lake so it wasn’t murky and gross or anything. Eliza swam and swam in String Lake and jumped off boulders. Seth paddled a total of about 9 miles. We portaged our raft about 100 yards between String and Leigh Lake. There was almost no one out on Leigh Lake, it was so peaceful!

The water in String Lake is really warm because it is only about 4ft deep the whole way across and the water is really clear!

Day 7: Our last full day we headed to Jackson Hole, WY which has similar vibes to Whistler, BC. We went up the gondola and did a 1.5 mile loop hike at the top of the ridge. The wildflowers were unbelievable. Eliza “ran out of energy” on her way up the 650 feet of elevation gain so Seth carried her a bit on the way up. Oliver was getting really close to nap time by the time we headed down so I carried him for the descent. Other than that the kids hiked on their own the whole way!

We gained 650 feet of elevation on this trail. We were so proud of the kids!

Day 8: We packed up camp and headed out by 9am. We drove through Yellowstone on our way out and we were SO glad we decided not to stay in Yellowstone. It was PACKED like Disneyland packed with people. The parking lot of Old Faithful and Grand Prismatic Springs were both insane. We stopped briefly at Old Faithful to use the bathroom, but left once we saw how crazy it was. We did stop at Biscuit Basin, which was similar to Grand Prismatic Spring, but had way fewer people. Eliza was thrilled that she thought she got to see a “real volcano” when a geyser erupted. We drove about 11 hours today and stayed in a hotel in Missoula, MT.

Quick stop in Yellowstone!

Day 9: We would have just driven all the way home in one day, but Eliza had to have a COVID swab done in Seattle on Saturday afternoon so we drove from Missoula to Seattle for the swab and then back home to Bellingham! We were home by 4pm and almost all the way unpacked by 10pm!

The kids were FILTHY after not bathing for a week. This was only day 4 haha!

I’m going to write later about our meal plan for the trip, more tips for camping/hiking with kids, etc. but I think this is enough for now! I feel like the Grand Tetons get overshadowed a bit from being so close to Yellowstone but if you are headed that direction, definitely don’t skip over it! I just can’t recommend this national park enough!

Easy DIY Slip and Slide!

I don’t know what the deal is, but summer is finally here in the PNW and Slip and Slides (and kiddie pools for that matter) seem to be sold out everywhere! I looked at three different stores with zero luck this past week and the cheapest one I could find was either $50 or wouldn’t arrive until September!

This summer is so special because Oliver is FINALLY allowed to play in hose water and outside in the dirt after transplant. Last summer, he was able to go in the kiddie pool, but we had to hand fill it up bucket-by-bucket from our kitchen sink to make sure the water was filtered and drinkable. This summer we can turn on the sprinkler and let him run outside like a regular toddler! We still have to be really careful with keeping him out of the shade or with sunscreen on but other than that he is free to run!

After a quick google search, I realized we would be able to make a slip and slide ourselves for much cheaper than the ones I was finding online. We had attempted to use a blue camping tarp a month ago for a slip and slide and it was a huge fail. Even though we have a pretty decent size hill in our back yard, the tarp was way too textured and not slippery at all.

Here is what you need for a DIY slip and slide:

  • Plastic Painter’s Drop Cloth (I got a 3.5 mil thick 10x25ft one from Lowes)
  • Plastic Stakes
  • Pool Noodles (optional)
  • Metal Grommets (optional)
Slip and Slide Anchored In
8 pack of 8-inch plastic paver spikes
Grommets installed to preserve the plastic
Pool noodles installed at the top to create a border

I folded the plastic painter’s drop cloth in half so it was double- thick and spread it out down our hill. They sell plastic drop cloth that is thinner and cheaper but I would be worried about it ripping. The 3.5 mil we got seems really sturdy for our kids. It cost about $12 for the roll.

I anchored the top with pool noodles on each side and put the plastic stakes through them. It would be great to have pool noodles all the way down on both sides but they were $1.75 at Lowes and I know you can get them from the dollar store so I wasn’t willing to buy more than two for right now.

Seth installed metal grommets where the stakes went in so the plastic will not rip and we can use the slip and slide over and over again!

If you have a flat yard you could just add a squirt of soap to make the slide more slippery! Our kids tend to be more timid than daredevils so they didn’t want the slide too slippery. Haha! We put the sprinkler on low right at the top of the hill and it was the perfect amount of water!

Let me know if you end up making one of your own slip and slides! I just love summer!  

Marine Drive to Hovander Park Trail – EASY

I searched all over google for the correct name for this trail. “Nooksack River Trail,” “River Dike Trail,” and “Tennant Lake to Marine Drive Trail” were all different names that came up. The parking lots on both Marine Dr. and Slater Rd. didn’t have names on them either. No matter the name, the trail was a beautiful, flat trail along Nooksack River!

Marine Drive Parking Lot

The trail is about 4 miles each direction going all the way from Marine Dr. to Hovander Park, but you could easily start at the Slater Rd. parking lot and go to Hovander Park for a 2-mile round trip. Slater Rd. to Hovander Park is much wider of a trail than between Marine Dr. and Slater Rd. The entrance on Marine Dr. is a little tricky to find. Going west on Marine Drive, it is on the right side of the road right after the bridge for Silver Creek and right before the bridge for the Nooksack River.

Beginning of the trail at Marine Drive

My sister and her 1-year-old came with us so we had Eliza ride on an awesome tag-along bike I got free on Facebook! Oliver and his cousin rode in the bike trailer. Eliza is not even close to being able to ride a bike with no training wheels, but she easily stayed on the tag-along bike for the ride! The only downside is that Eliza weighs 35 pounds and the tag-along weighs probably 30 pounds so it was a lot of extra weight for me to carry. Seth is used to towing the bike trailer with almost 100 pounds when fully loaded with kids and supplies!

A lot of the trail is shaded!

The trail is great for both biking and hiking, but the trail between Marine Dr. and Slater Rd. is pretty skinny (singletrack) so Seth was towing the trailer with both wheels on grass. Once we got to Hovander Park, we biked to downtown Ferndale for ice cream. Round-trip it was about 10 miles total – perfect for an afternoon bike ride!

Narrower part of the trail (between Marine Dr. and Slater Rd)

The trail was not too busy, and it is plenty wide enough to social-distance. Nearly every walker we passed either had masks on or put them on when we went by.

There were plenty of places you could access little beaches along the river on the trail too which would be fun for a stop for a snack or picnic if you were walking.

You can see the river most of the way!

One thing to note is that the parking lots at both Marine Drive and Slater Road had signs that you needed a Discover pass. We (for the 3rd time this year) forgot our Discover Pass in the other car than the one we brought and we risked it and did not get ticketed. I wish they would just give you two passes with one spot to write the license plate instead of one pass with two places for license plates! If you do not have a Discover Pass you could park for free at Hovander Park and do the trail the opposite direction!

Made it to Hovander Park!
Ice Cream after 5 miles!

I’d love to know of any other hidden gems in Whatcom/Skagit County! We usually go to Canada for our outdoor family adventures, but it looks like that won’t be happening this year. Happy hiking!

Squires Lake Hike

We hiked another beautiful Pacific Northwest trail this past weekend! Squires Lake is located on Highway 99. It is just a couple minutes off Exit 242 on I-5. There is a small parking lot and additional parking on the wide gravel shoulder of the road. The parking lot also has a large, wheelchair-accessible port-a-potty. The trail is not wheelchair or even stroller friendly though!

I’ve seen mixed labels of how long this hike is. Washington Trails Association says it is 2.0 miles roundtrip with 200 feet of elevation. Alltrails says it is 1.4 miles with 350 feet of elevation. Seth had Strava going during the whole hike and it said that the trail was 2.5 miles roundtrip with 350 feet of elevation gain so I’m guessing that is the most close to accurate!

The first ¼ mile is uphill with switchbacks. Our kids (2 and 4) were able to go all the way up by themselves no problem though! Once we reached the lake it is a mostly flat trail around the lake. There is one decently sized hill up and down during the loop that our kids both wanted to be carried on towards the end.

There were streams, waterfalls, a few bridges, and lots of wildlife to see! The trail is dog-friendly and connects to several other trails if you wanted to make it a longer hike or a bigger loop.  Various places have benches at outlooks along the way. There were not many other people on the trail, even for a sunny Sunday afternoon!

Oliver’s fanny pack filled with snacks!

I hope no one thinks that we have perfect children that always happily hike along with us. At one point on the hill, Eliza just plopped down and said, “I ran out of energy.” Overall, they are really good troopers, and the more we get out with them, the more used to it they will be! We are hoping to work up to longer and longer hikes so we can eventually go backpacking with them (without needing to carry them)!

Eliza is very confident she will catch a fish one of these days with the sticks she finds along the trails.

This trail was a bit muddy in spots so Oliver’s Nike’s were not the best shoes for this trail. Eliza has amazing waterproof Keen hiking shoes that I bought used for $20 but I’m not willing to fork over $55 for the same shoes for Oliver since he seems to outgrow his shoes every 3 months! I have a great pair of Keen hiking boots that I got last year to replace the exact same old Keens that had lasted about 10 years! Seth wore his Chacos for this hike, which also worked great for the distance.

One extra fun addition that we just started using for the kids is the addition of a kid-size fanny pack. We only have one right now for Eliza but we will probably get one for Oliver too. This lets them have quick access to their snacks or works for collecting little pebbles along the way. It is a lot easier for them to use than an entire backpack for right now!

Happy Hiking!

Point Whitehorn Hike

Sunday afternoon was perfect PNW weather! We had originally planned to hike the Rock Trail, but read online that the road to the trailhead is closed due to landslide risk. Instead, we headed north to Point Whitehorn which we had been meaning to do for a long time!

Point Whitehorn is a perfect hike for little kids! It is ADA accessible for the entire 0.75 mile trail. You could easily bring a stroller if you aren’t wanting to go down to the beach. Once you get to the end of the completely flat, winding path through the forest, there is a short steeper area that heads down to the beach. It wasn’t too steep for our kids (ages 2 and 4) to be able to do it on their own, but it might be too steep for a stroller without a brake! The very last section is a staircase that leads down to the rocky beach.

Steps to the beach!

The beach was almost completely deserted which was surprising for a beautiful Sunday afternoon! There was one other family way down the beach flying a kite and that was it! There were quite a few little driftwood house structures other people had set up and lots of seashells and small sea animals for the kids to look at. The beach is full of large round rocks so I would definitely encourage wearing sturdy water-type shoes like Chacos. The kids had their cheap Target water shoes on and Oliver ended up skinning his knees a few times. I wish I would have put their Keens on instead!

There are no bikes or dogs allowed on the trail and the only bathroom is a port-a-potty in the parking lot. There are quite a few little boardwalks/bridges on the trail and both of our kids loved running across them! Even if you don’t take the steps down to the beach there are several viewpoints with benches towards the end of the trail. This is such an easy, flat hike that I would totally recommend!

Our 3 Favorite Chocolate Chip Cookie Recipes

If you know me at all, you know I LOVE my chocolate chip cookies. I’m also SUPER picky about my cookies. I’m not a fan of sugar cookies, Oreos, or pretty much any store-bought cookies…if it isn’t perfect, it isn’t worth the calories in my opinion!

I have three different cookie recipes that I make and keep in the freezer: my original most delicious (and most unhealthy) ones, Seth’s favorite oatmeal ones, and my recently discovered brown butter chocolate chip cookies!

Top: Oatmeal (#2), Bottom left: Brown Butter (#3), Bottom Right: Original (#1)

Recipe #1: The Original

I don’t have a source for this recipe – my mom makes them, my grandma makes them. I think it was maybe from the Toll House chocolate chip bag years and years ago?? The secret of these is the Crisco AND Margarine. Not healthy, but SO good. I make myself feel slightly better about making these by knowing that all the store-bought cookies have at least this or worse in them…probably.

  • 1 Stick Margarine (1/2 C), softened
  • 1 Cup Crisco
  • 2 Eggs
  • 1 Cup White Sugar
  • 1 Cup Brown Sugar
  • 1 tsp Vanilla

Mix with hand mixer or stand mixer then add and stir by hand:

  • 3 Cups Flour (minus about 1 tablespoon for a less cakey cookie)
  • 1 tsp baking soda
  • 1 tsp salt
  • 1 cup chocolate chips

Bake at 375 for 9-10 minutes until golden brown around the edges

Recipe #2: Cinnamon Chocolate Chip Oatmeal Cookies

Seth didn’t love seeing all the margarine and Crisco going in to the cookies in our lunches and requested something slightly healthier. I modified my original chocolate chip cookie recipe to make Seth’s favorite oatmeal cookies!

  • 1 Cup Butter, softened
  • 1 Cup Sugar
  • 1 Cup Brown Sugar
  • 2 Eggs
  • 1 tsp Vanilla

Mix with hand mixer or stand mixer then add by hand:

  • 2 Cups Flour
  • 1 tsp Baking Soda
  • 1 tsp Salt
  • 1.5 tsp cinnamon
  • 2 Cups Old Fashioned Oats (I prefer not instant)
  • 1.5 Cups Chocolate Chips

Bake at 375 for 9-10 minutes until golden brown around the edges

Recipe #3: Everyday Chocolate Chip Cookie

This recipe isn’t mine but I linked it right here! I have never made a Baker By Nature recipe that I didn’t love. This one is a little more work because you have to boil the butter ahead of time to give them a browned-butter flavor but they are delicious and do not go stale too fast!

I always freeze the cookies I bake within 2 hours of baking them. They are great to grab for lunches or when you last-minute need to bring a dessert somewhere!

I would love to know if you try any of these recipes! Happy Baking!

Step 1: Prepped for electric mixing
Electric mixing done!
Dry ingredients added!
Left to right: Brown Butter, Oatmeal, Original
Left to right: Original, Oatmeal, Brown Butter

Fireplace Renovation!

Seth and I have a long list of house projects we want to do and we got a big one done over the last 2 months!

During this blog post I’m going to say that “we” did this project, but I want to make sure you know that Seth (and my dad) did 95% of this project. 😉

Original fireplace!

Step 1: Demo!

We originally were going to replace the entire fireplace unit until we found out it would be over $5000. After discussing it, we decided to save our money and keep the same fireplace unit. We painted all the gold parts black. We took hammers and crow bars and just started hitting! We taped plastic to the ceiling to make a “dust tent” to try to minimize demo dust.

Step 2: Beam!

We looked at a lot of different options for mantle beams and ended up deciding on an 8″x8″ solid wood beam from Westside Building Supply. The beam cost $120 and my dad used a beam cutter to cut it to the correct length. The beam set into the wall about 2-3″.

Fireplace prepped for the beam
The beam is in!

Step 3: Stacked Stone

We bought about $100 worth of stone from Northstar Stone & Landscape Supply. My dad is a contractor so he was able to show Seth how to place hardy backer against the 2x4s, place metal lath, then place a scratch coat to prep it for the stone.

Placing the hardy backer and metal lath
Ready for the stone!
Measuring and cementing the stone

Step 4: Staining the Beam

Once the stone was done, we chose some stain did two coats of stain. It turned out a little bit darker than we were planning because we did not realize we were supposed to wipe the stain off as soon as we put it on! We were still really happy with how it turned out. Once everything was dry we put the doors back on to the fireplace and decorated the mantle! In total the project cost about $300 since we did all the labor ourselves!

Next plans: We are hoping to place this exact same stone on the bottom 1/3 of our house in the front. Our plan is to take off the existing siding and use the same methods to make the front of our house look a little bit more modern. It looks like we will be having a pretty long unplanned vacation thanks to COVID-19 so hopefully we will be getting this done in the next couple months!

Finished project!

Tennant Lake “Hike”

Saturday was the first sunny, slightly warm day in what seemed like a long time! We decided to take the kids to Tennant Lake in Ferndale for the afternoon. The last time we went to Tennant Lake, Oliver still had a feeding tube and I’m fairly sure he wasn’t walking yet. It felt so good to see him RUN down the boardwalk!

If you live in Whatcom County, I totally recommend going to Tennant Lake if you haven’t been in a while (or if you haven’t been since your elementary school field trip!). You walk through a fragrance garden then past a 50-foot overlook tower on your way to the boardwalk. They have both a shorter wheelchair-accessible boardwalk and a nearly 1 mile long boardwalk loop! The boardwalk has no edge on it so I probably wouldn’t be comfortable walking it with any more than a 1:1 ratio of parent to toddler!

We grabbed the back of Eliza and Oliver’s coats a few times when we felt like they were getting too close to the edge! The water isn’t super deep in most areas, but it would still be a pretty wet and muddy mess if someone fell in. When we went last fall we did take our single BOB stroller on the boardwalk, but it was pretty narrow when people walked by us coming from the opposite direction so I probably wouldn’t recommend taking a stroller.

This would be such a fun place for a preschool/homeschool activity to take a yardstick to measure the water depth at various locations. It also has beautiful views and a big variety of wildlife! I did see online that the boardwalk trail is closed from October-January for hunting season but any other time of the year is great to go! The fragrance garden would definitely be more exciting in the spring/summer.

We finished off the afternoon with a stop at Edaleen Dairy in Ferndale. What a fun day!